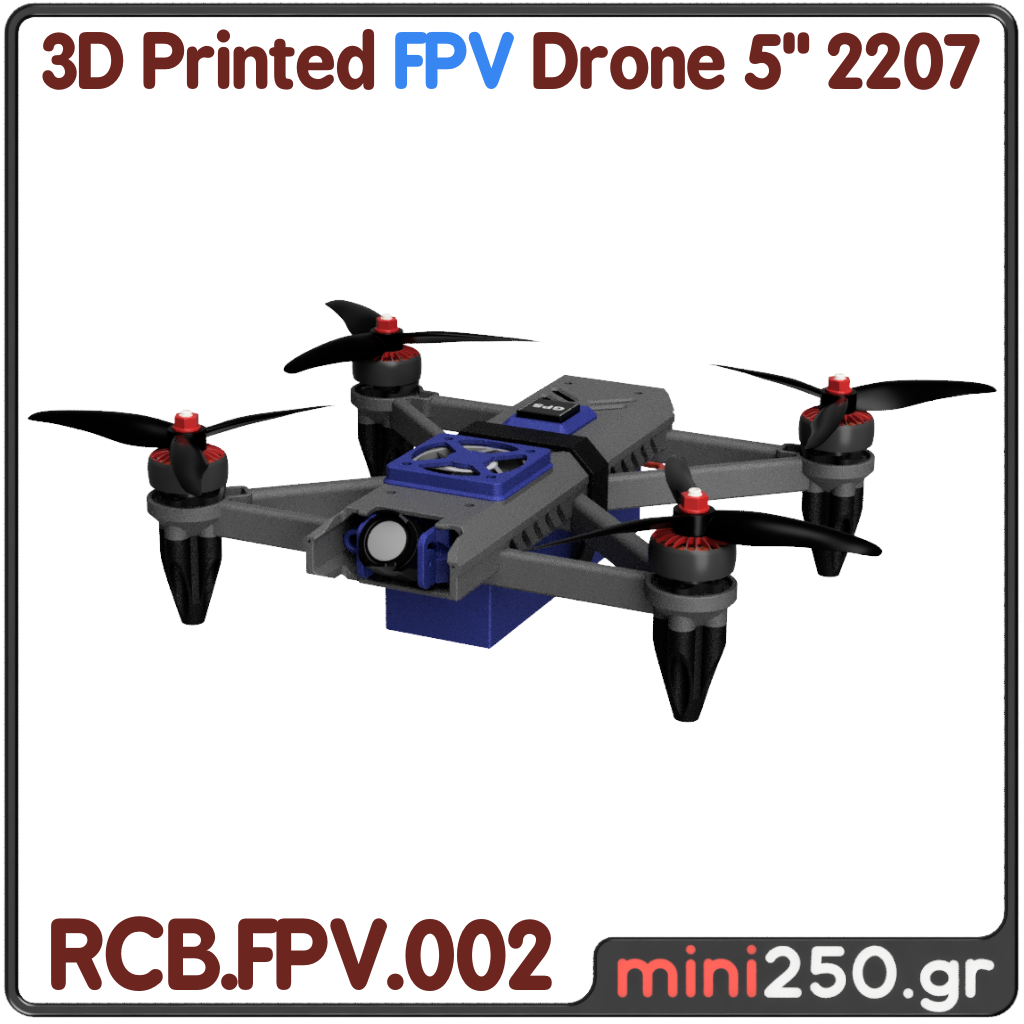
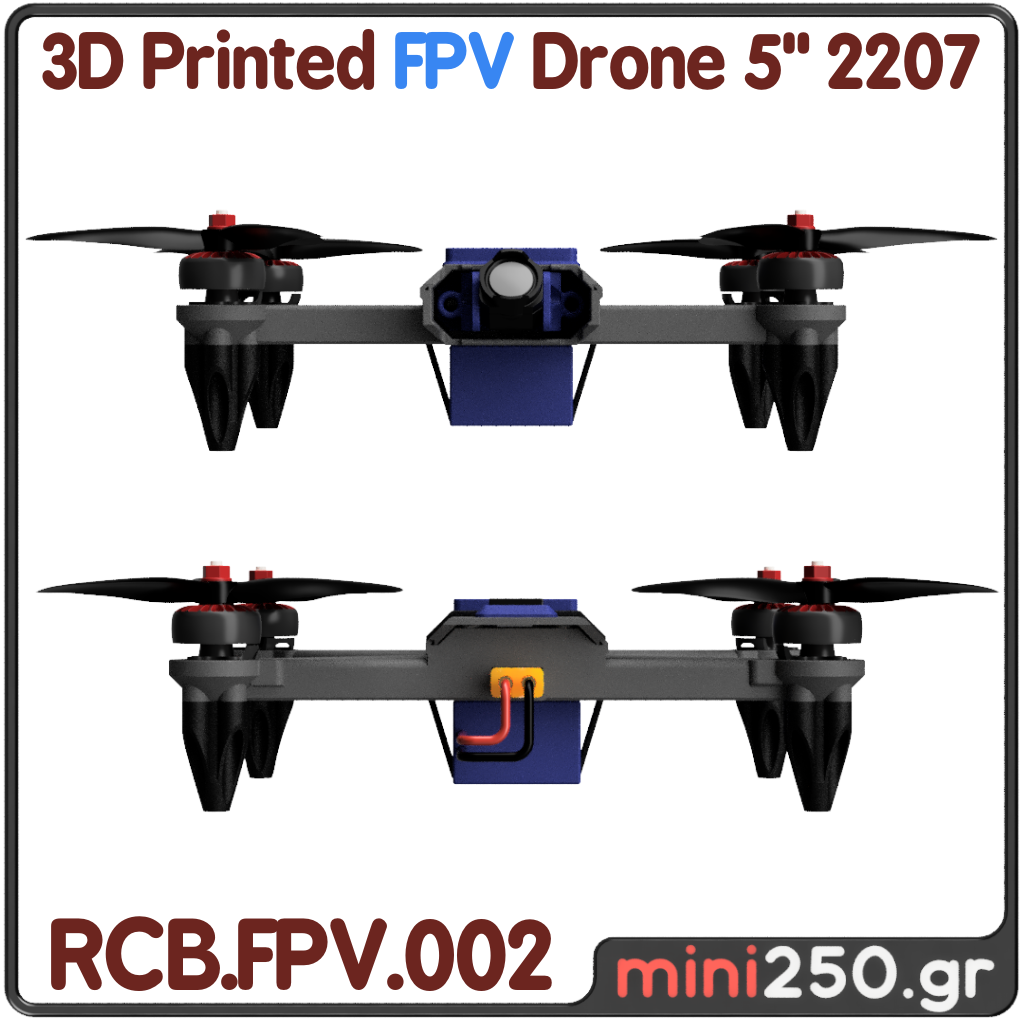
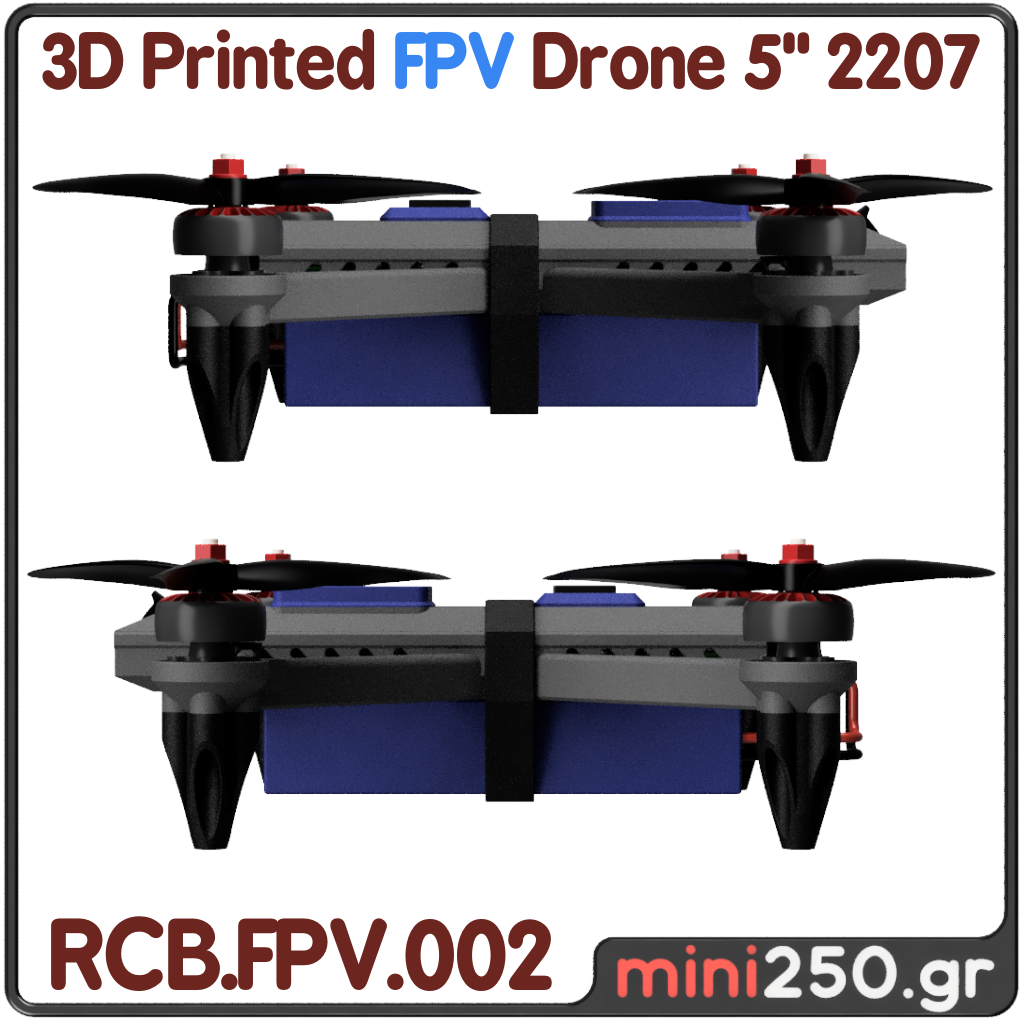
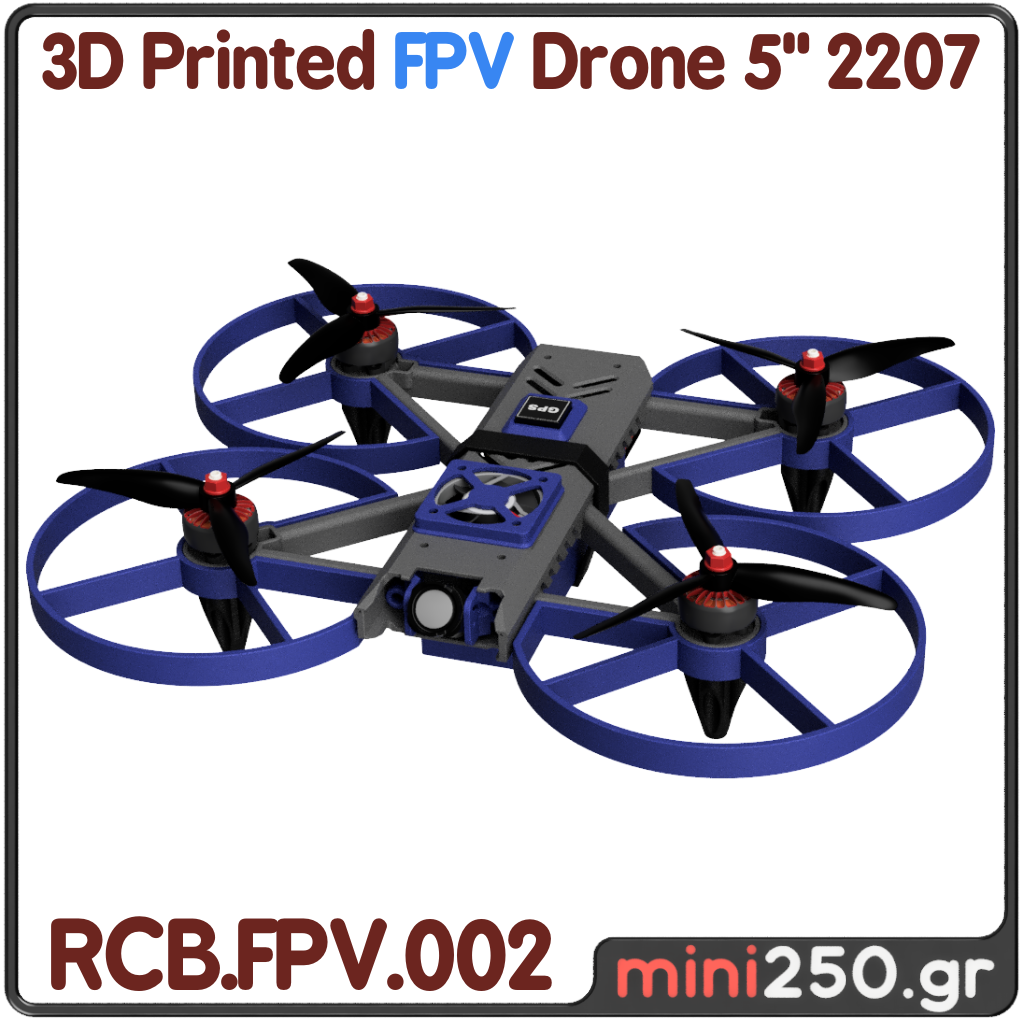
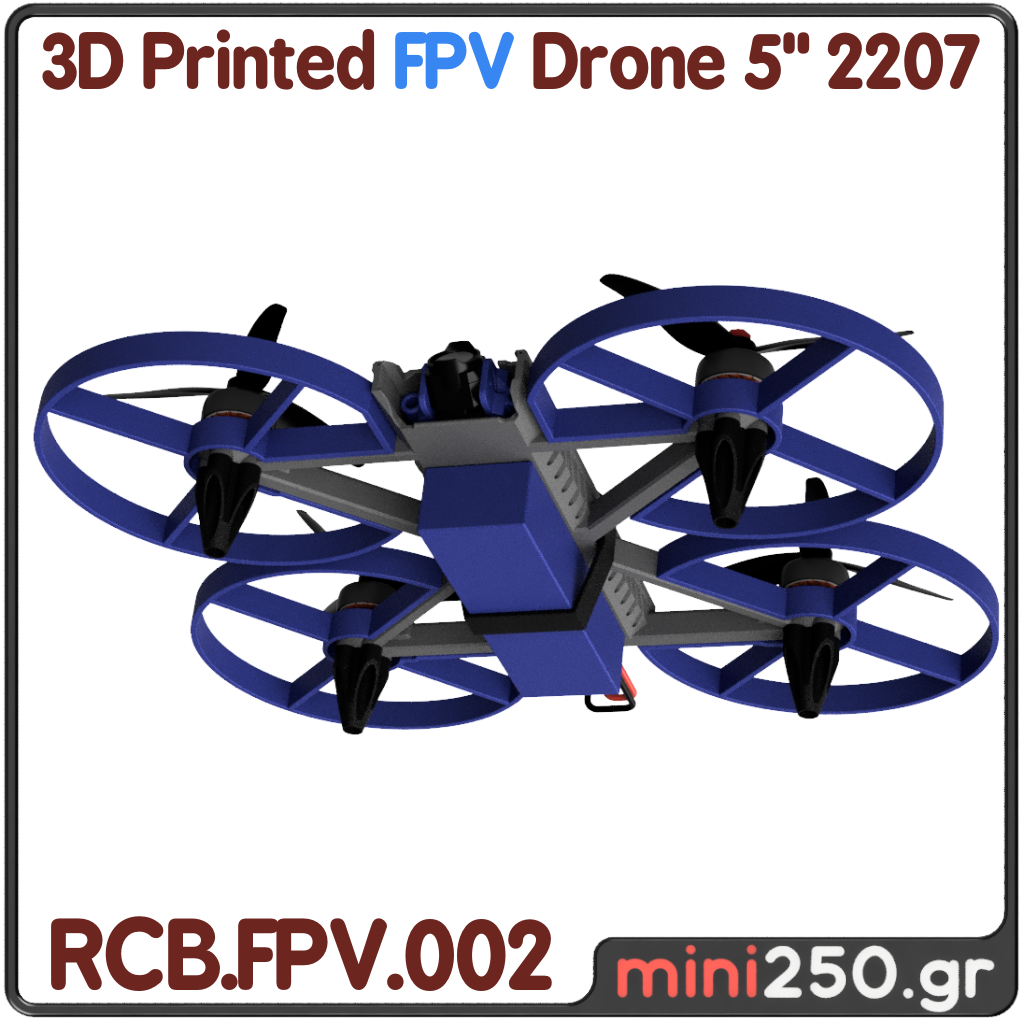
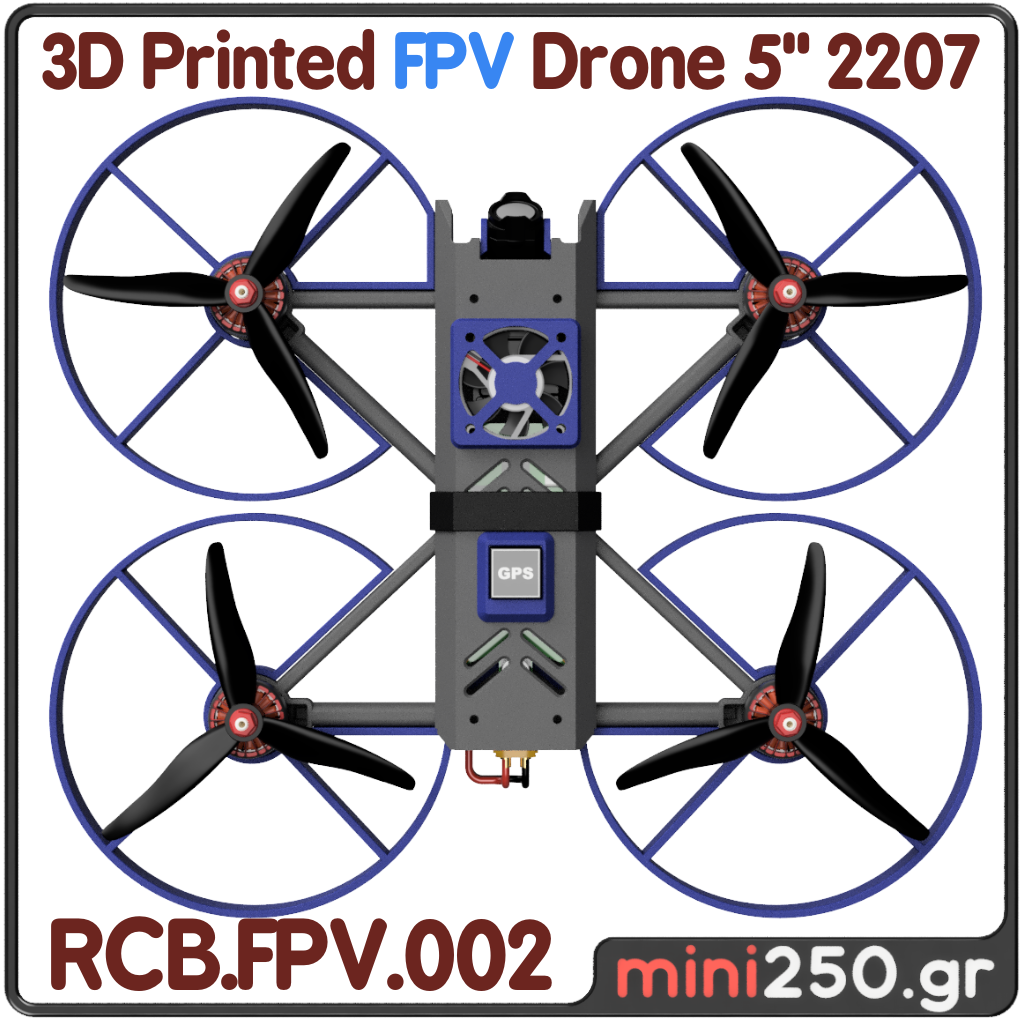
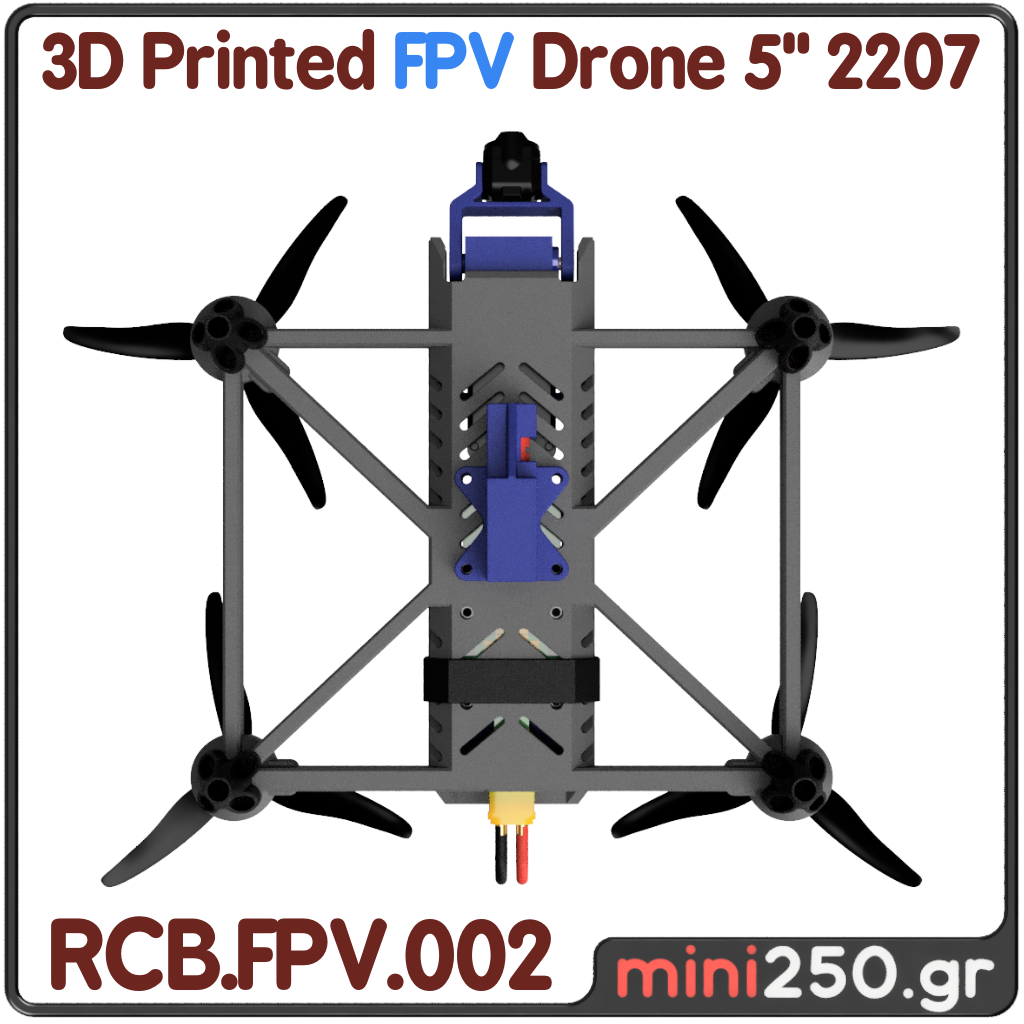
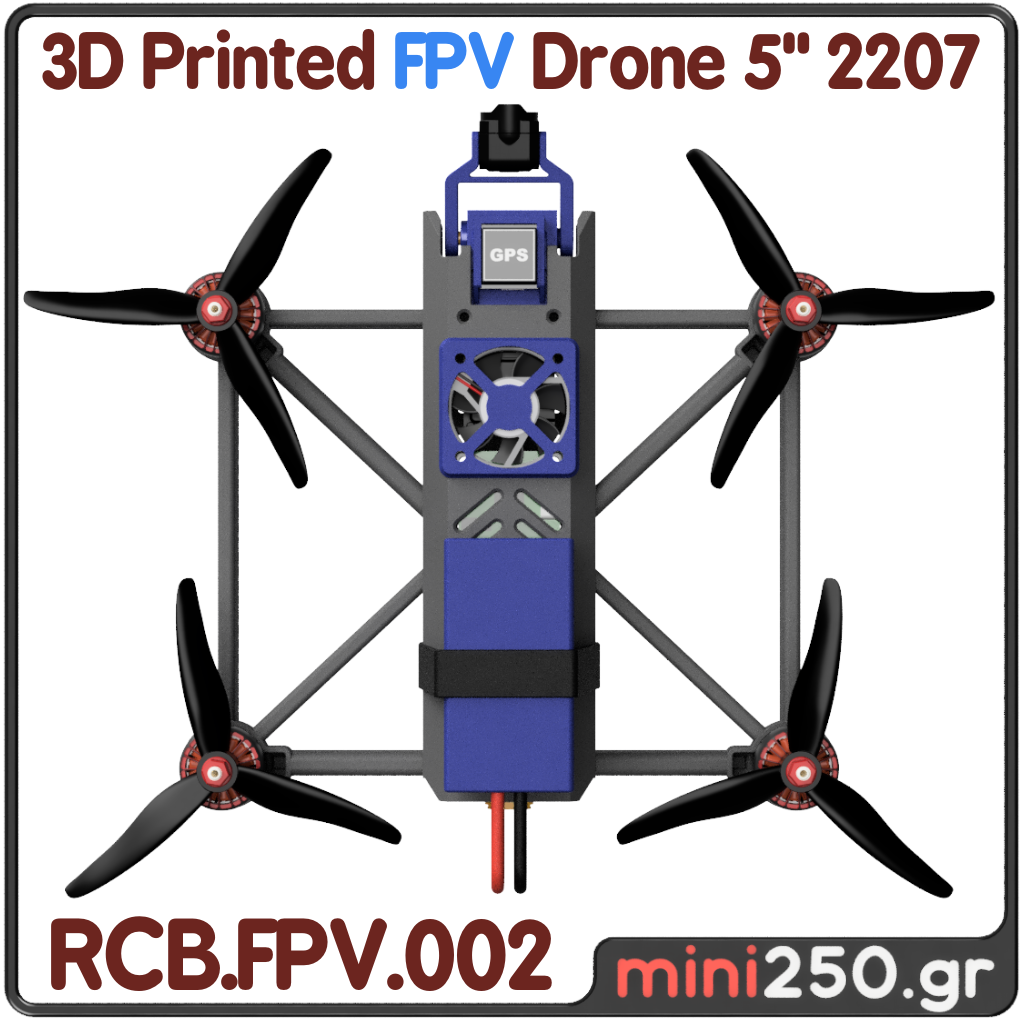
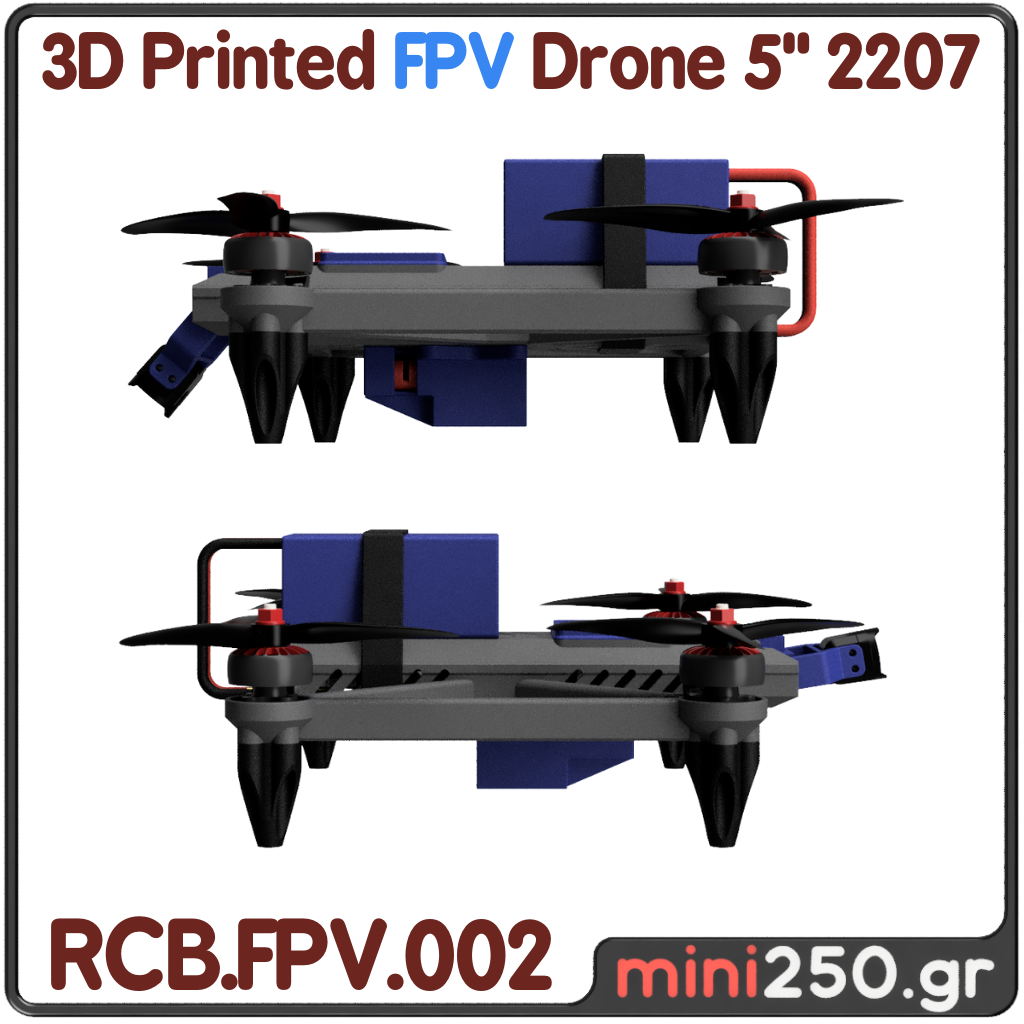
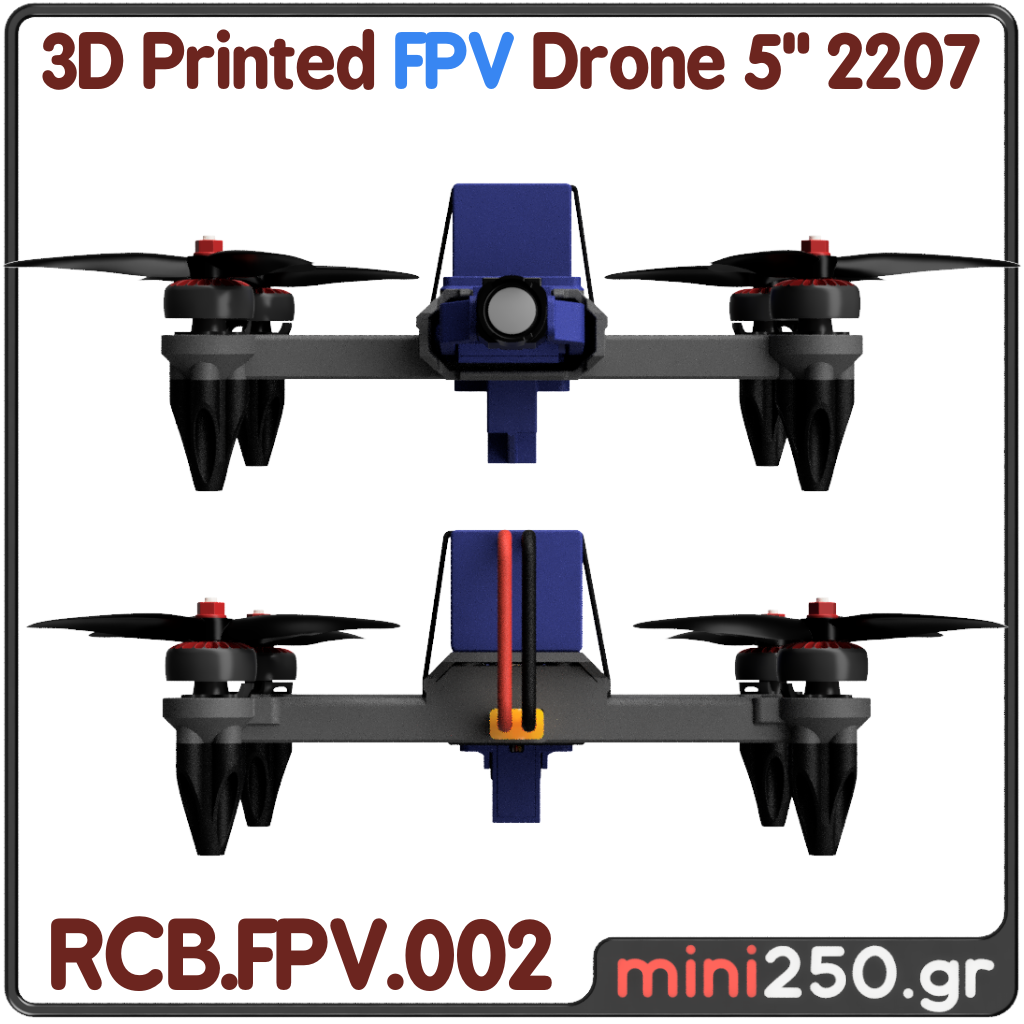
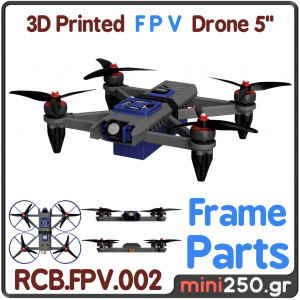
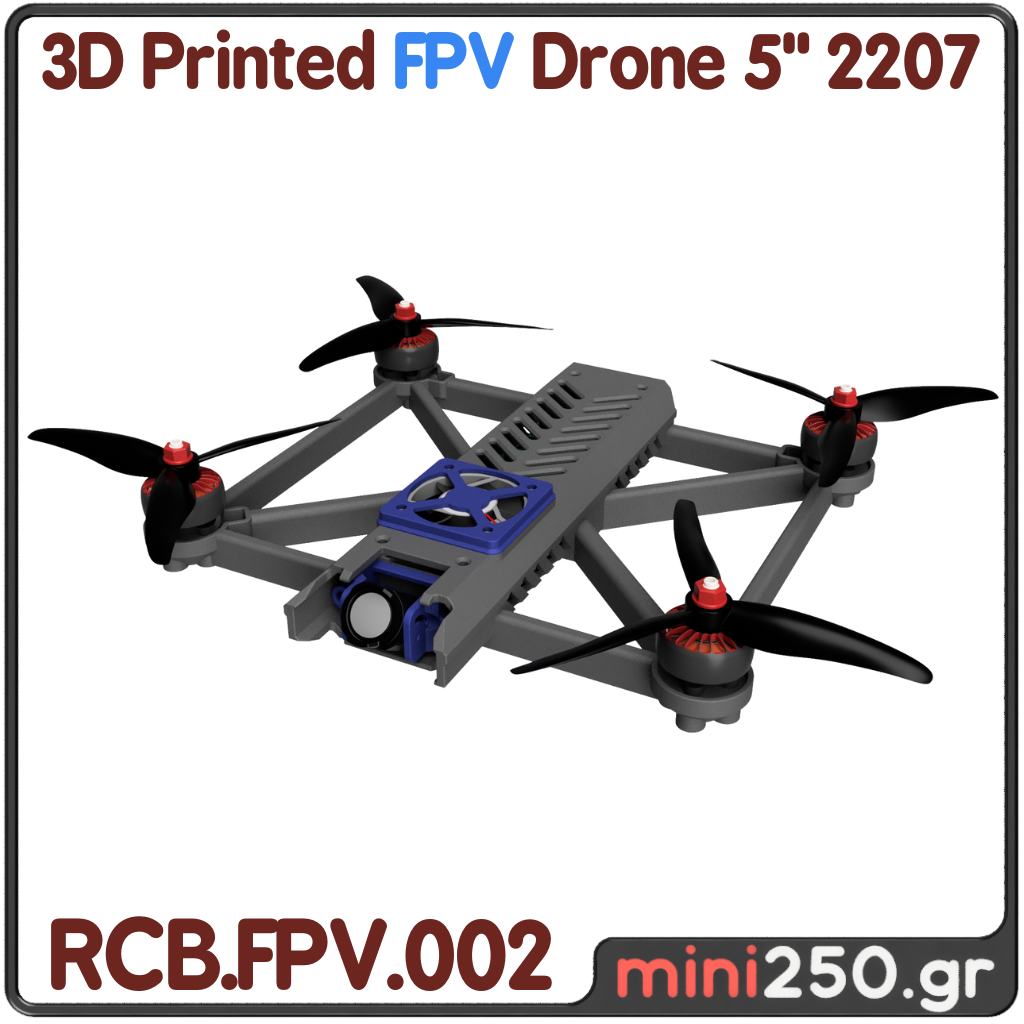
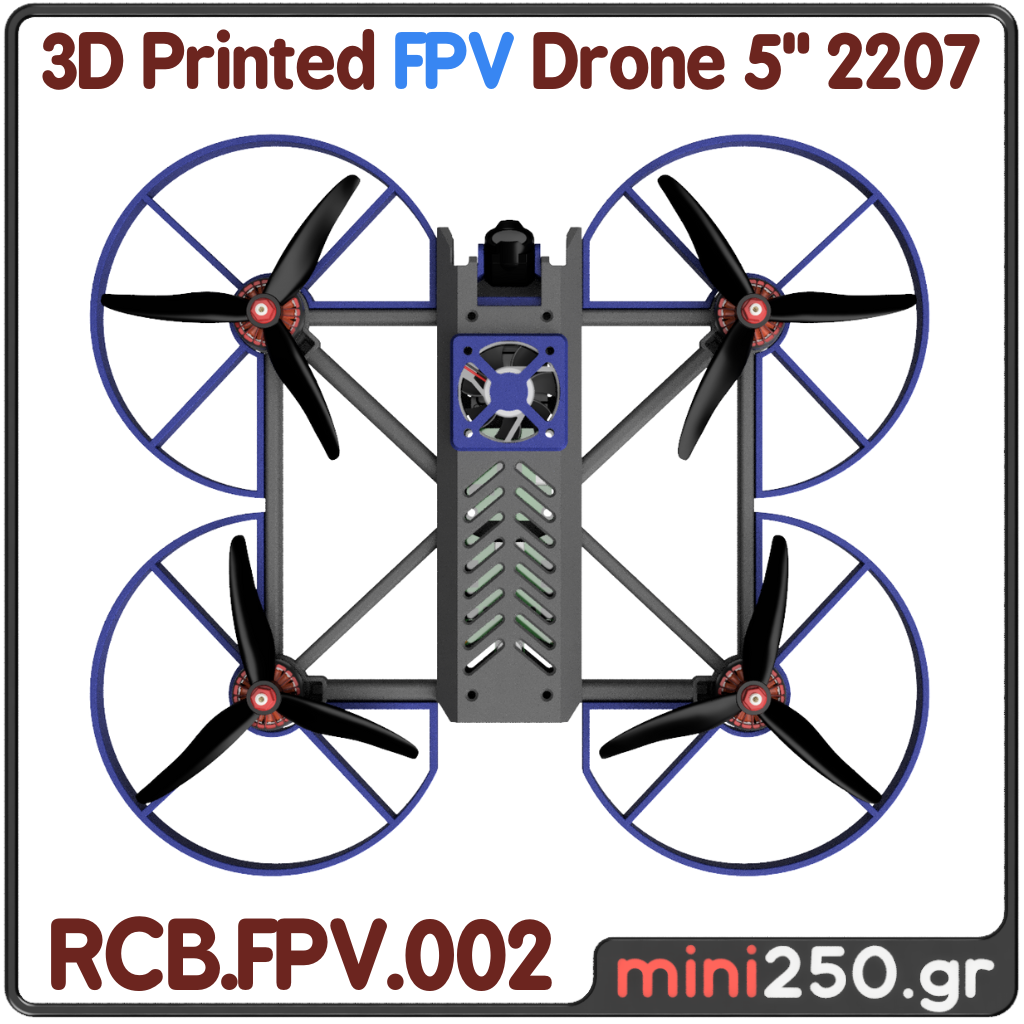
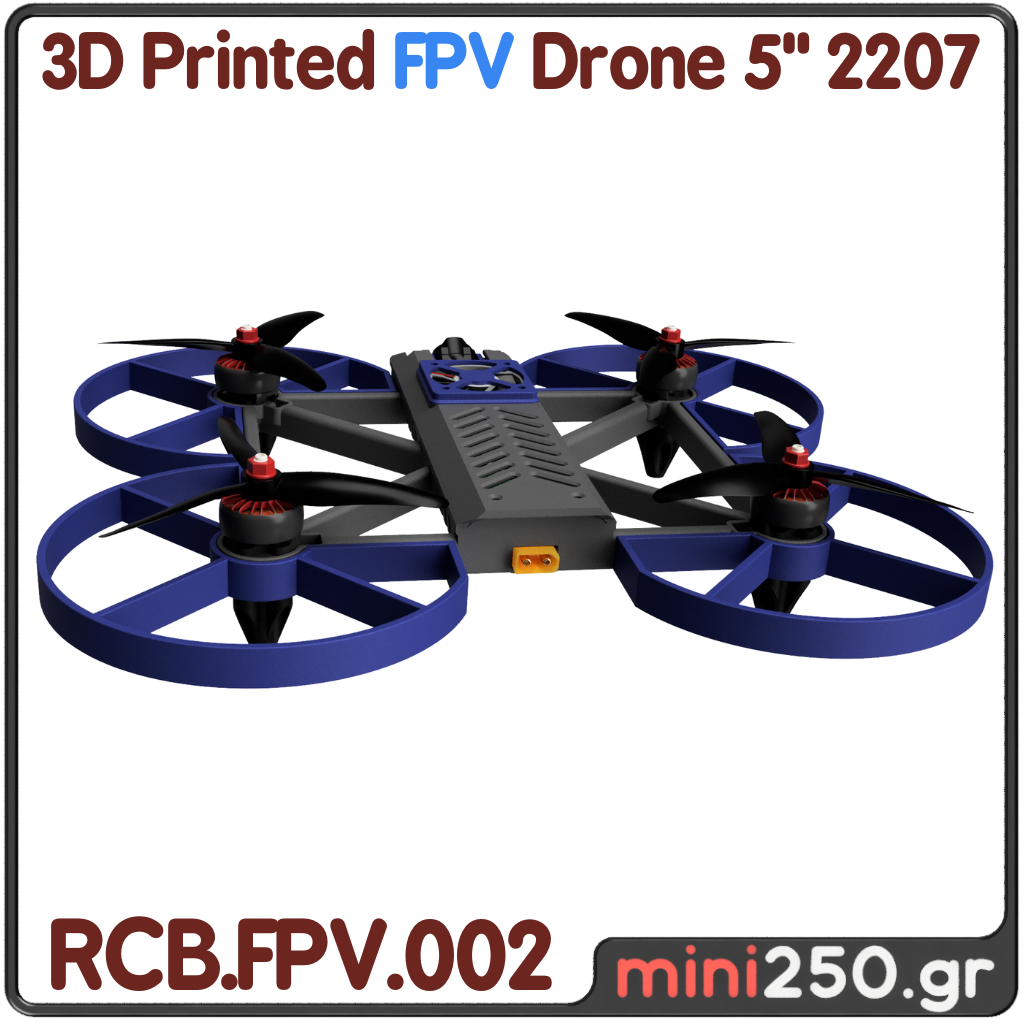
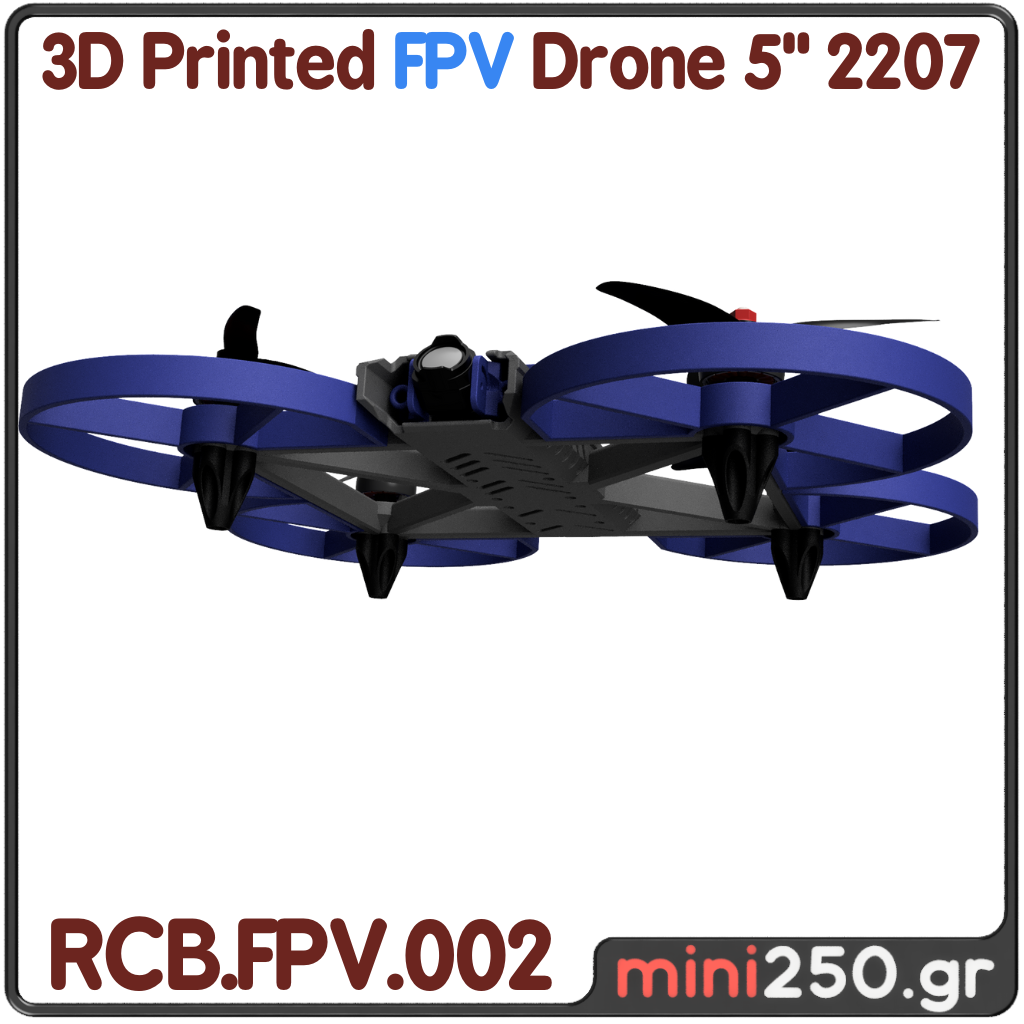
RC Block : FPV Drones
Project RCB.FPV.002
")
")


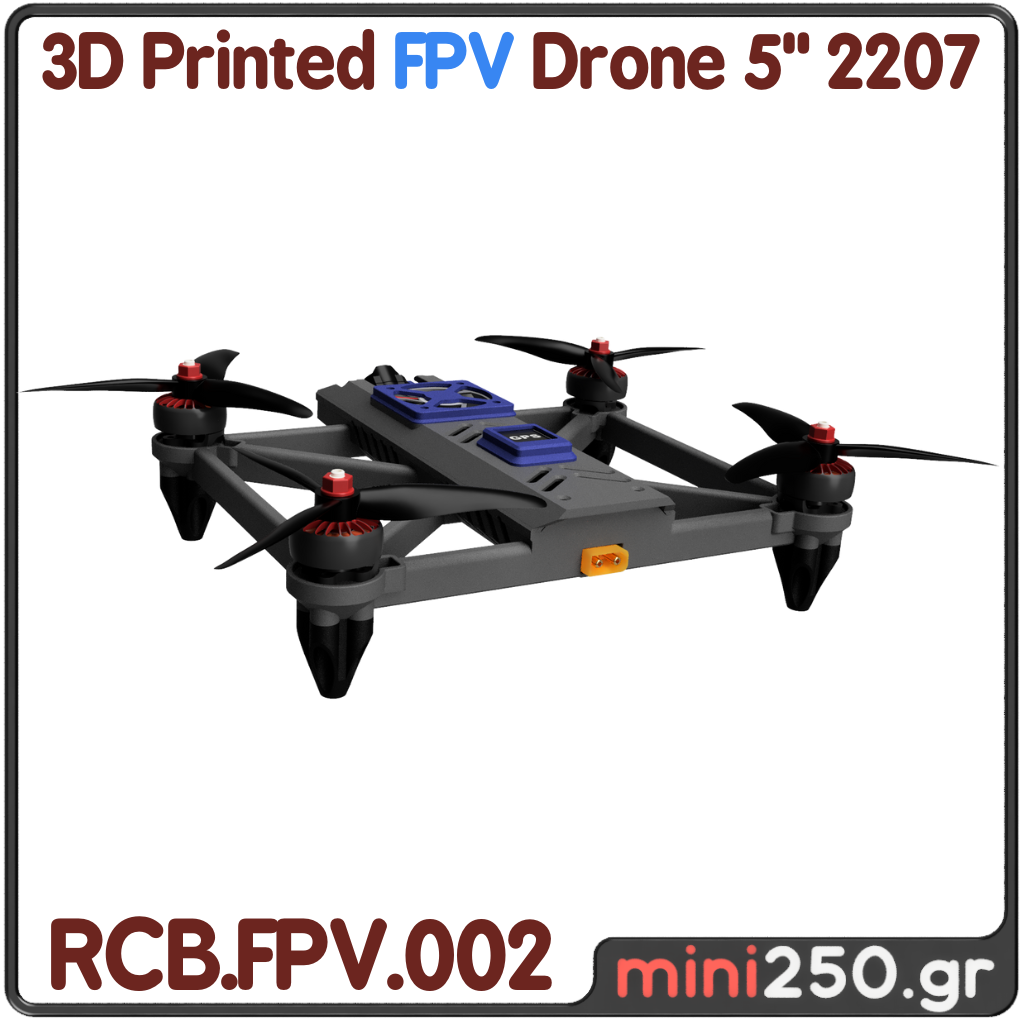
The Ultimate Drone for those who want to start FPV now
Durable! Easy to Assemble, Repair and Train
Em. Skoulikaris
In most live you ask me to design and build a Drone that is exclusively for Beginners!
The 10'' Drone, a bit layered, you could see it was huge and very heavy.
What you need is to be able to assemble it easily, without "crazy" knowledge of course, to be light and to be able to carry it anywhere.
So there you go, I designed it!
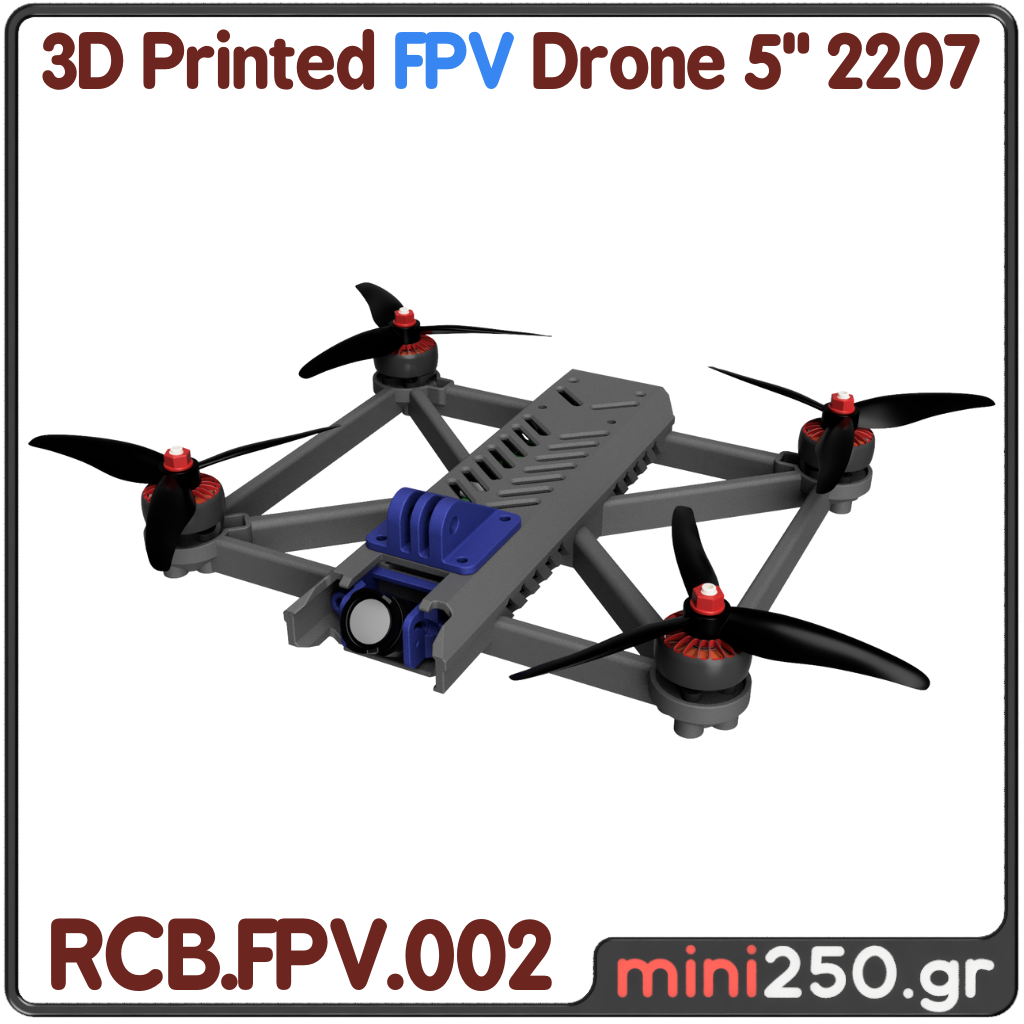
The 5” Drone combines all the above positives and is the Ultimate machine for Beginners!
The 10'' Drone, a bit layered, you could see it was huge and very heavy.
What you need is to be able to assemble it easily, without "crazy" knowledge of course, to be light and to be able to carry it anywhere.
So there you go, I designed it!
The 5” Drone combines all the above positives and is the Ultimate machine for Beginners!
Frequent questions
If you don't find the answer you want below, call me and I'll answer it live
Choose the one that suits you from the following combinations
In case you don't know what to choose, just contact me so we can choose together!
Cinematic ( For Everyday Use )

The ultimate combination for daily flight, relaxed indoor and outdoor videography.
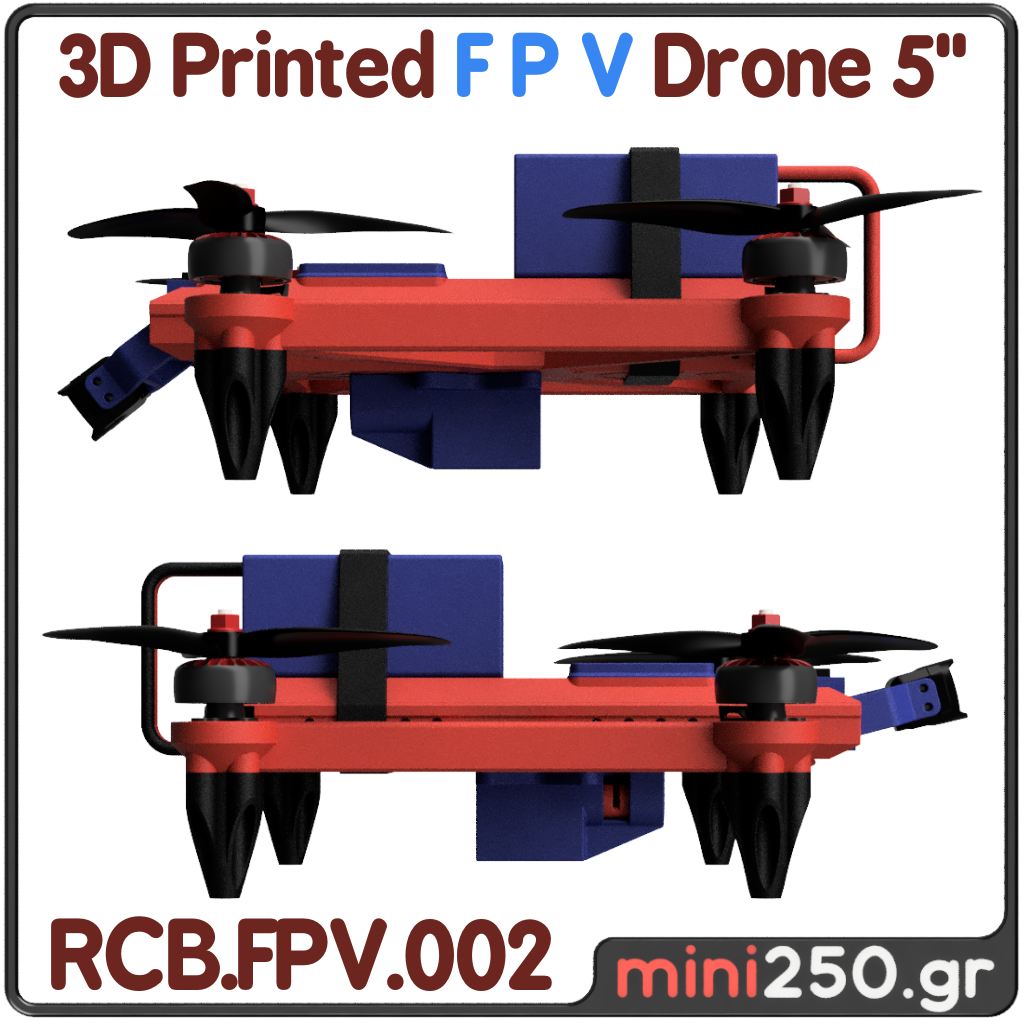
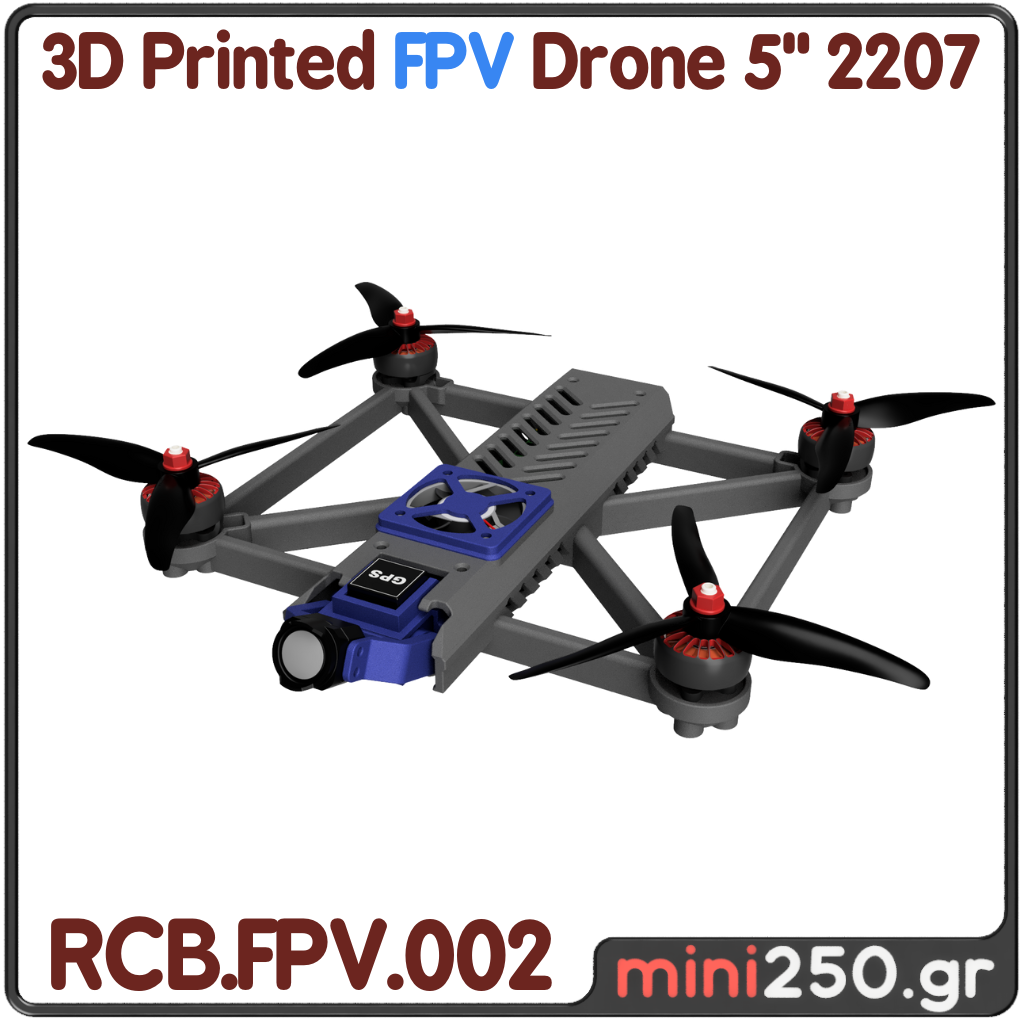
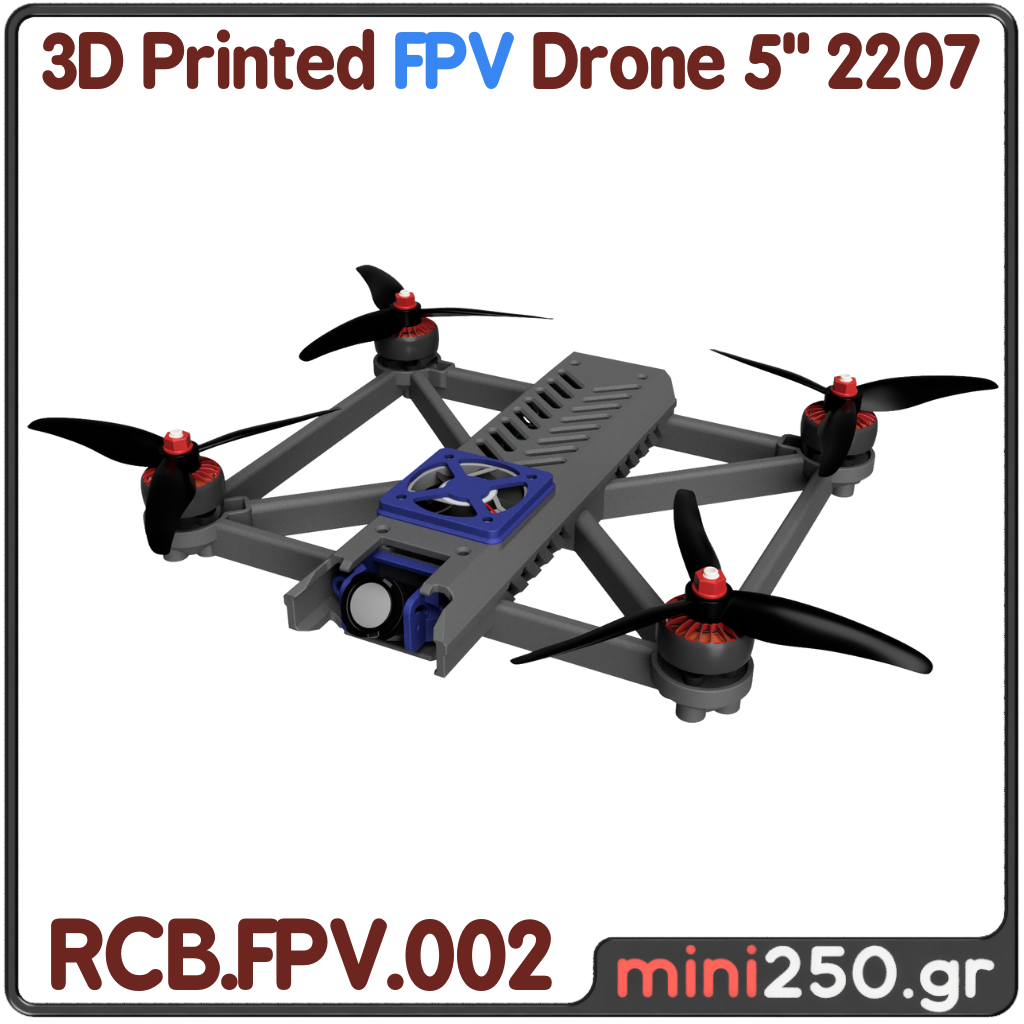
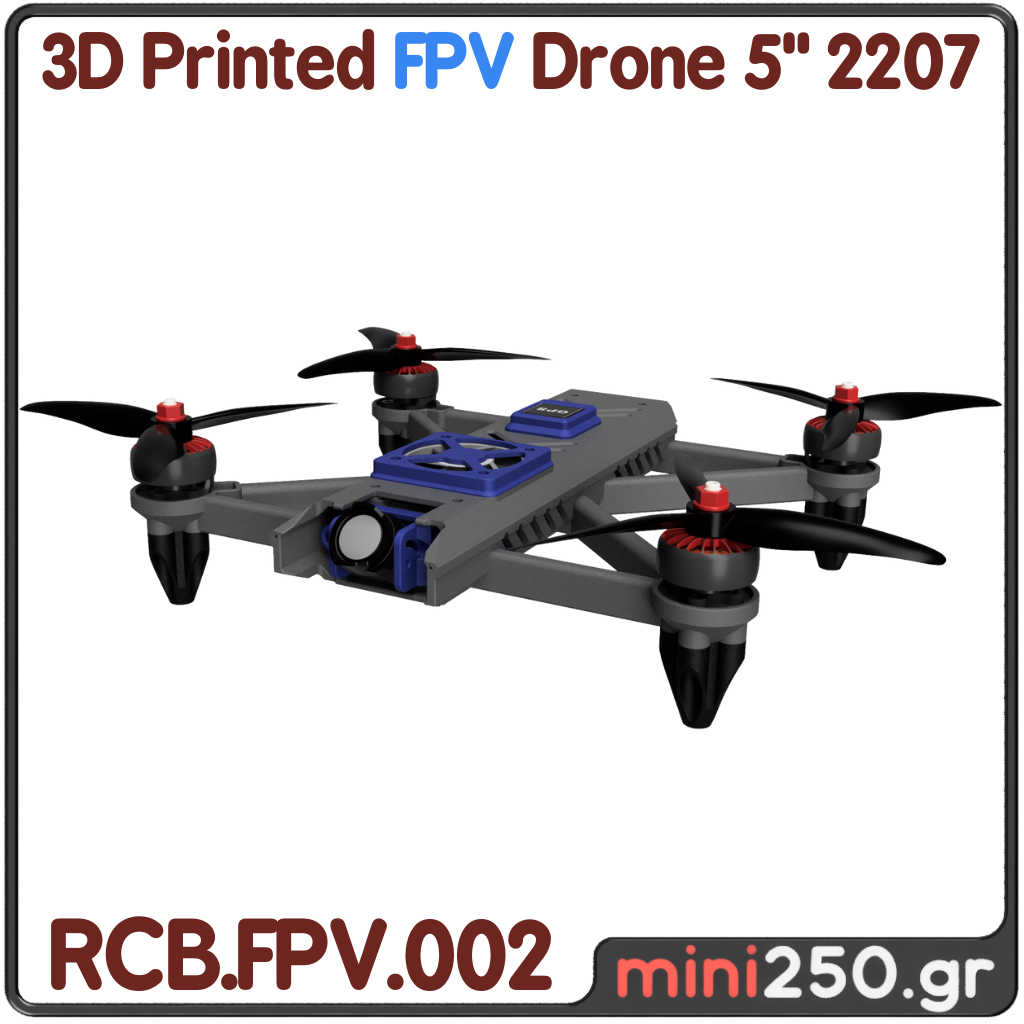
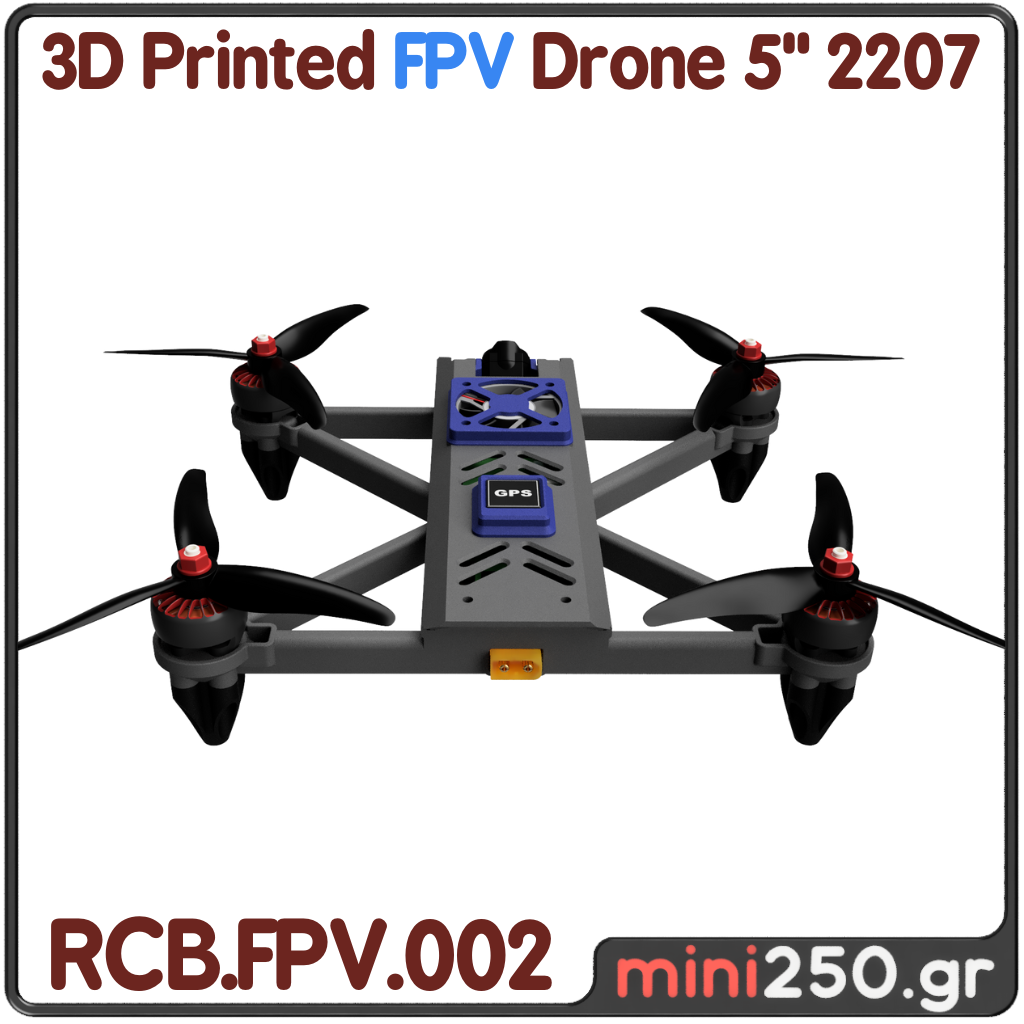
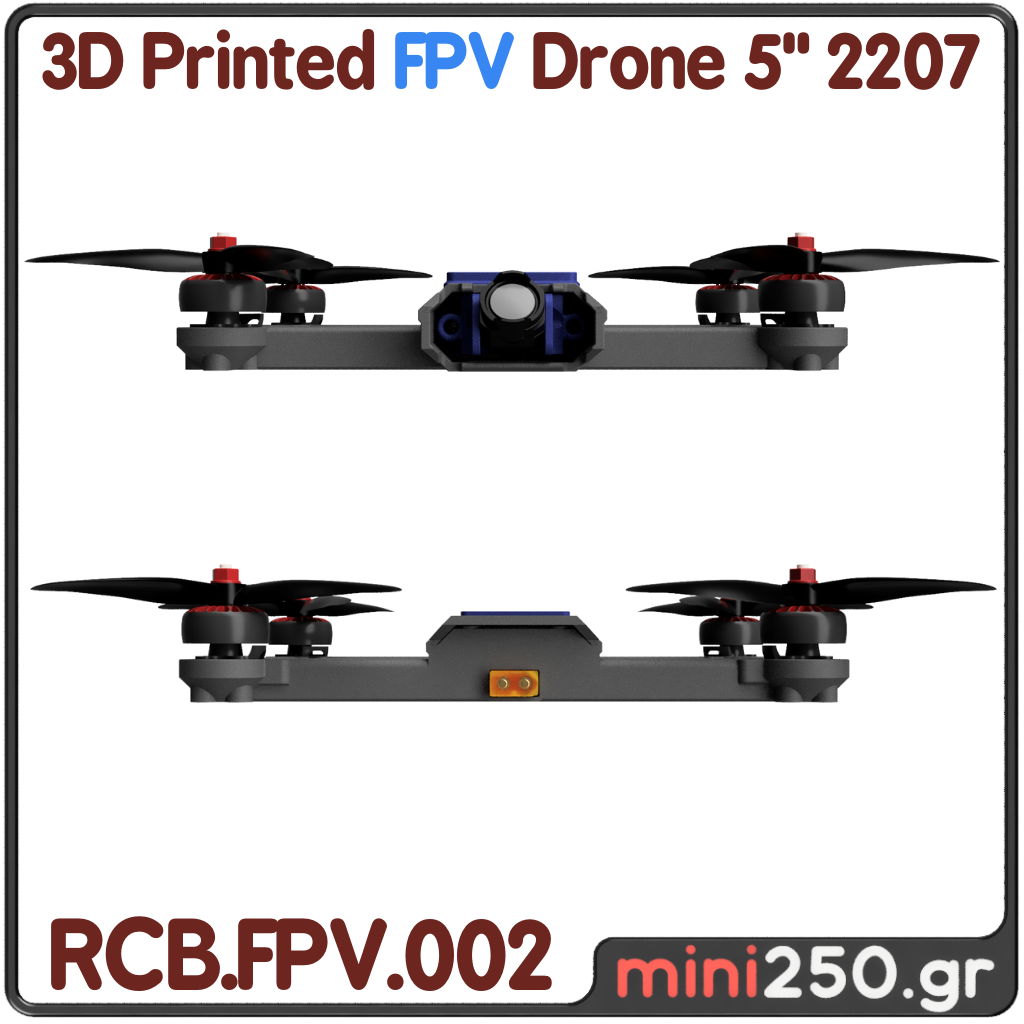
The X Frame combines the perfect balance between strength and weight.
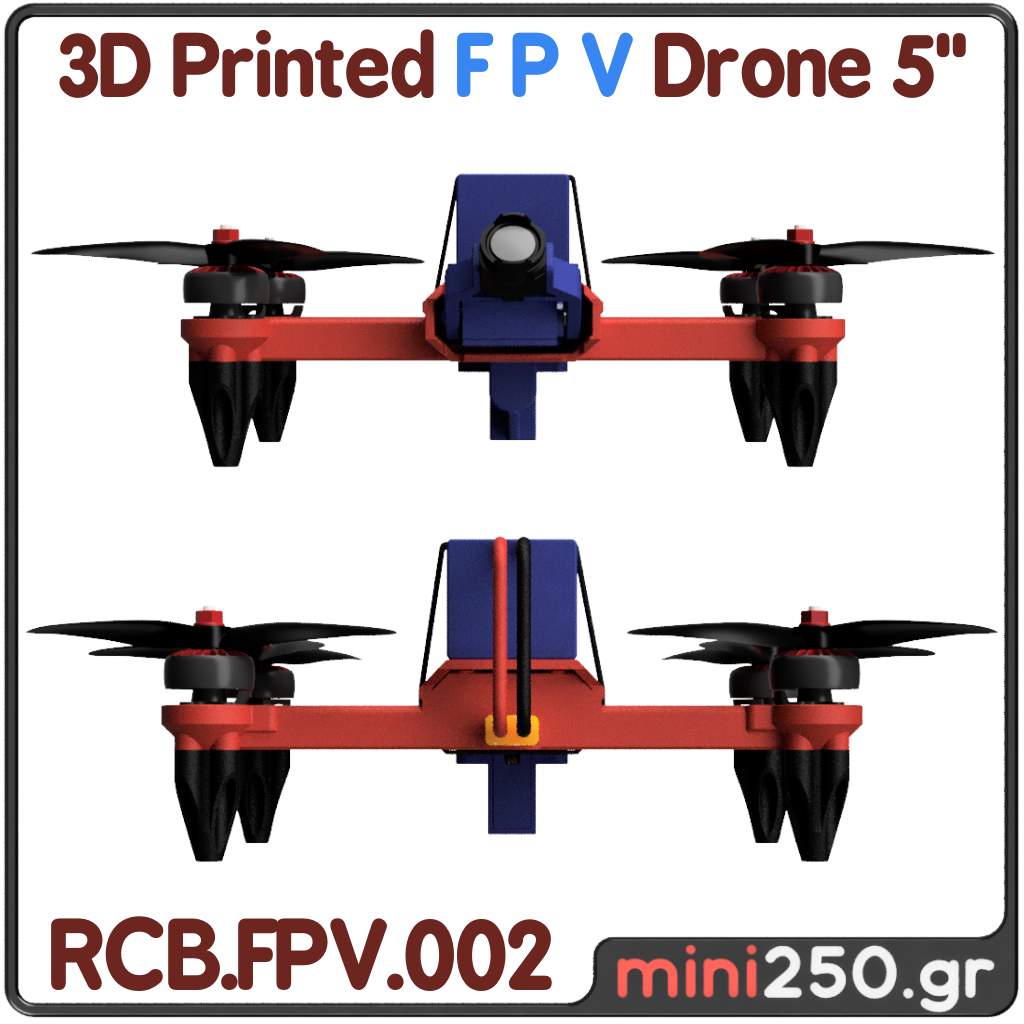
By choosing the fixed base for the O3 you have a compact and light machine.
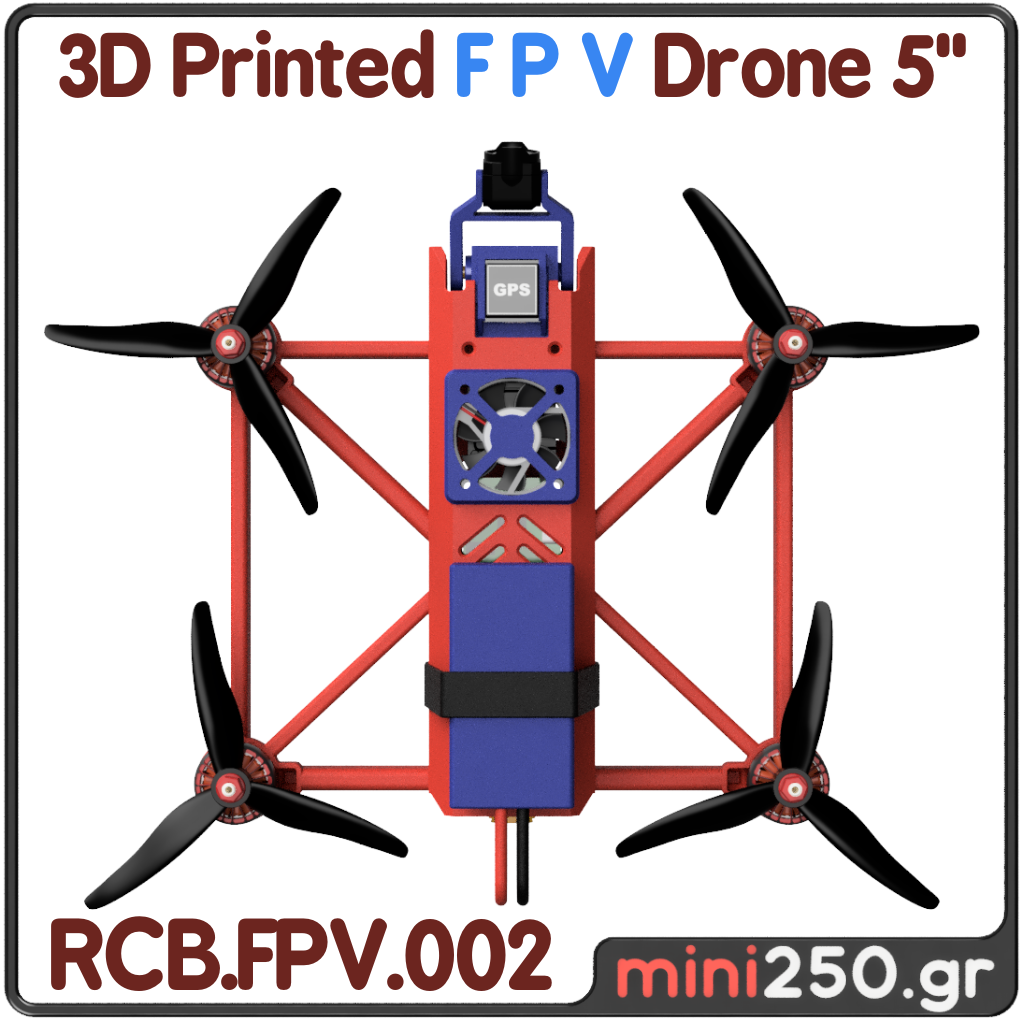
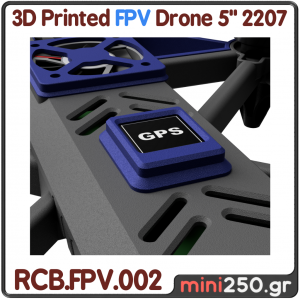
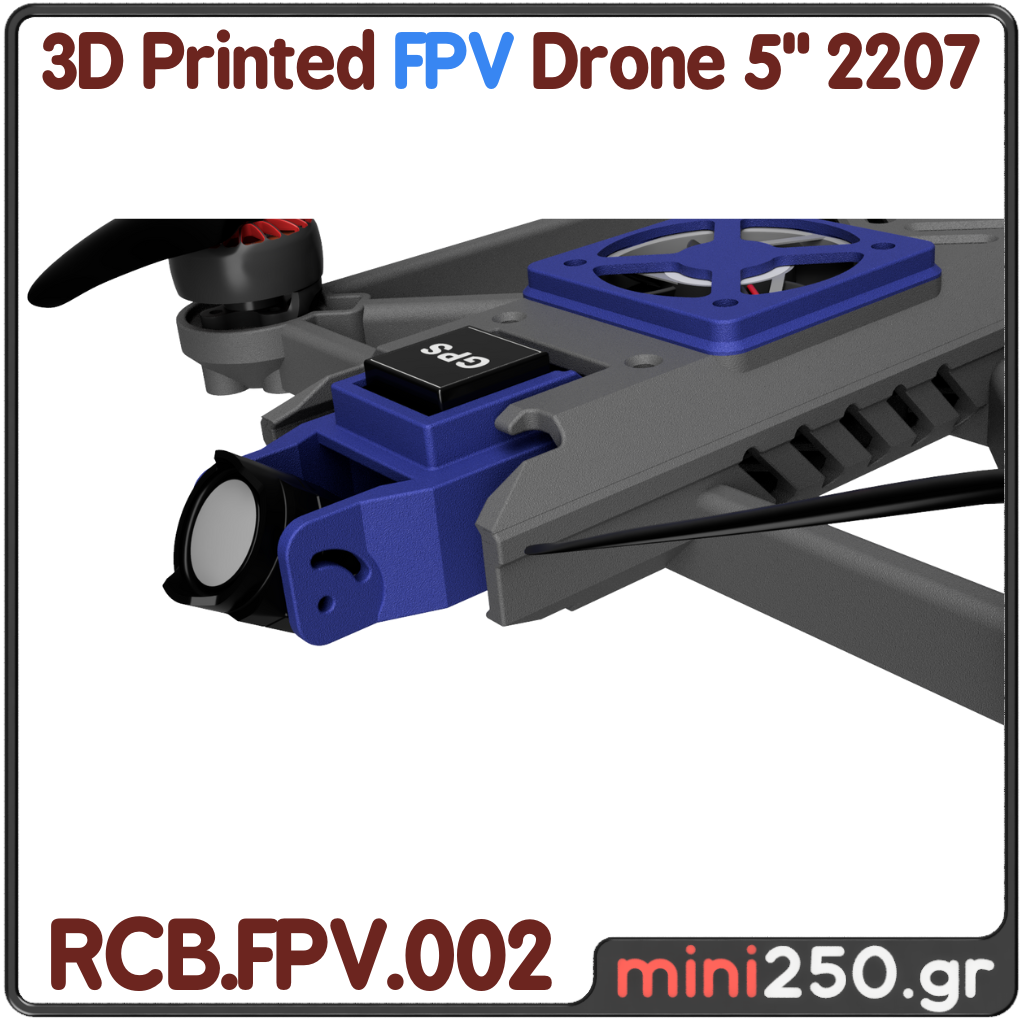
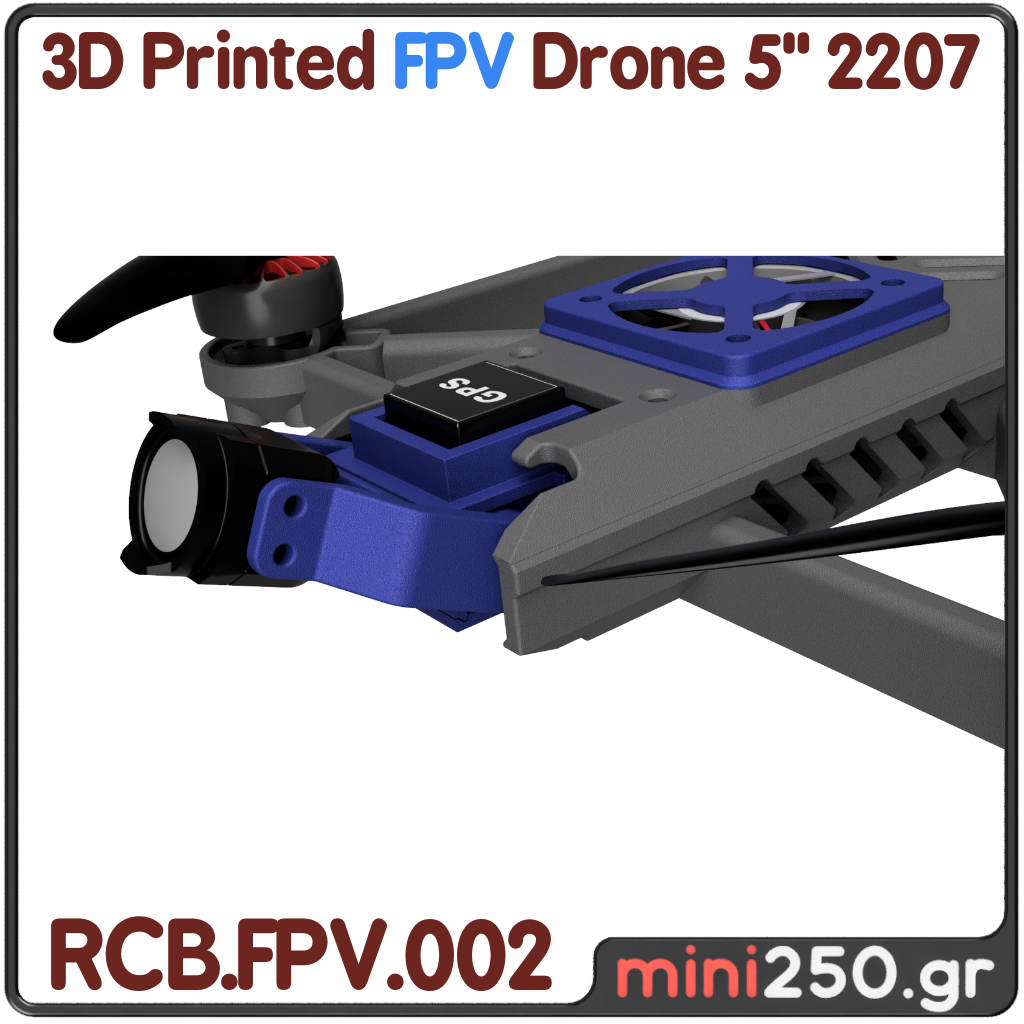
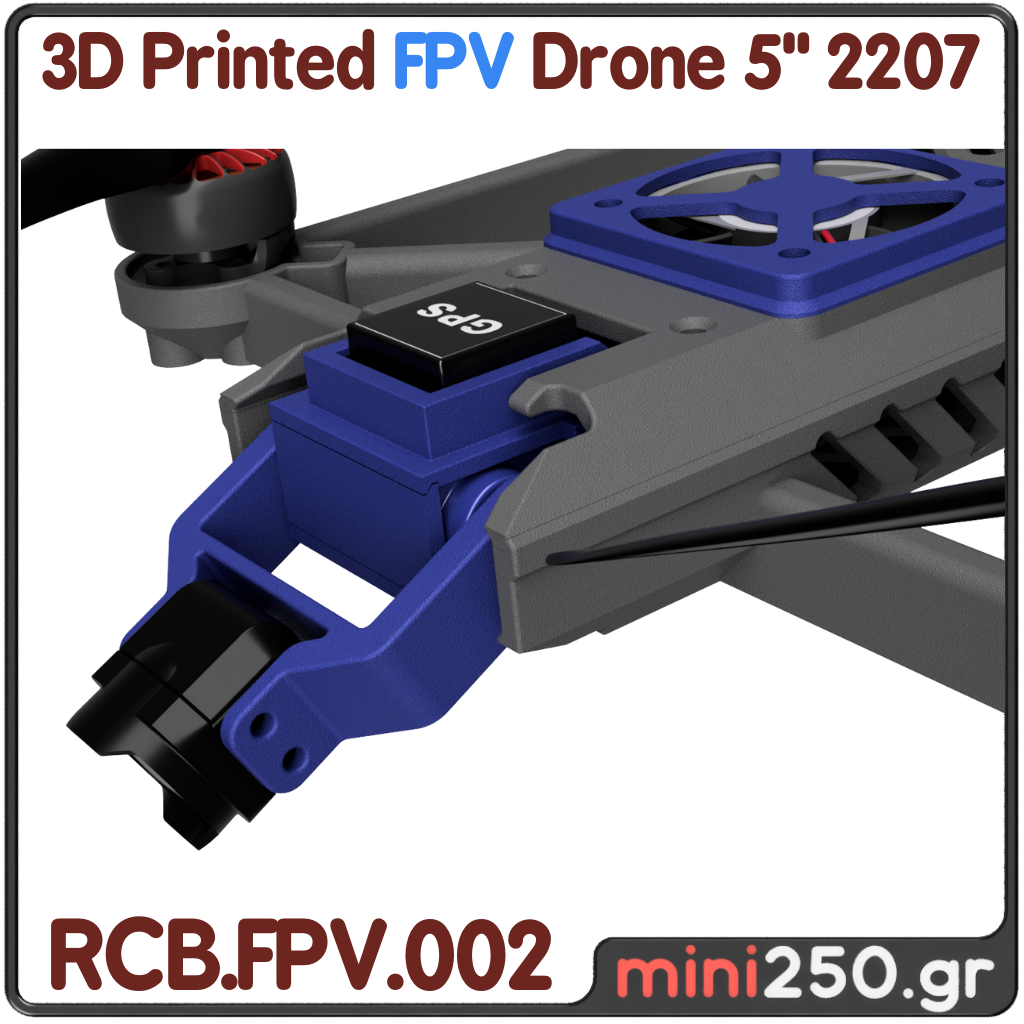
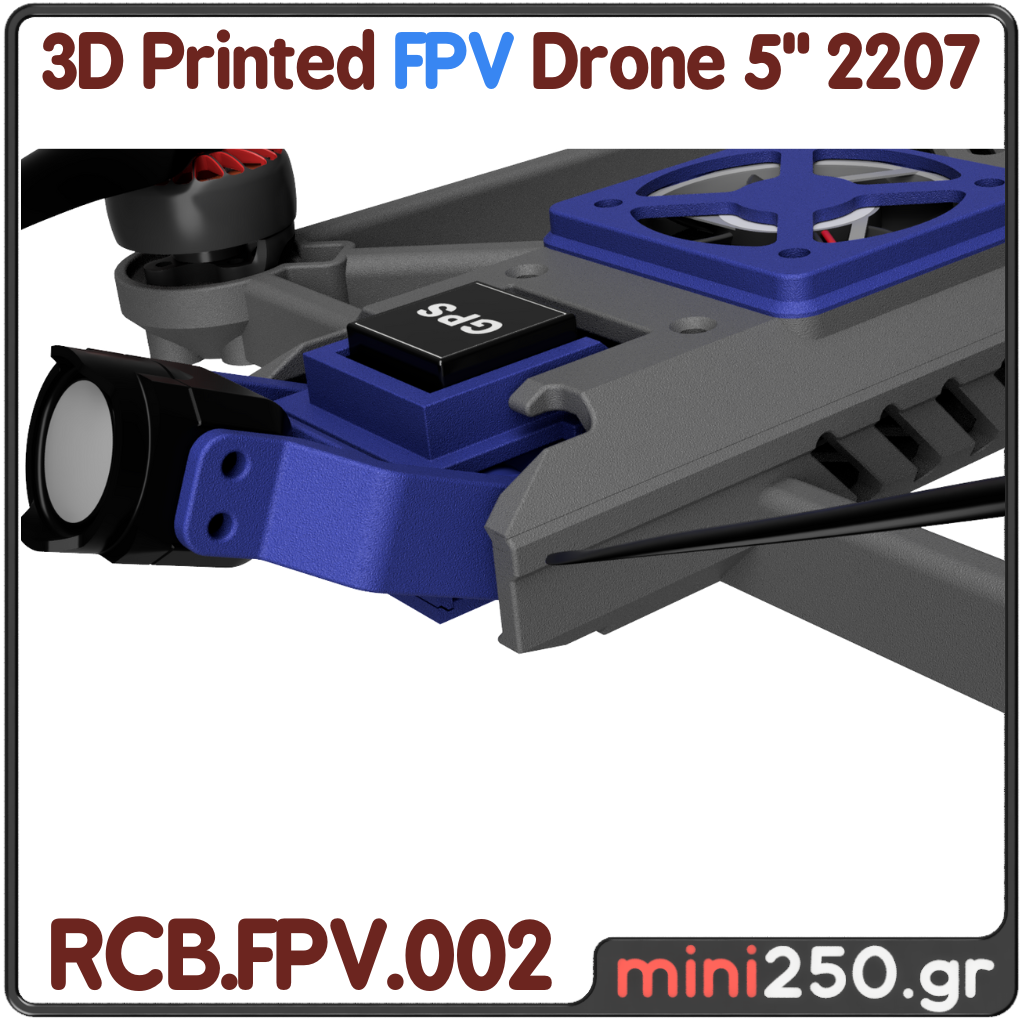
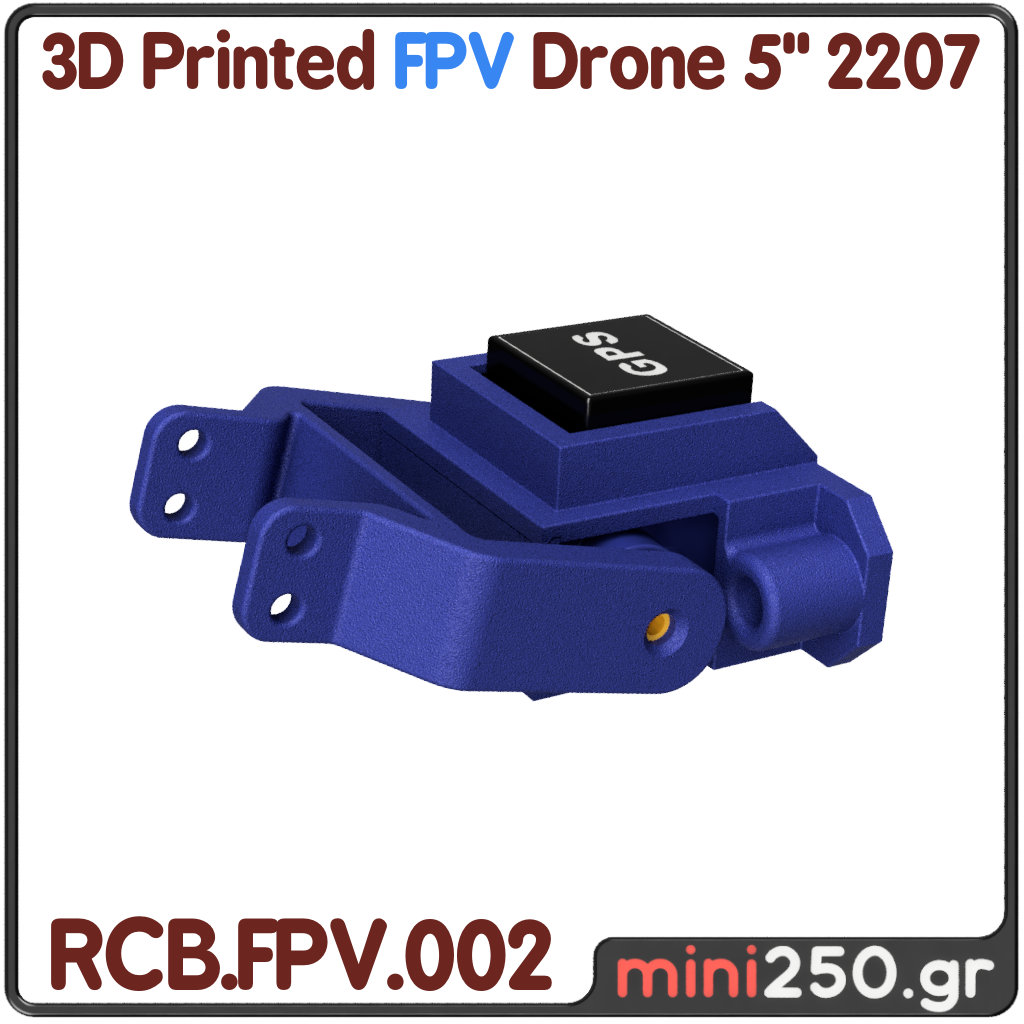
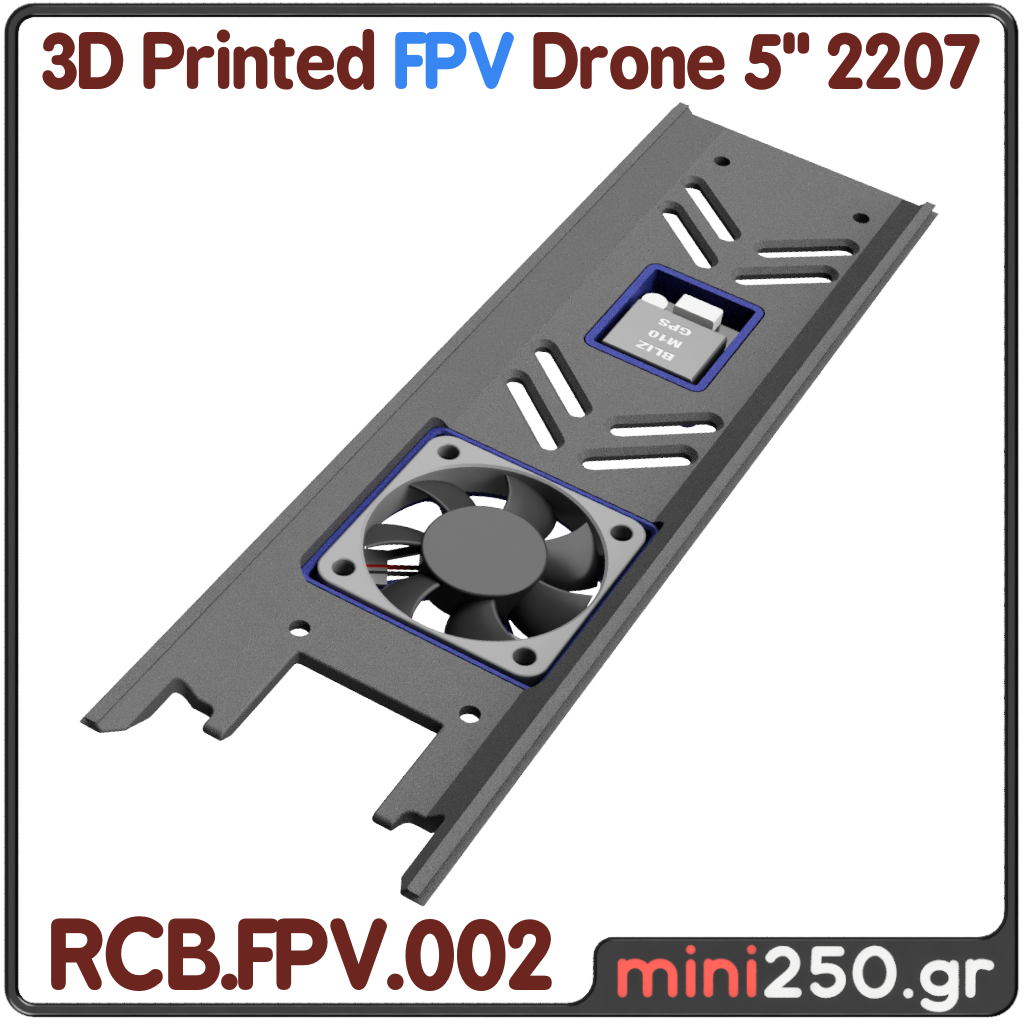
With the Fan & GPS Top Cover we keep the VTX of the O3 camera cool so that we never lose the image transmission when flying slowly and comfortably in or around buildings.
With GPS we are sure that when we get up to go far to take a panoramic shot we will not lose our machine. We will also have the flexibility of stabilizing the point so that we can put on the glasses and get comfortable in our position, taking off and landing the machine line of site.
If you want an extra level of safety you can put on LW Prop Gards and increase the riskiness of your shots by going too close to walls.
We place the largest battery at the bottom of the machine as we want the longest and most powerful flight duration.
Drone set up
The X Frame combines the perfect balance between strength and weight.
By choosing the fixed base for the O3 you have a compact and light machine.
With the Fan & GPS Top Cover we keep the VTX of the O3 camera cool so that we never lose the image transmission when flying slowly and comfortably in or around buildings.
With GPS we are sure that when we get up to go far to take a panoramic shot we will not lose our machine. We will also have the flexibility of stabilizing the point so that we can put on the glasses and get comfortable in our position, taking off and landing the machine line of site.
If you want an extra level of safety you can put on LW Prop Gards and increase the riskiness of your shots by going too close to walls.
We place the largest battery at the bottom of the machine as we want the longest and most powerful flight duration.
Drone set up
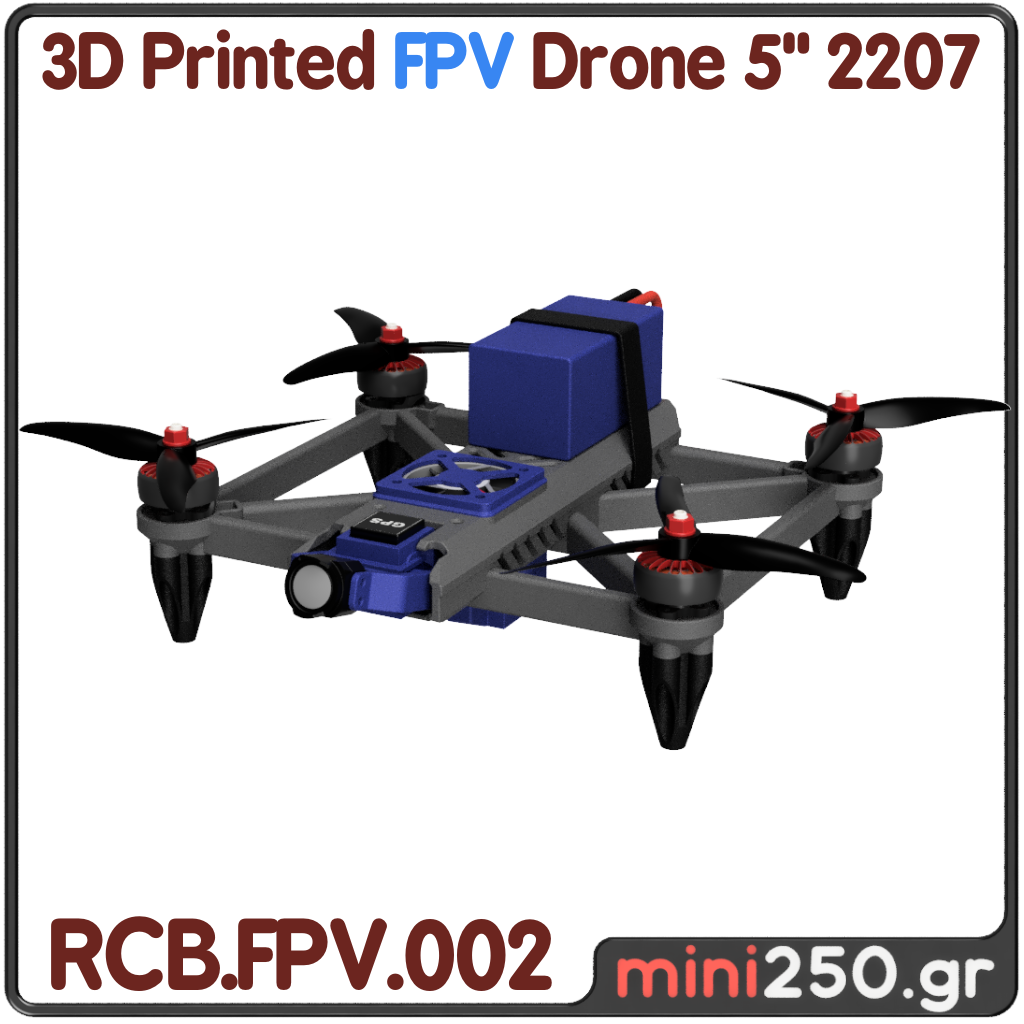
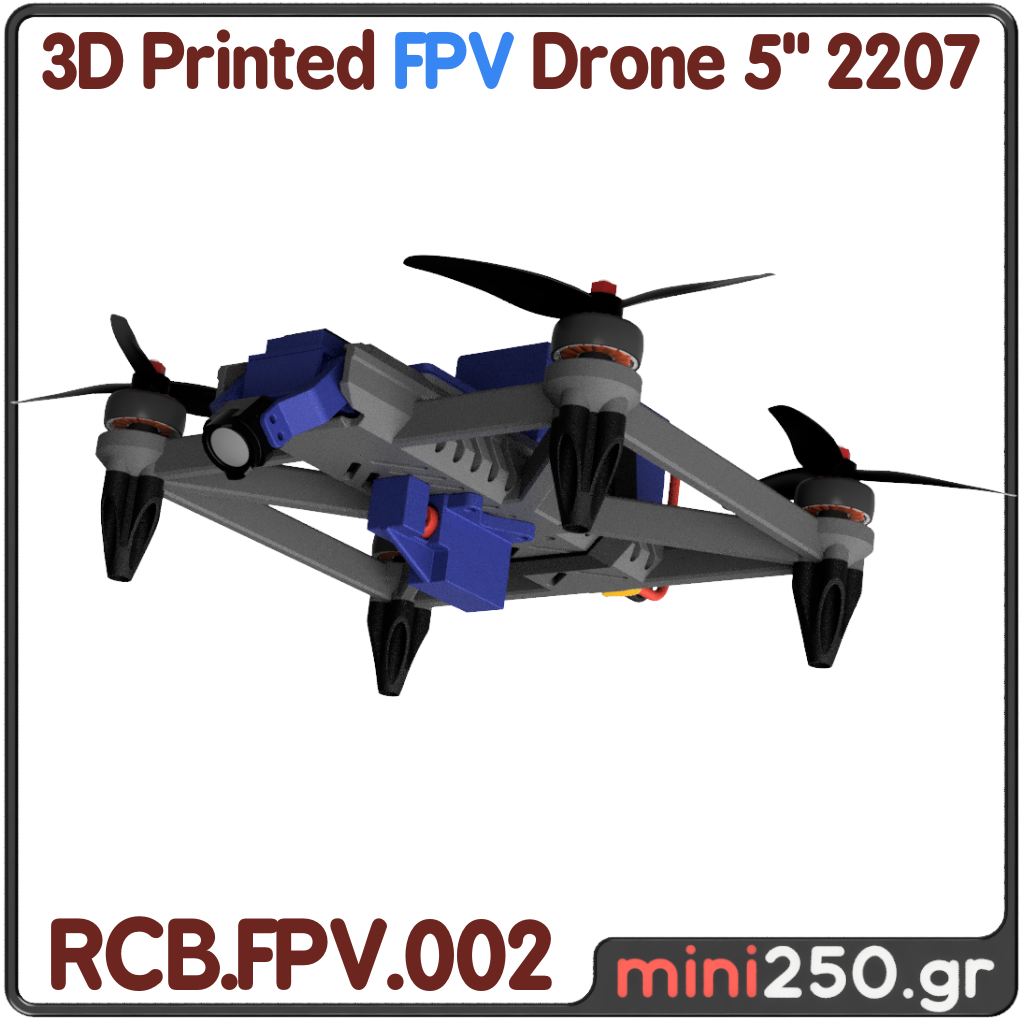
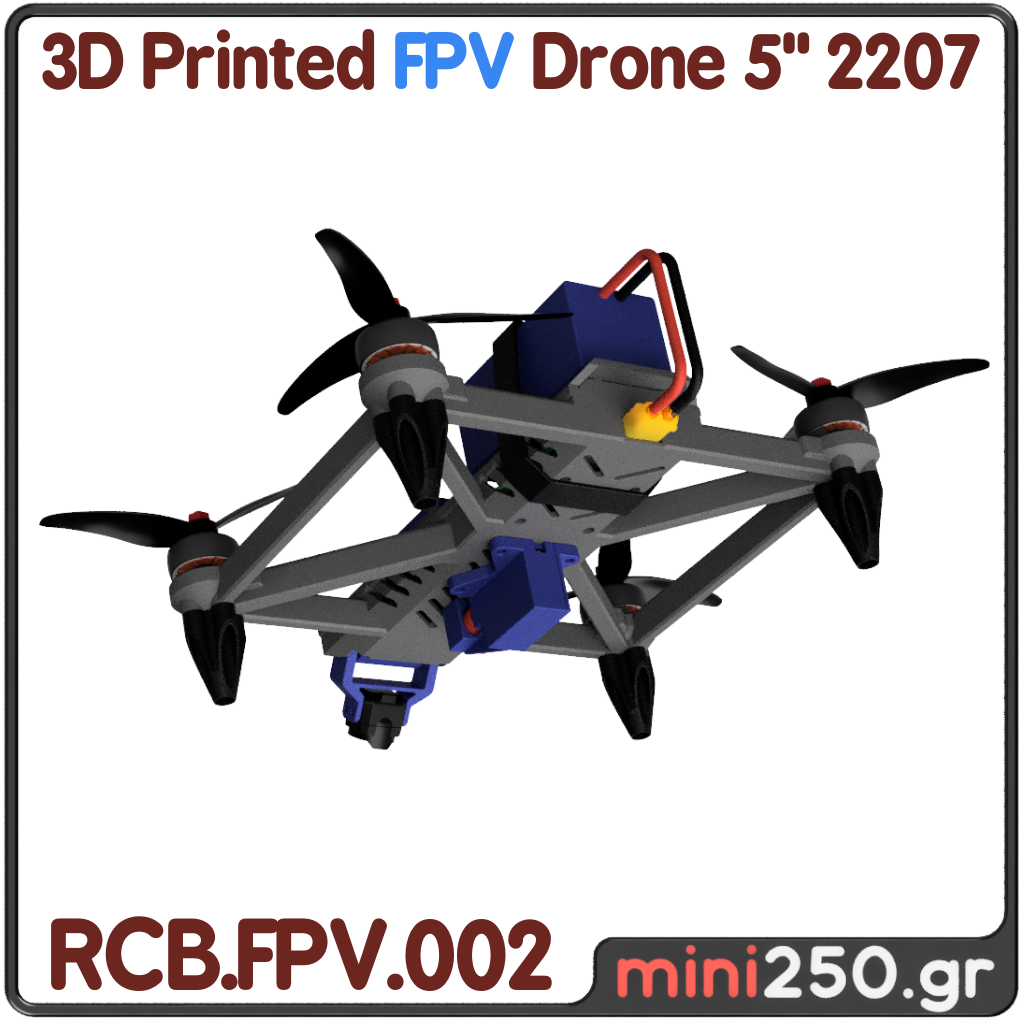
- X Frame
- Fix o3
- Fan & GPS Top
- Prop Gard
- Battery ( TATTU 4s 3700ma )
Cinematic ( For Everyday Use )


SAR ( MED Delivery )

The maximum load transfer is 800 grams, with a maximum of 1 kg.
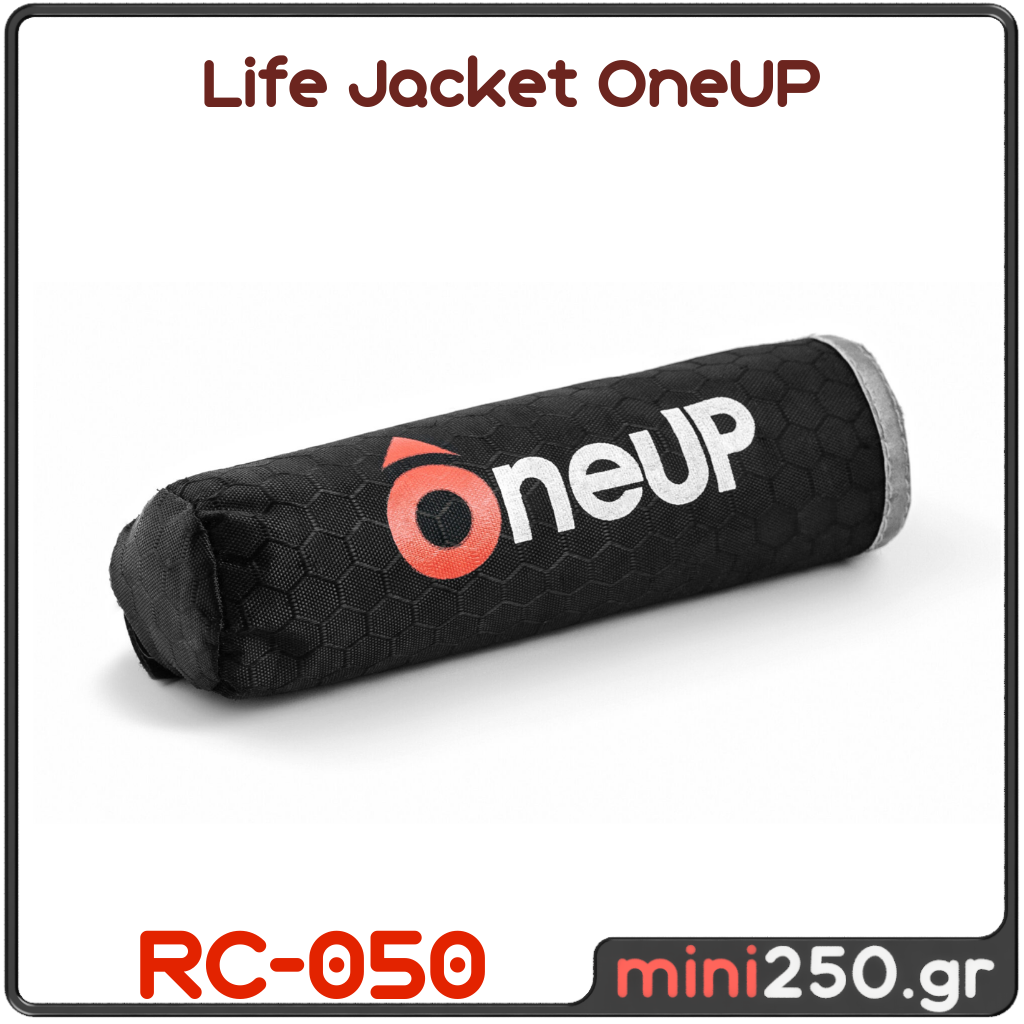
Ideal for carrying a compact automatic life jacket or a small first aid kit to someone who is close to land, e.g. on a rock in the sea.
You also have the possibility to fly a pilot* to a surfer or Paddle Board that has gone far and cannot return due to strong currents.
You tie the pilot under the drone and then take it over the one who needs it. Then you let him catch him and pull him out like a fish ( Big fish... )
*Pilot is the small rope that we tie down the drone and then send it to the one who needs help. When the Drone lets go of the rope, it grabs it and then we pull it off the land without having to put ourselves in danger to rescue it.
The ultimate combination of components for carrying the life jacket, as with the HD frame you can carry quite a lot of weight.
With Tilt O3 you have the possibility to look straight while going to the point. Then when you arrive you throw in the life jacket.
Finally, with the Servo Release System you can release the Life Jacket you are carrying.
In this case we place the battery at the top and the gps at the front, above the Servo Release System.
Do not try to put the Servo Release System on the X Frame or LW X Frame it is not going to withstand the stresses of carrying the load.
Also here we choose motors with low KV so that they do not overheat. Forget 2750KV! Choose 1800KV and let the ESC and motors be cold.
Drone setup
- HD H Frame
- Tilt o3 & GPS
- Servo Release System
- Battery ( TATTU 4s 2000ma )
SAR ( MED Delivery )


The Hunter ( B*** Delivery )

The ultimate combination of components for carrying loads as with the HD frame you can carry quite a lot of weight.
With the Tilt o3 you have the ability to look straight while moving towards the target and then down when you arrive to drop the load.
And finally with the Servo Release System you can release the load you are carrying.
In this case we place the battery at the top and the gps at the front, above the Servo Release System.
Do not try to put the Servo Release System on the X Frame or LW X Frame it is not going to withstand the stresses of carrying the load.
Also here we choose motors with low KV so that they do not overheat. Forget 2750KV! Choose 1800KV and keep the ESC and motors cold.
Drone setup
HD H Frame
Tilt o3 & GPS
Servo Release System
Battery ( TATTU 4s 2000ma )
Airsoft & Paintball : Surprise your teammates by neutralizing your opponents by sending an aerial remote controlled smoke bomb with Hunter!!
P.S. Soon I will also prepare a game and competition of skill and shooting. It will aim to achieve specific goals in a specific time.
This game we will be able to expand the possibilities of teenagers with drones and instead of flying around like crazy, they make videos. We will also be able to use them as a tool for this game.
If you have more ideas and you are interested in working with this idea, contact me to discuss it.
The Hunter ( B*** Delivery )
"Fine I want it!! What choices do I have?"
It's DIY! Together we will choose the right equipment for you!
RTF BNF STL ( Explained )
I want to start now!

If you don't have any equipment (remote control, glasses, charger) then the choice for you is Ready to Fly.
By following the link below you will be taken to the product tab where I have gathered all the equipment you will need to start from scratch.
Indicative of the equipment you will need are the following
Remote control
FPV Goggles
3D Printed FPV Drone
Charger
Batteries
If you don't know what to choose from all this, don't delay, call me so that we can choose the right equipment for your needs together!
I have equipment and I only want to get the machine!

If you already have your own equipment (remote control, glasses FPV, charger) then the option for you is Bind and Fly.
Following the link below will take you to the product tab where I only have the machine without the rest of the equipment.
In order for me to configure the machine according to the equipment you have, you will need to tell me the parts you have. The following are indicative
If you don't know which of these to choose, don't delay, call me so we can analyze together the equipment you have and then choose the right parts that match your equipment!
Following the link below will take you to the product tab where I only have the machine without the rest of the equipment.
In order for me to configure the machine according to the equipment you have, you will need to tell me the parts you have. The following are indicative
- Remote control
- FPV Goggles
- Charger
- Batteries
If you don't know which of these to choose, don't delay, call me so we can analyze together the equipment you have and then choose the right parts that match your equipment!
How do we assemble it? It appears to have 500 parts
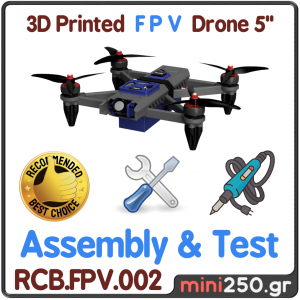
Machine options - Option : Assembly
By choosing this option, you can entrust the assembly, programming, as well as the first test flights of your machine to me so that you can be sure that you will have a fully functional and guaranteed machine.
If you are a beginner pilot and this is your first machine do not try to assemble it yourself. There is so much to learn and so many details to adjust to have the best flying experience. Trust this process to me! I have built enough machines and can get you out of trouble!
When I hit it or choke it, what do we do?
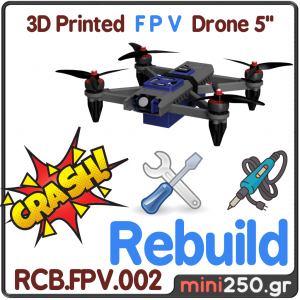
Inevitably at some point you're going to screw it up
Don't worry though, as I'm here to repair and rebuild your machine even after the worst plaster. (unless you drown it. there we can only save the propellers, undercarriage and motors, but still we will save something)**
One of the main advantages of DIY FPV machines is that we can repair them with parts from any company we want. In this way I guarantee you that there is no chance that we will not find spare parts. I will repair your machine in less than a week, at the lowest cost.
I already have a half broken one, can we do a Conversion?
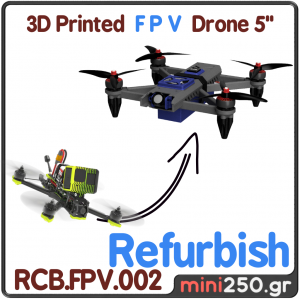
If you already have parts that you want us to use or you have "inherited" from any of your friends, parts or even a whole machine and you want us to turn it into a 3d printed fpv drone, I have the solution for you. You send me photos of your equipment on Viber, so that we can analyze together the components you have and then choose the right solution for you!
Most of the time it is necessary to send me what you have so that I can update all the firmware of the components you have, connect them to the machine and make the first test flights.
Most of the time it is necessary to send me what you have so that I can update all the firmware of the components you have, connect them to the machine and make the first test flights.
Can I repair and print the parts myself?
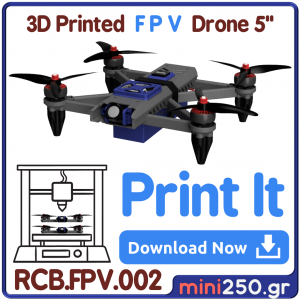
In case you have a 3d printer and want to get involved even more deeply in the process of manufacturing and repairing the machine, you can download the files and then follow the Tutorials. I have Tutorials on repairing, rebuilding the machine after a fall. In this case, you will be able to print your spare parts yourself and repair the machine yourself.
If you are a professional and use the machine for photography, it is a very good opportunity to reduce your operating costs. Learning the entire process of repairing, rebuilding and also programming the machines you fly. In this way you will be more confident in the field so that you can do your work more comfortably. You won't be limited by the fear of breaking. Finally, you will have the option much more economically, more than one machine and you will go to the field with 4-5, to be sure.
If you are a professional and use the machine for photography, it is a very good opportunity to reduce your operating costs. Learning the entire process of repairing, rebuilding and also programming the machines you fly. In this way you will be more confident in the field so that you can do your work more comfortably. You won't be limited by the fear of breaking. Finally, you will have the option much more economically, more than one machine and you will go to the field with 4-5, to be sure.
I don't have a printer. Can I get the parts ready?
All the spare parts for the machine are on this page and you can buy some parts or the whole frame. All the mechanical parts needed such as screws, inserts, servos, fans and anything else you might need are here!
The Ultimate Drone for those who want to start FPV now
Durable! Easy to Assemble, Repair and Train
Innovation Points
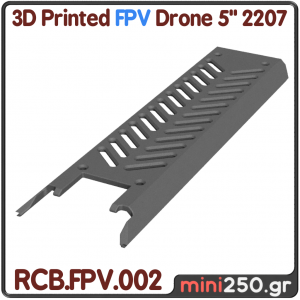
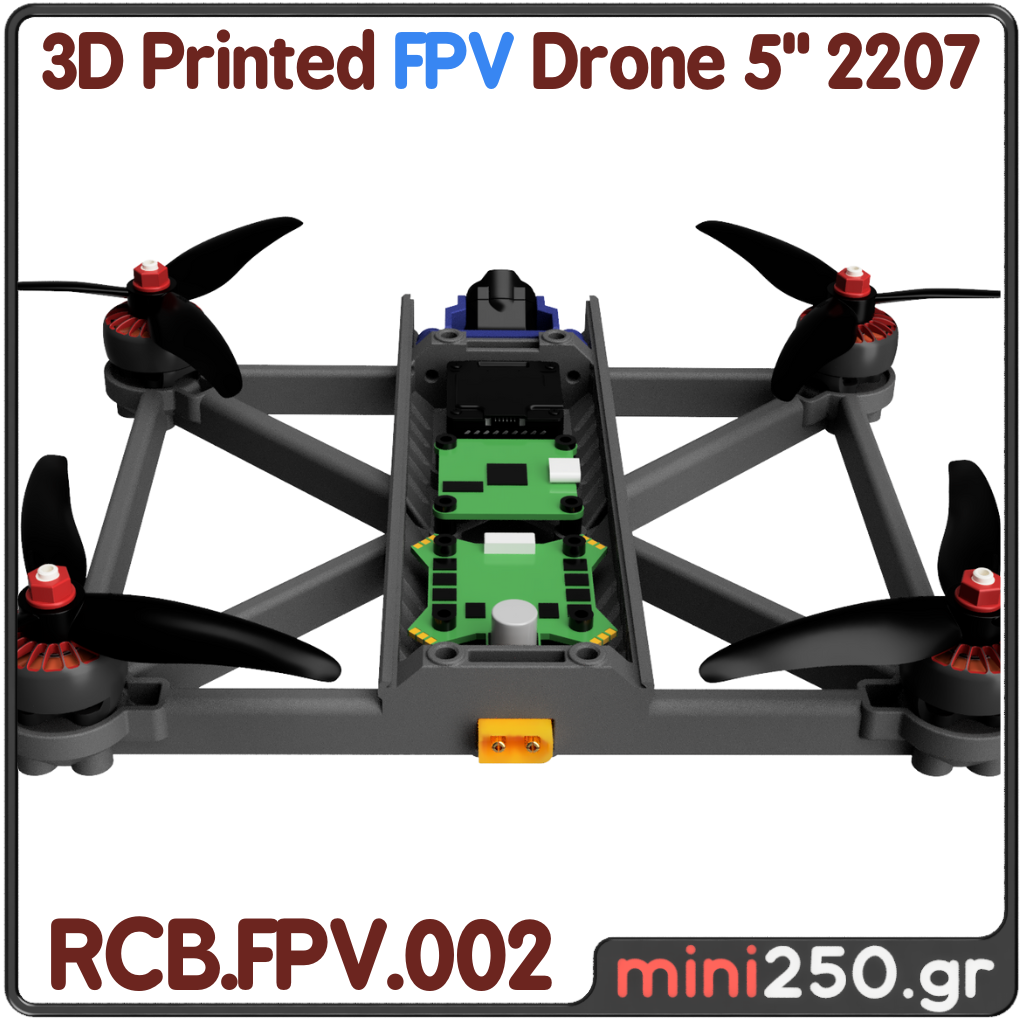
Flat Layout For Easy Build

Servo Gimball Tilt Camera
GPS Nav Mods
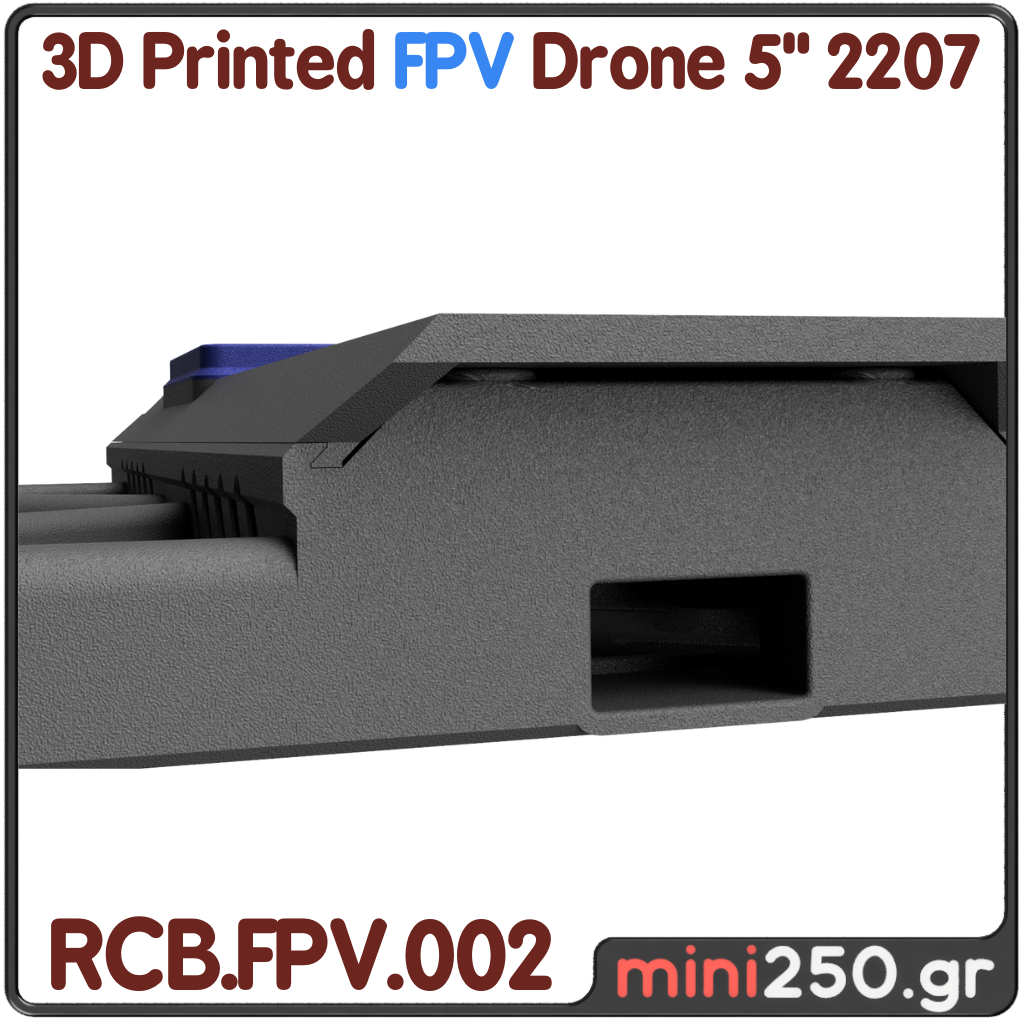
Cable in the frame

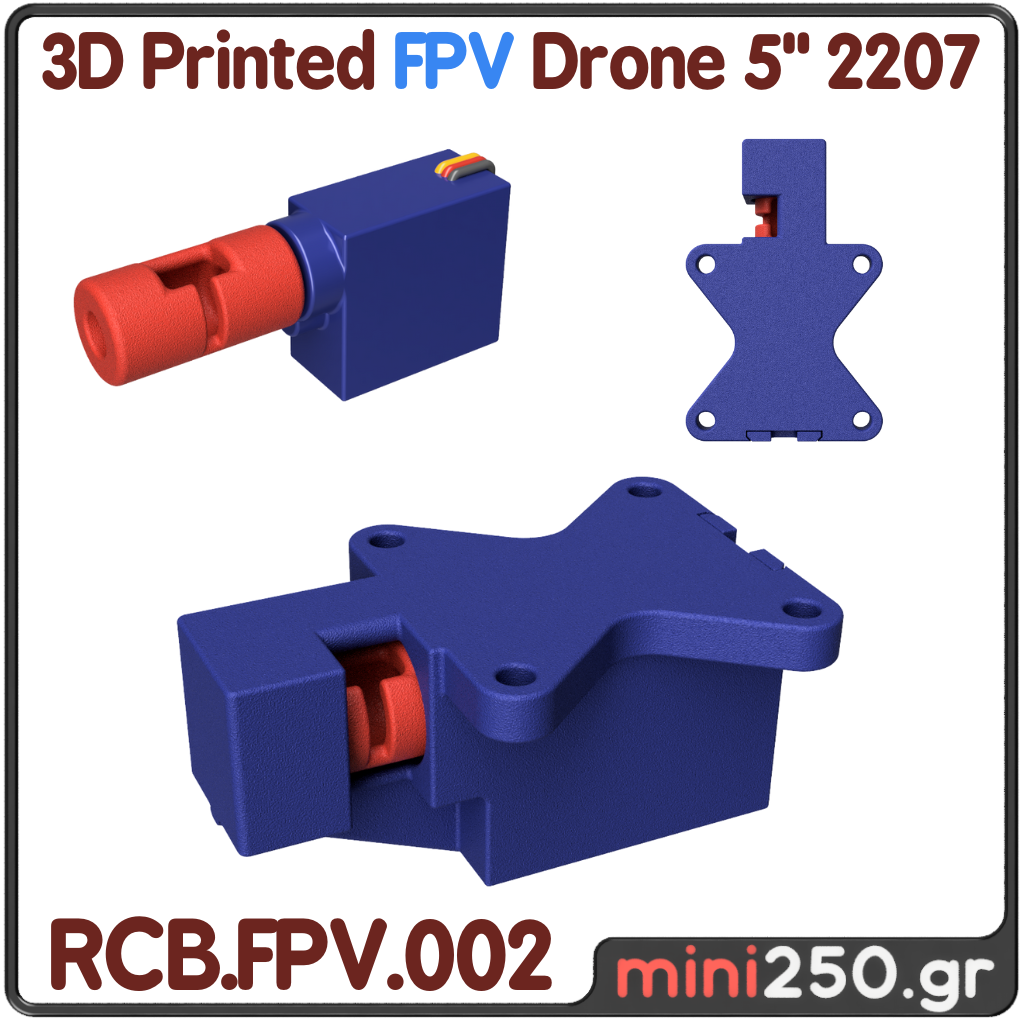
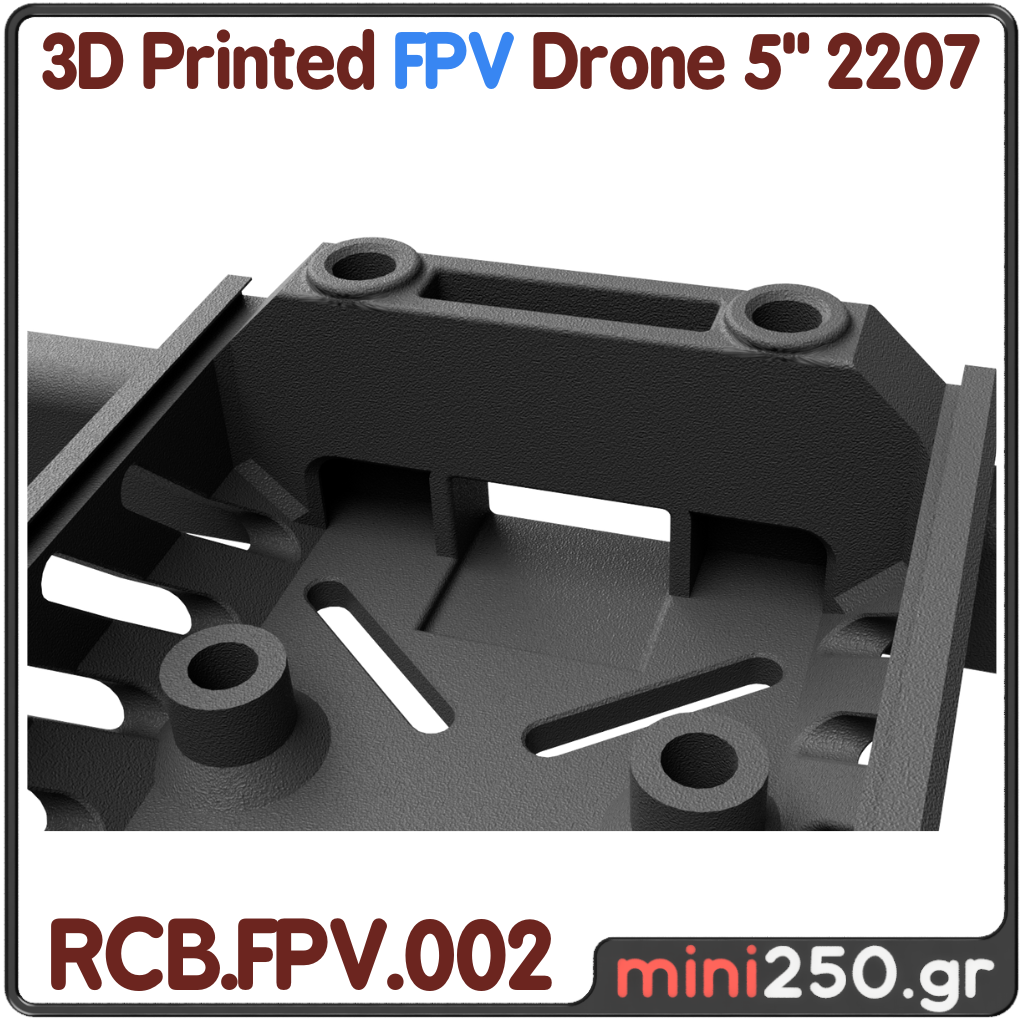
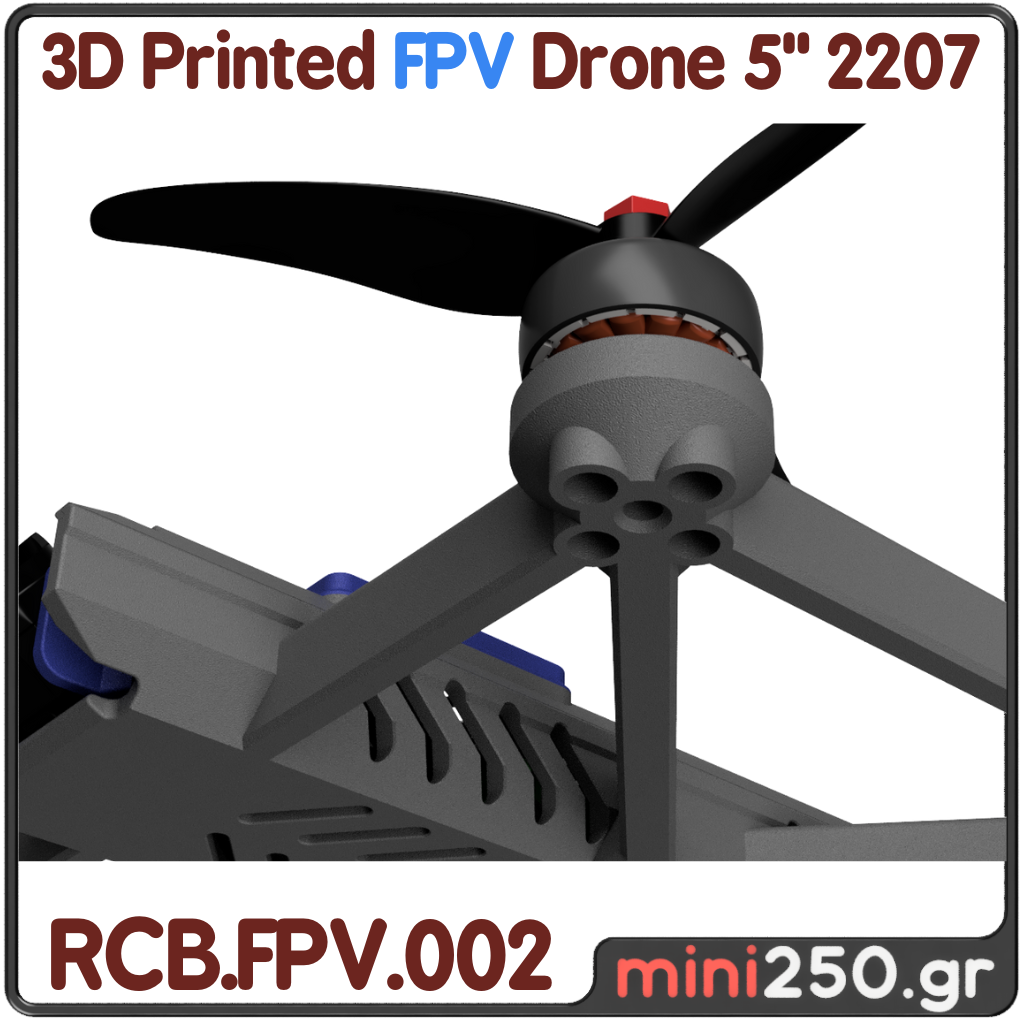
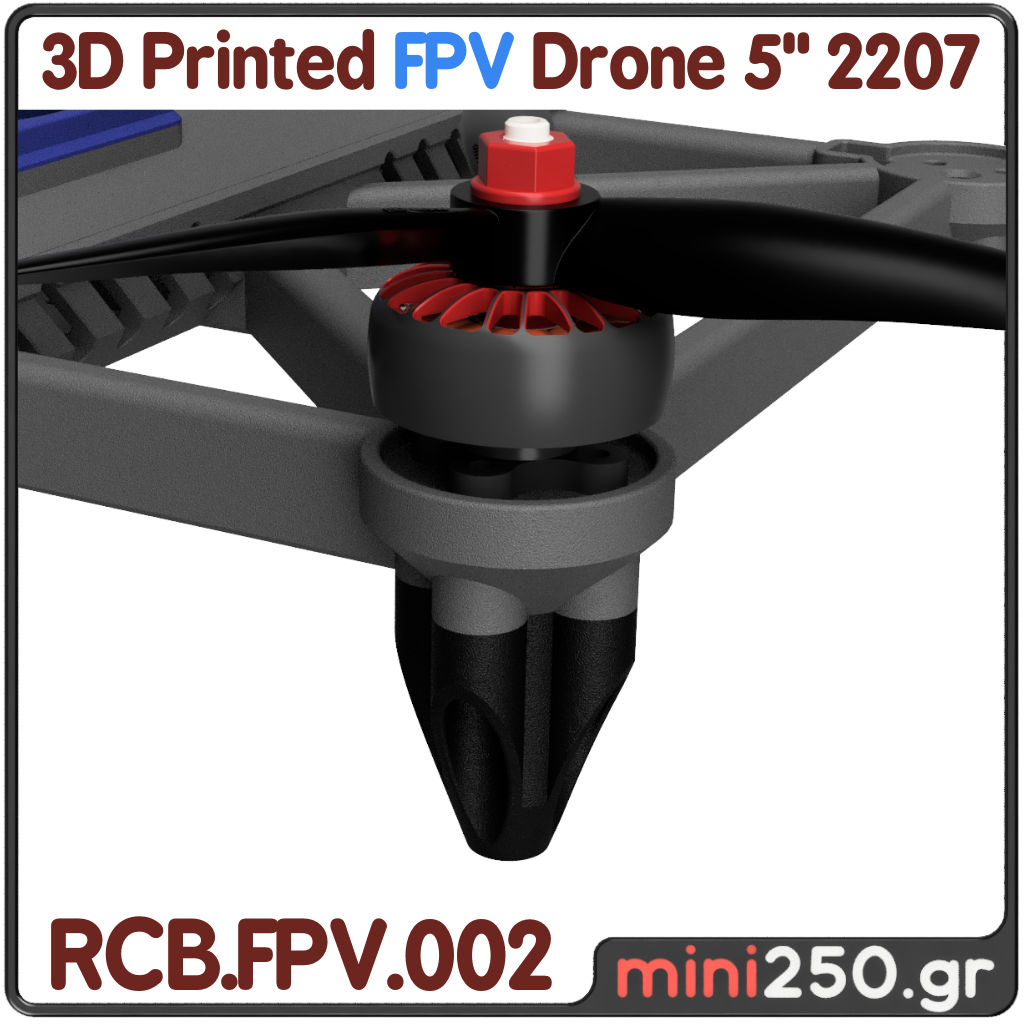
Signature Motor Mount
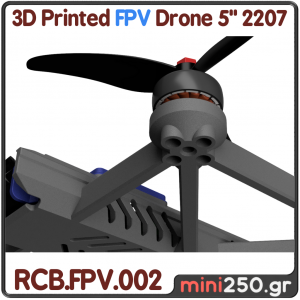
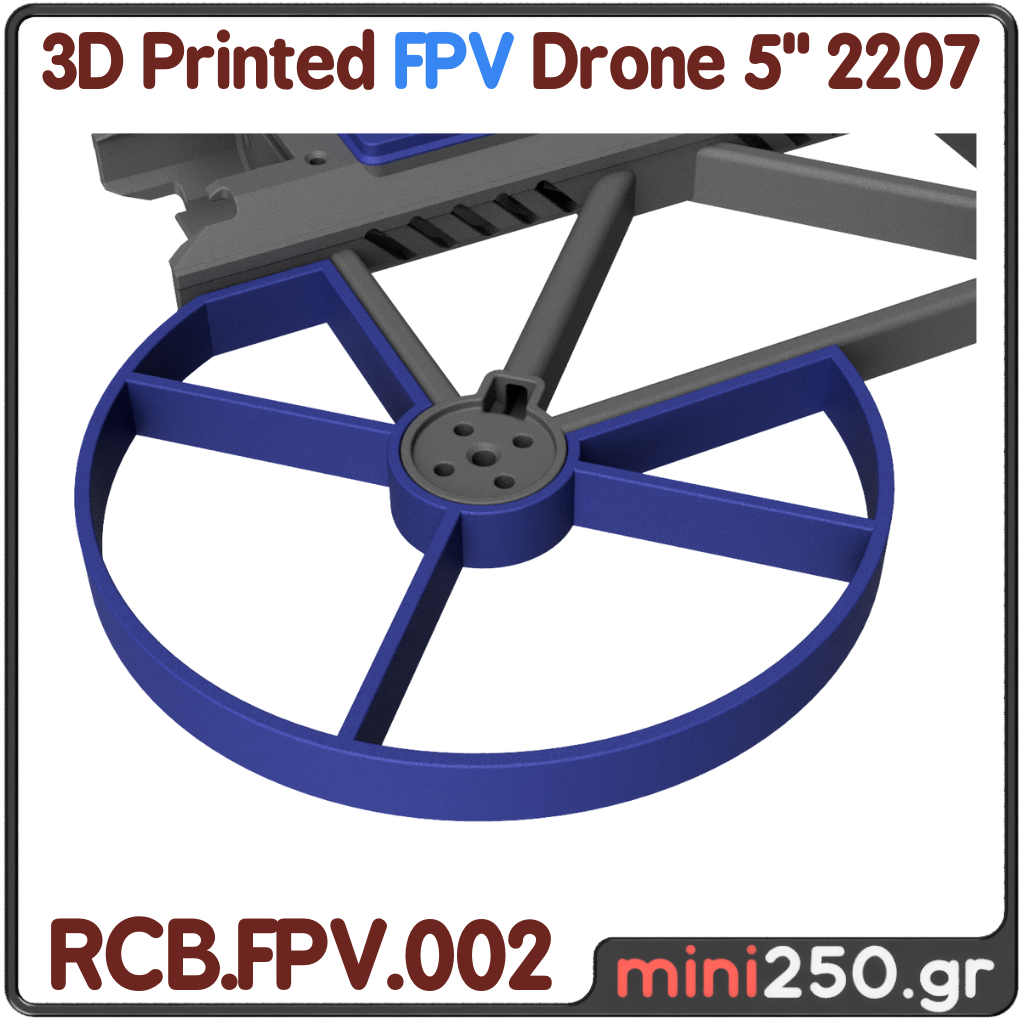
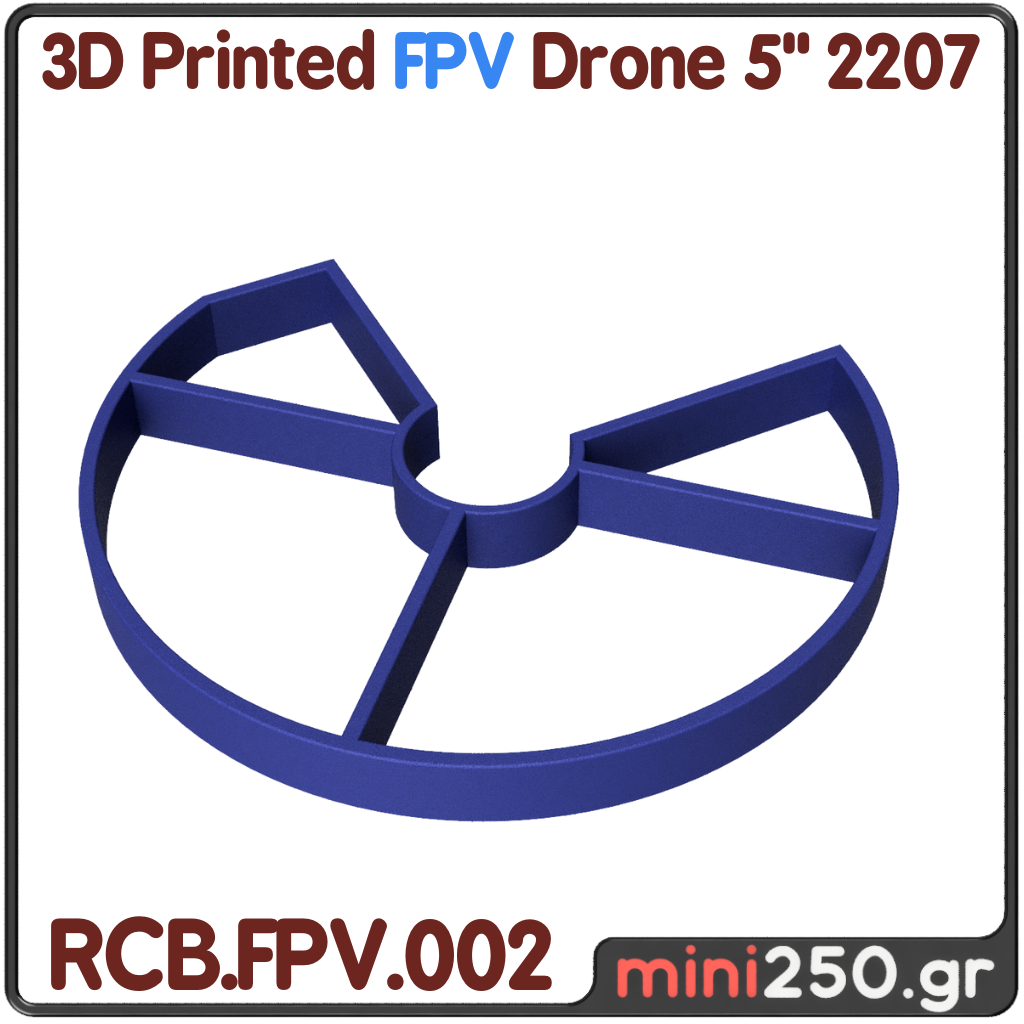
Simple Prop Gards

Servo Release System
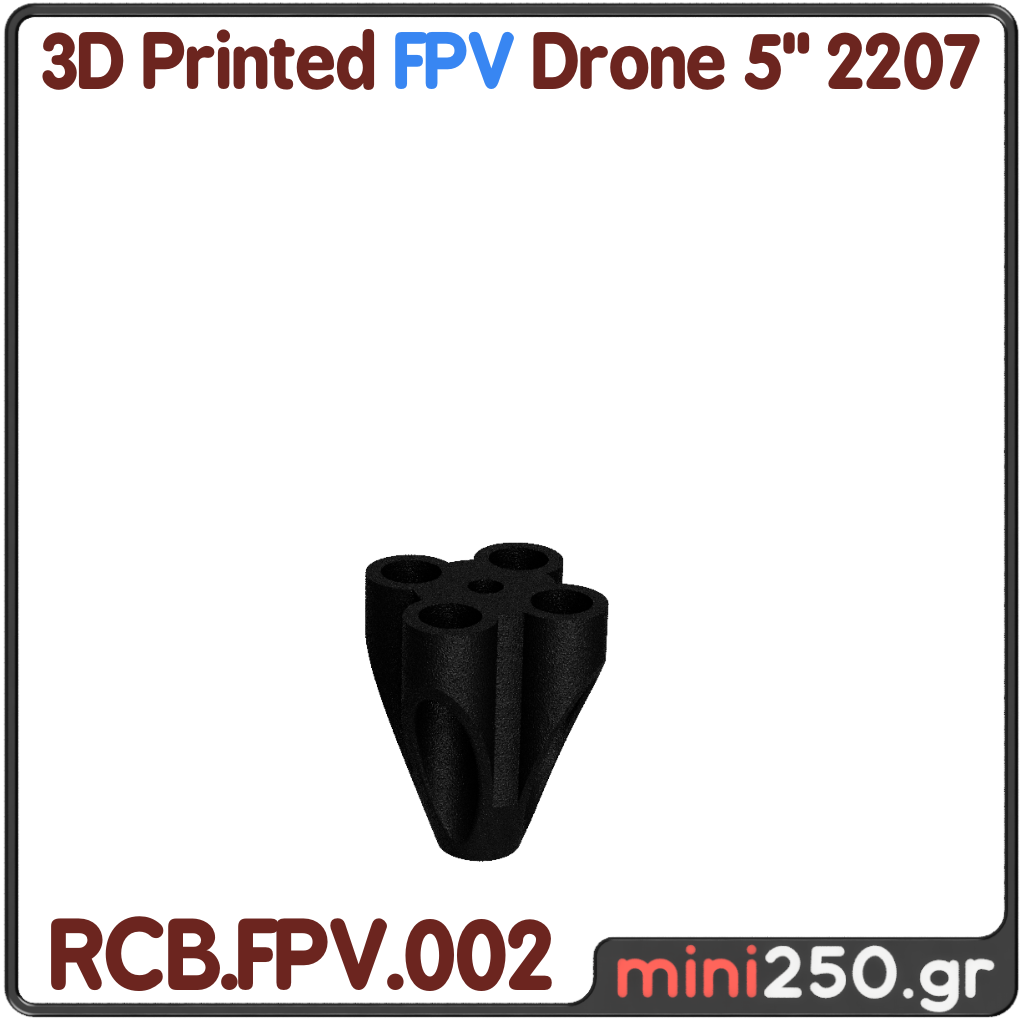
TPU Rubber Feet

Build your own unique Drone by combining the parts that suit you!
Top Cover Mods
Em. Skoulikaris
When you're not the center of attention play it cool and wait your turn!
We are not the center of attention, but the event.
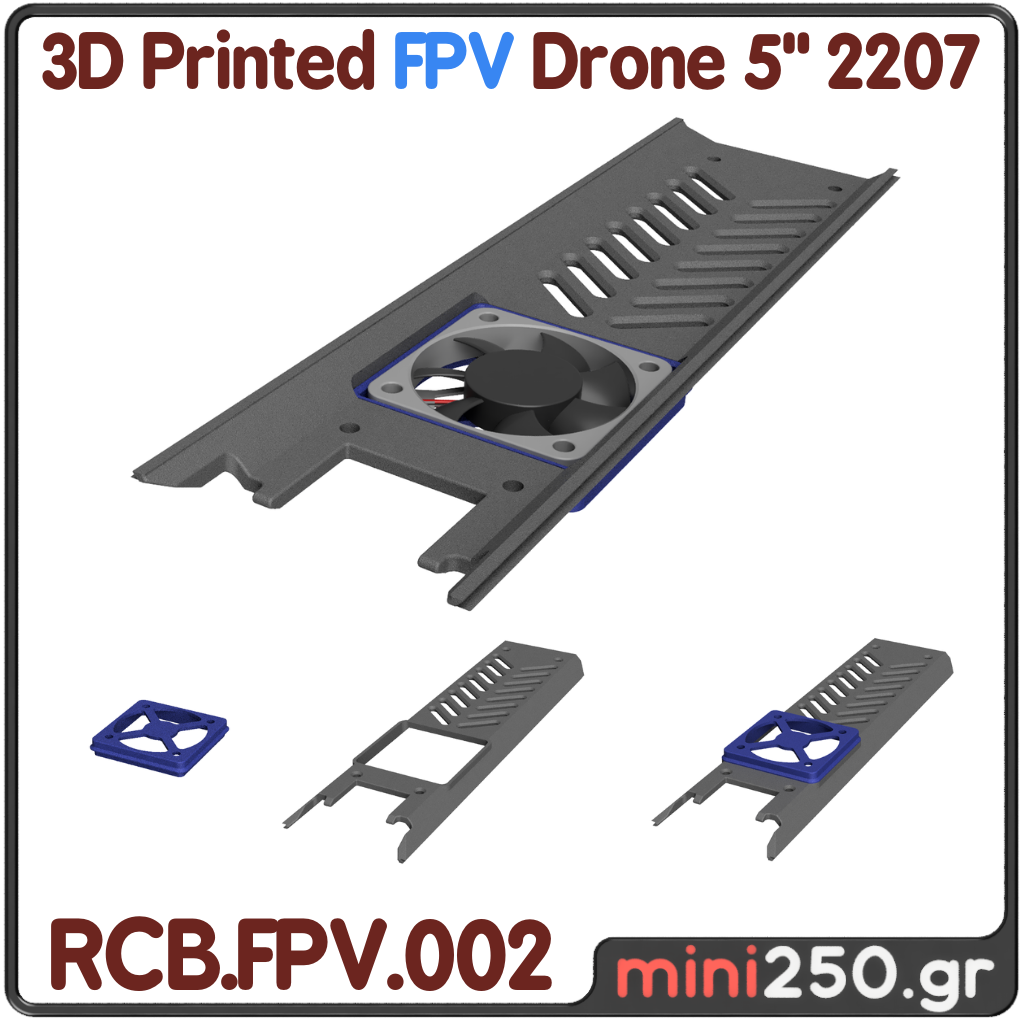
For this reason I designed the top of the machine to accept 3 different caps,
depending on the scenario you have to run!
Pair the camera you want with the corresponding cap to take the shots you need!
Again if you need something that I haven't planned, don't hesitate to contact me!
We are not the center of attention, but the event.
For this reason I designed the top of the machine to accept 3 different caps,
depending on the scenario you have to run!
Pair the camera you want with the corresponding cap to take the shots you need!
Again if you need something that I haven't planned, don't hesitate to contact me!
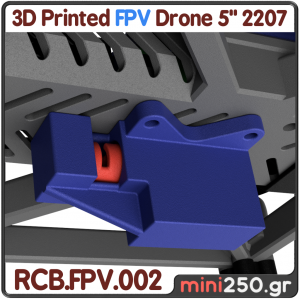
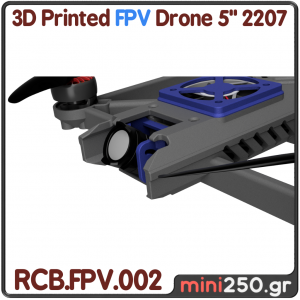
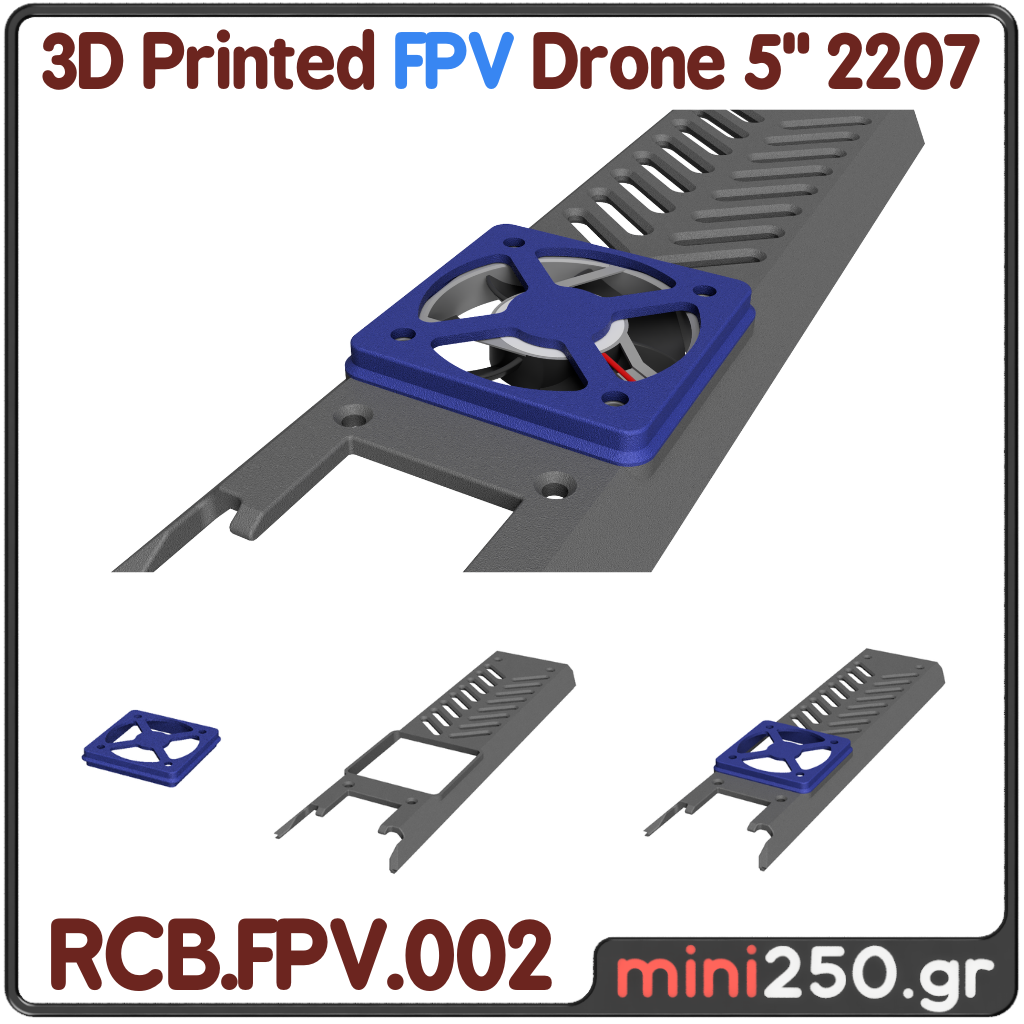
Fan & GPS Top Cover
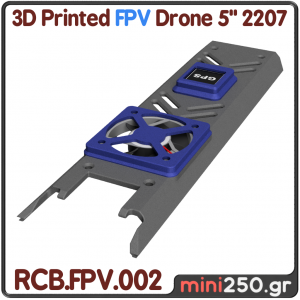
Fan Top Cover
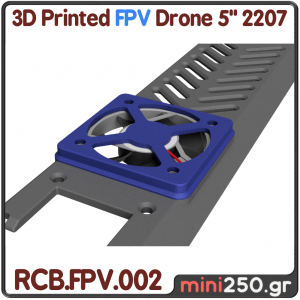
Blank Top Cover
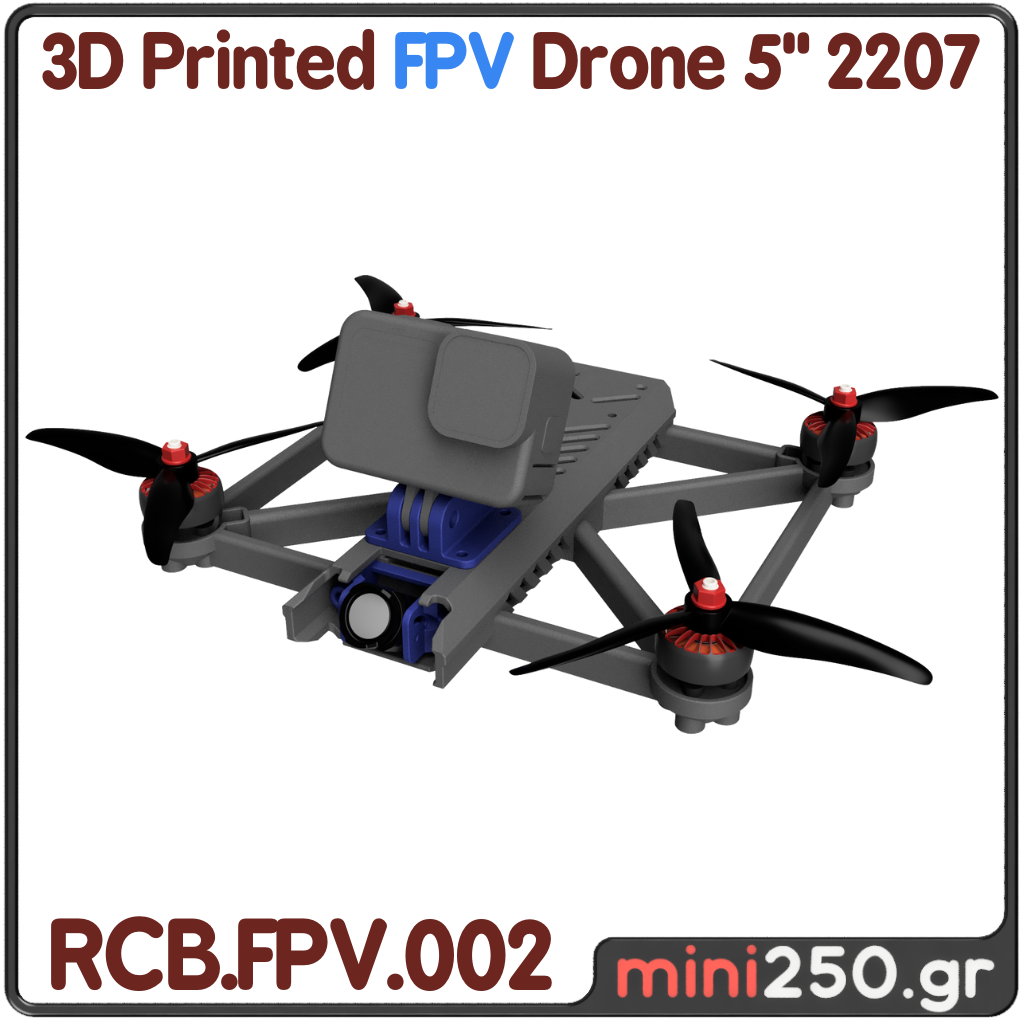
Action Top Cover

Enjoy the best experience of FPV flight
Everything you need and still don't know! All gathered in one Drone!
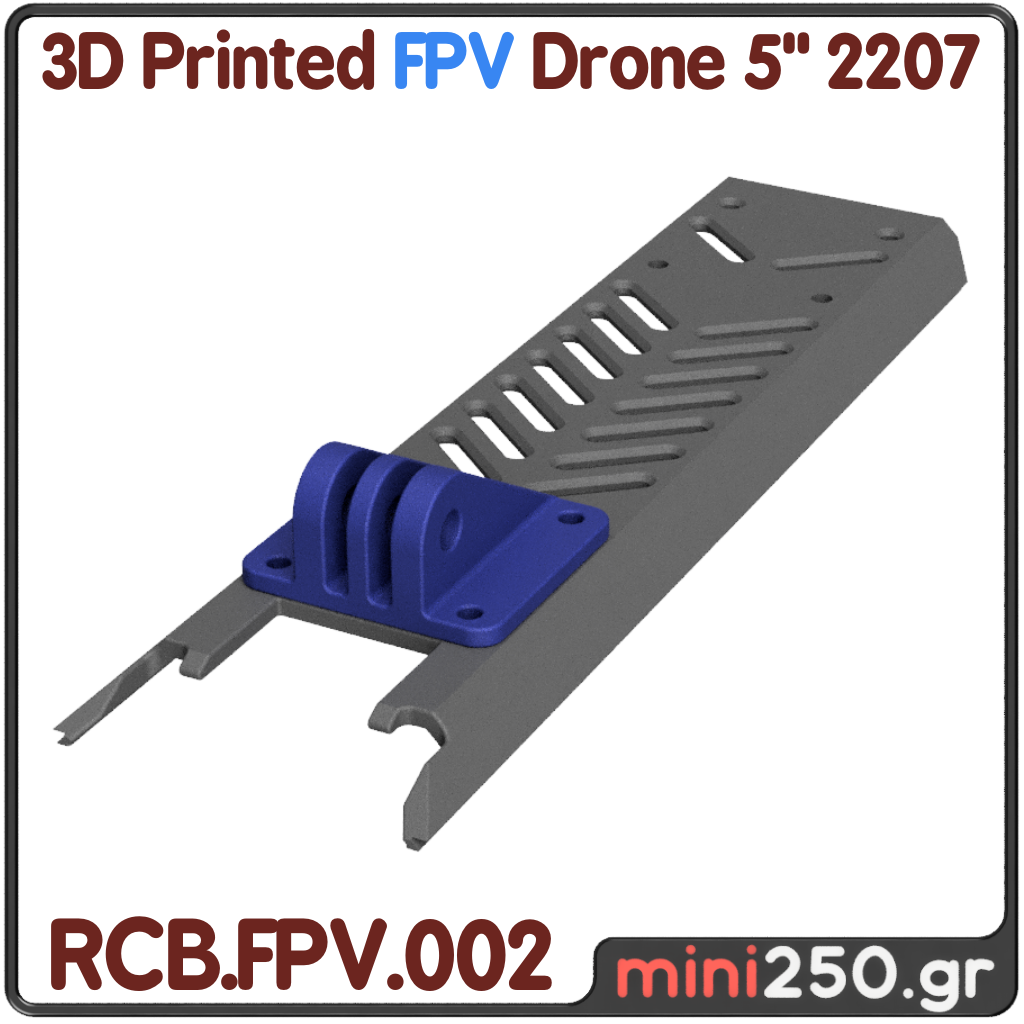
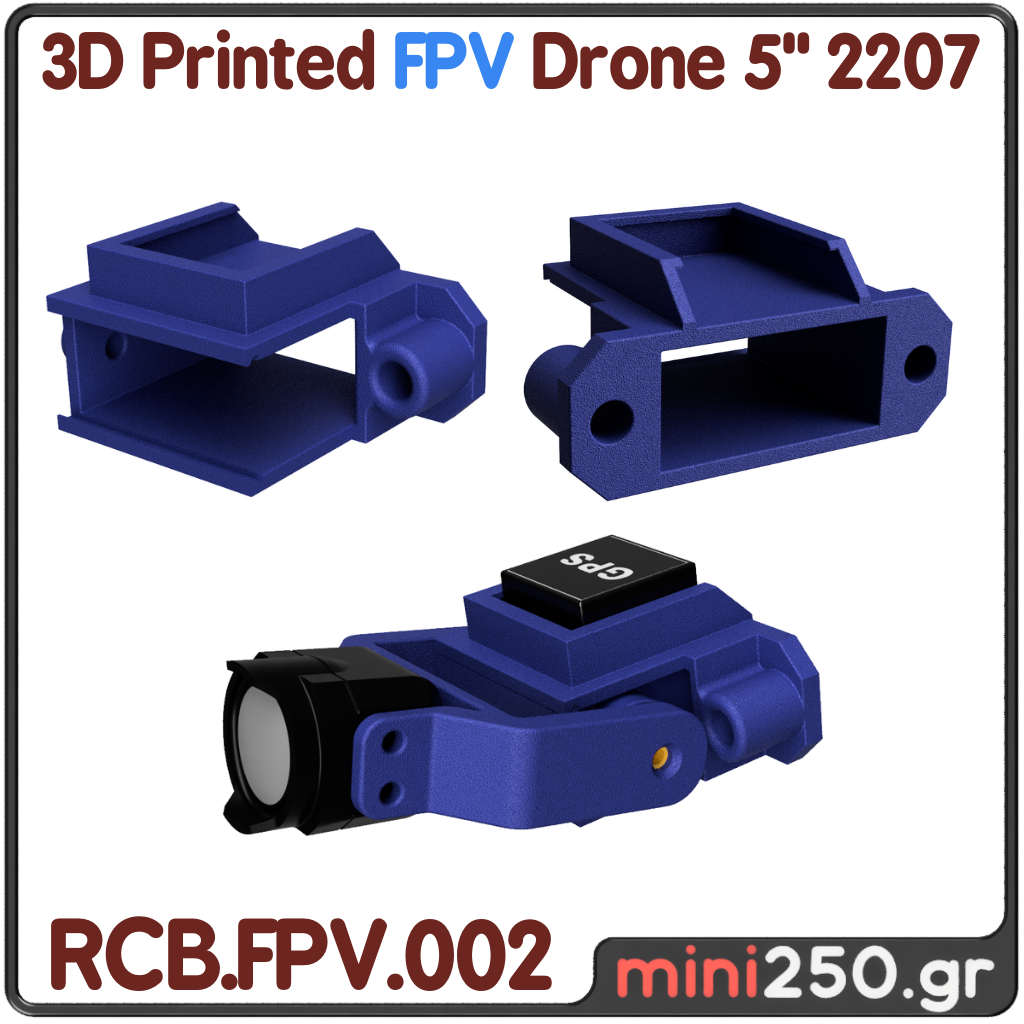
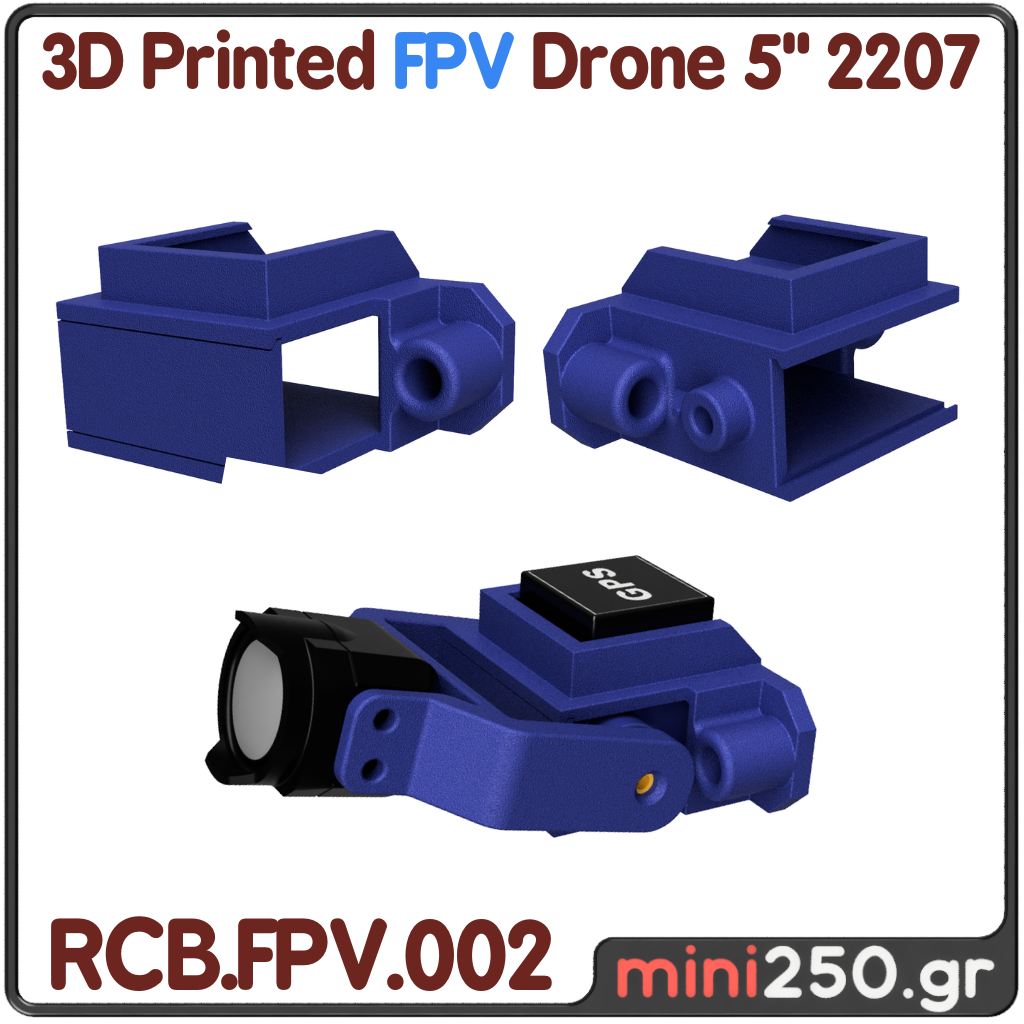
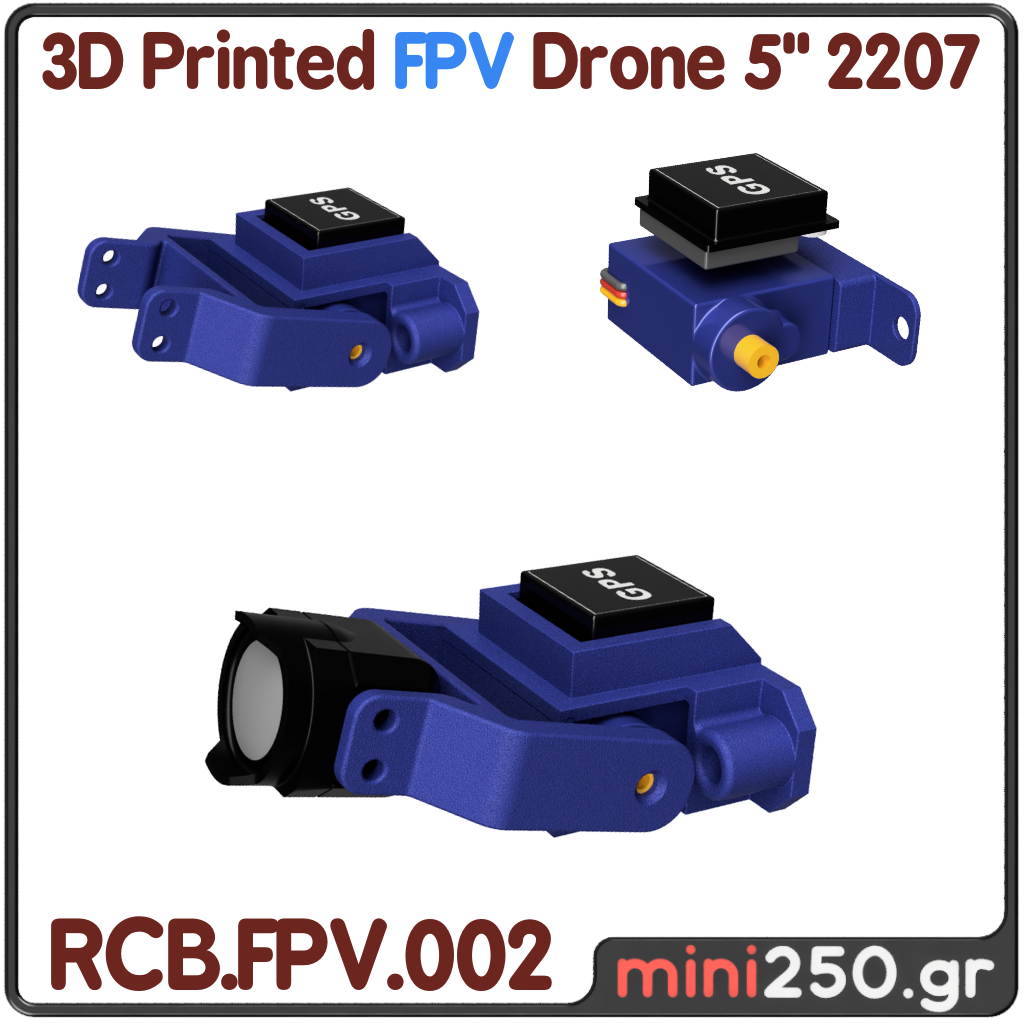
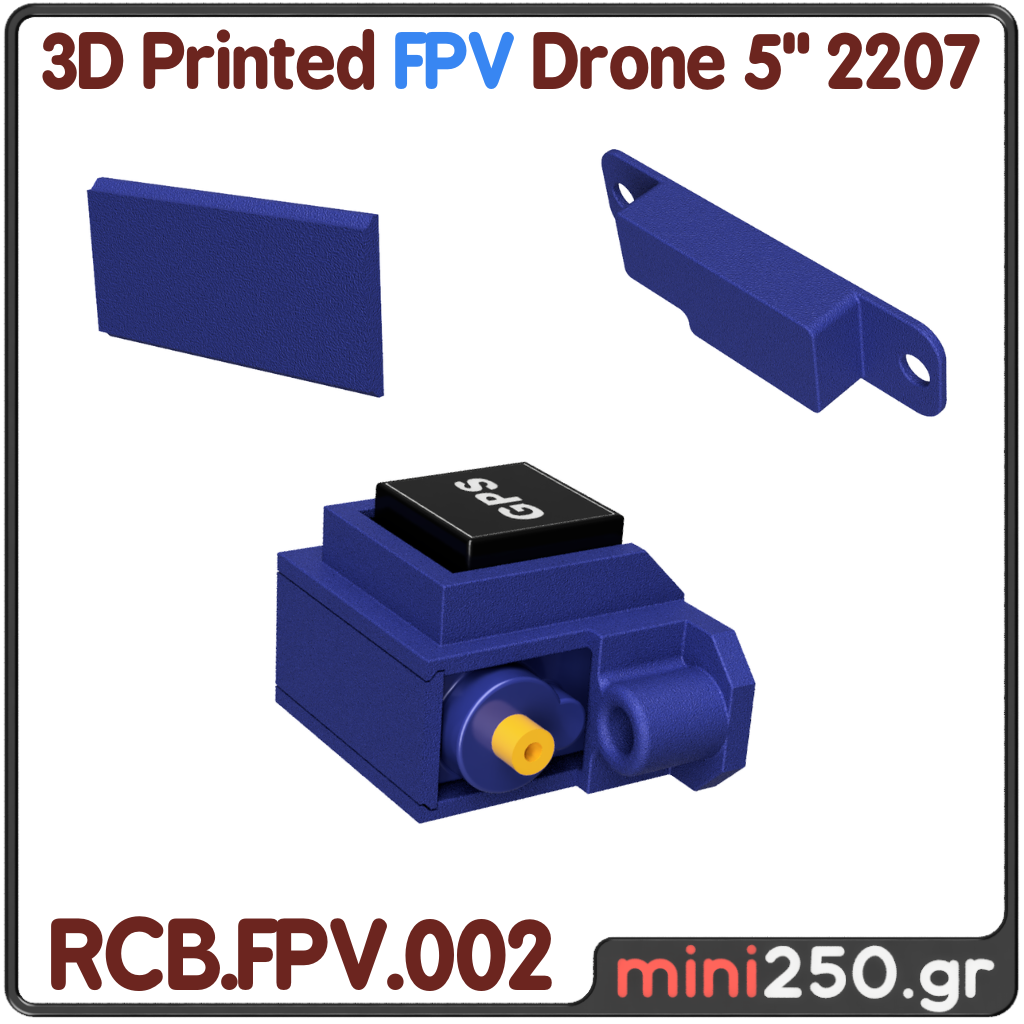
Camera Mods
Em. Skoulikaris
Is there a way to satisfy the requirements of all operators?
No there is not.
That's why I designed 3 different systems to stabilize the camera either with or without gps.
Choose the one that suits your flight scenario! Even if you change your mind with just two screws, you change it and choose the next one.
If you want a different type of camera that I haven't designed an adapter for or you want something different, feel free to contact me as I can design the adapter for you.
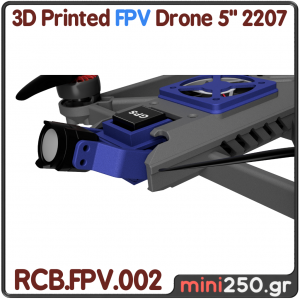
DJI o3 Fixed Angle
DJI o3 Fixed Angle & GPS

DJI o3 Tilt Angle & GPS
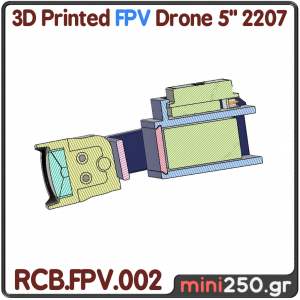
Your Drone Frame evolves with you!
As you improve your flight control, you can switch to a lighter and faster frame.
Em. Skoulikaris
Like everything in life, the frame of the machine I designed should be able to evolve according to the evolution of your capabilities.
I have designed 3 different frames. 1 for each of your development levels and the type you like to fly!!
You can put the caps for the camera parts on all 3 machines so that you don't have to print the same parts again and again.
I have designed 3 different frames. 1 for each of your development levels and the type you like to fly!!
You can put the caps for the camera parts on all 3 machines so that you don't have to print the same parts again and again.
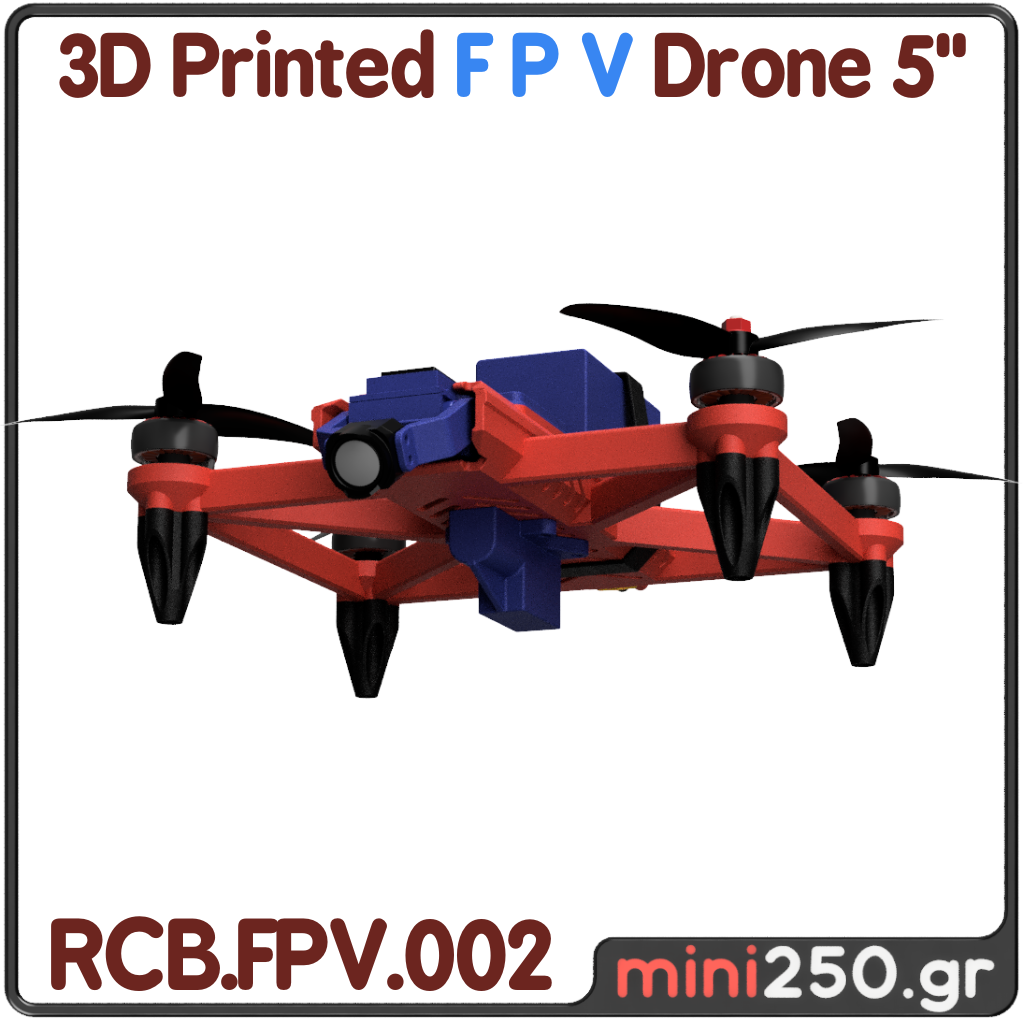
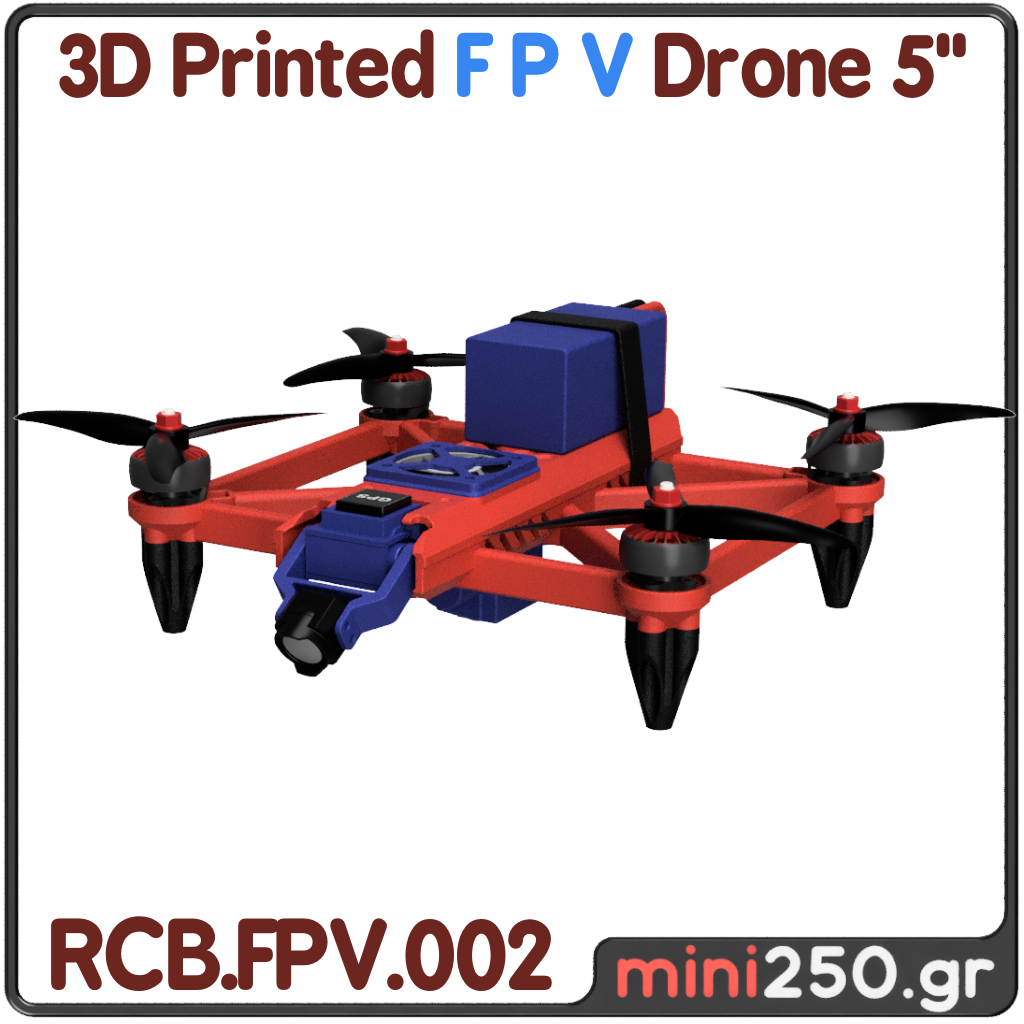
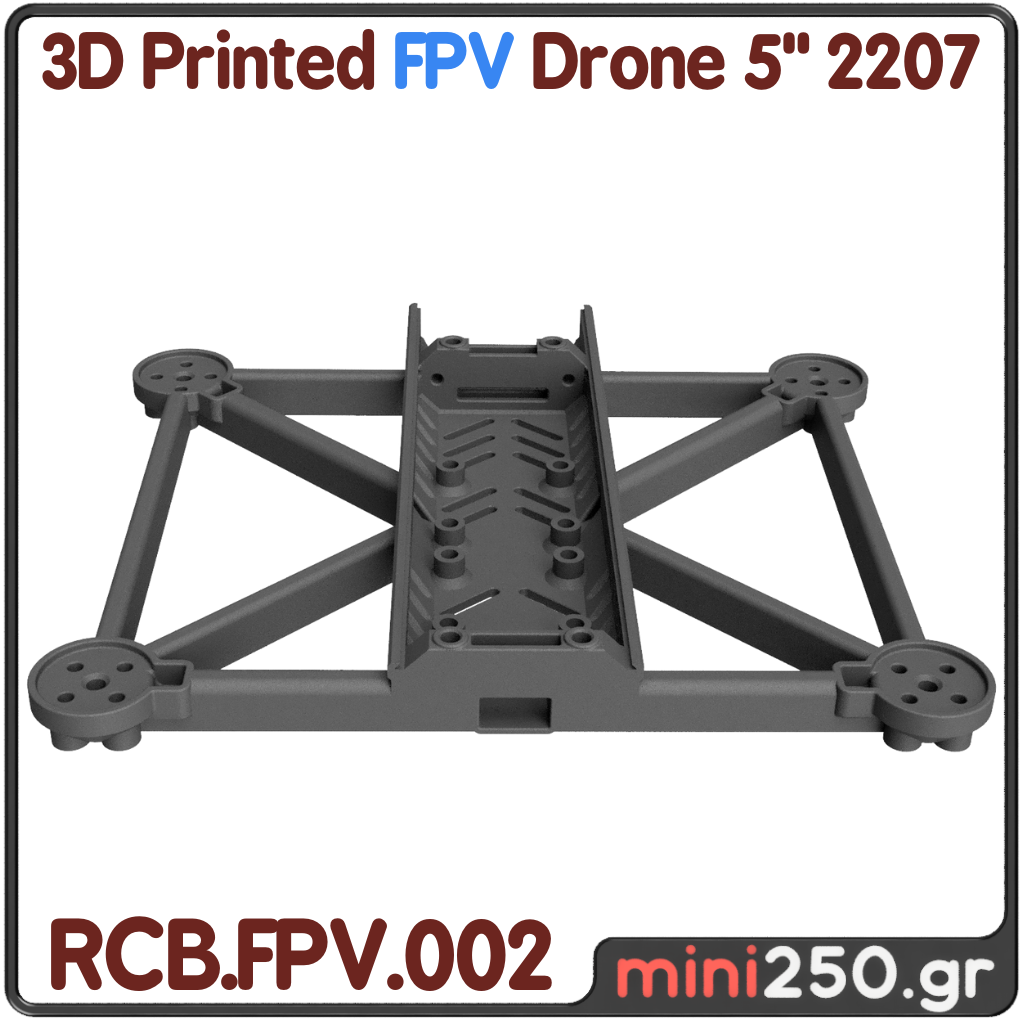
Heavy Duty Frame ( 150g )
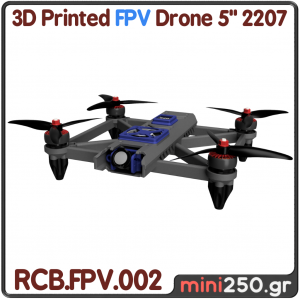
Normal X Frame ( 120g )

LW X Frame ( 100g )
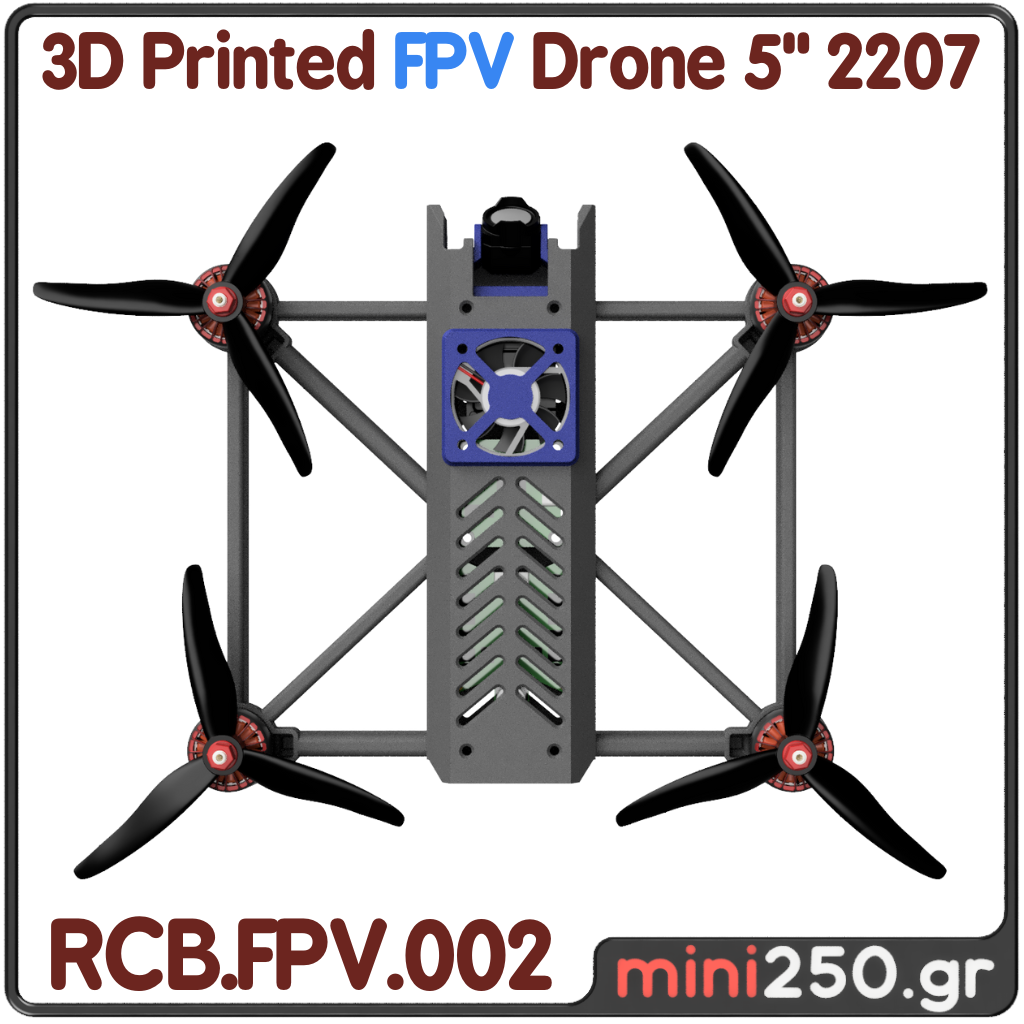
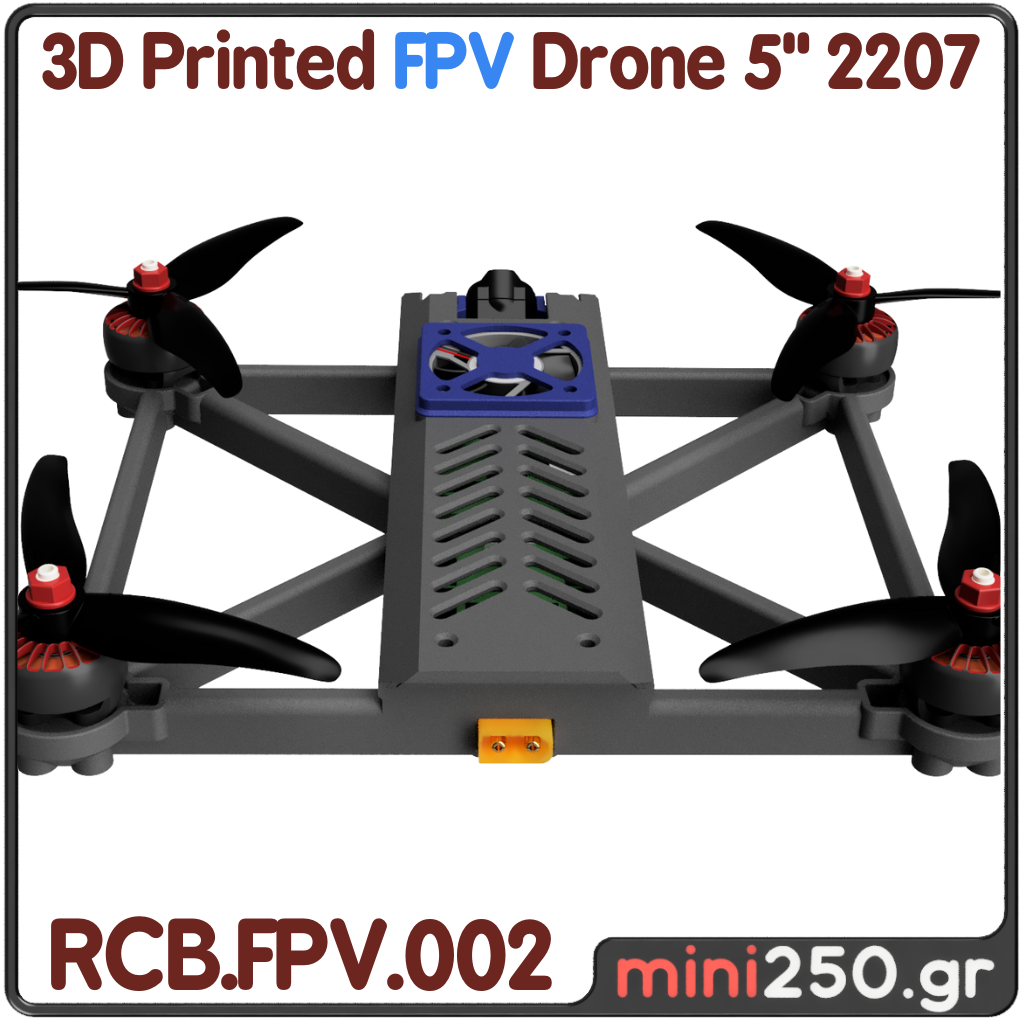
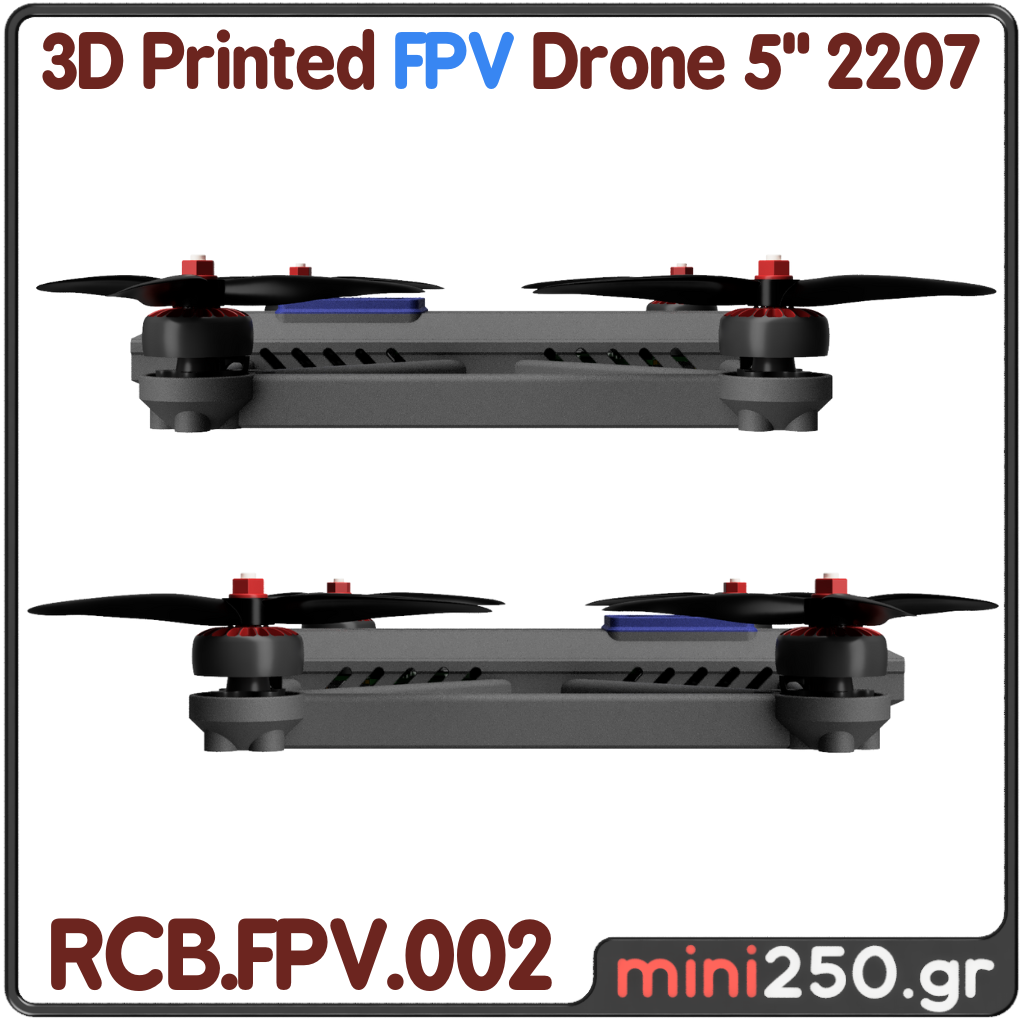
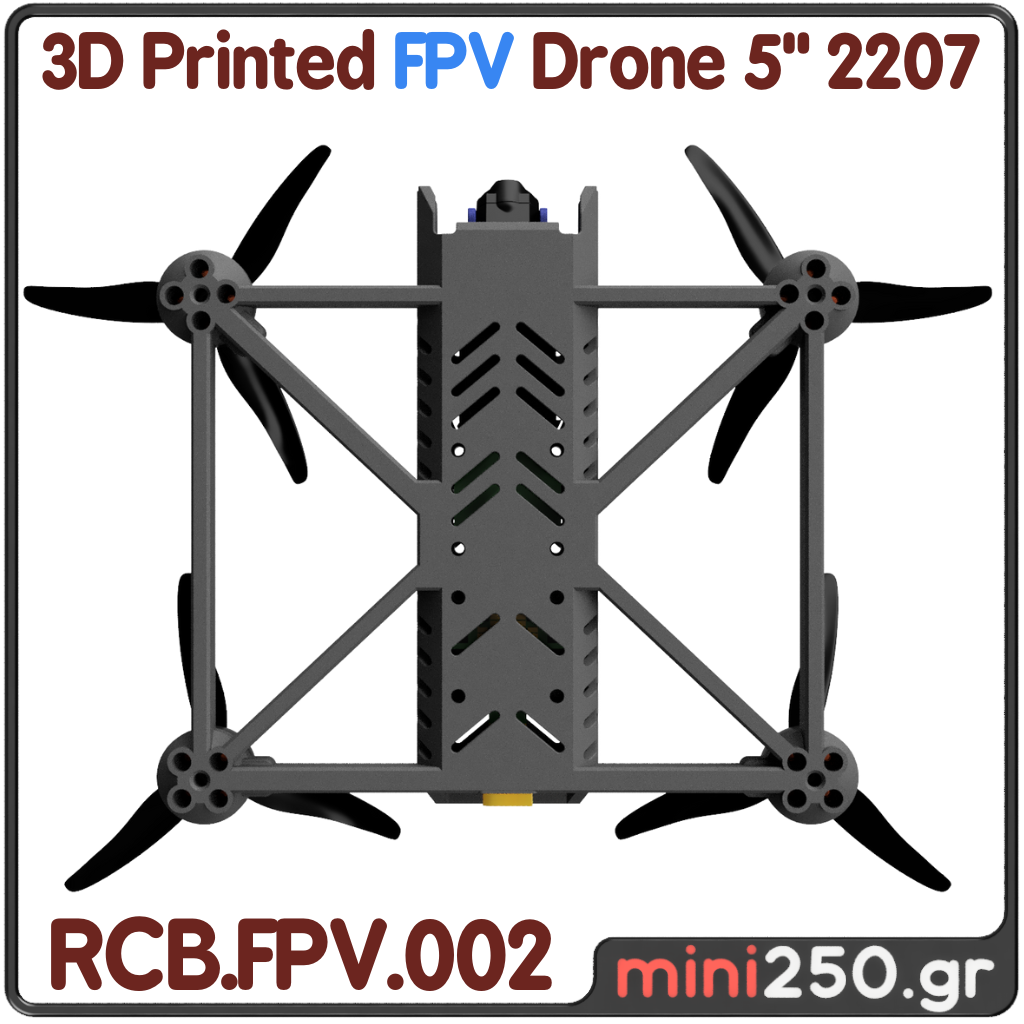
Image Gallery
RCB.FPV.002 : ( Εξαρτήματα 3D )


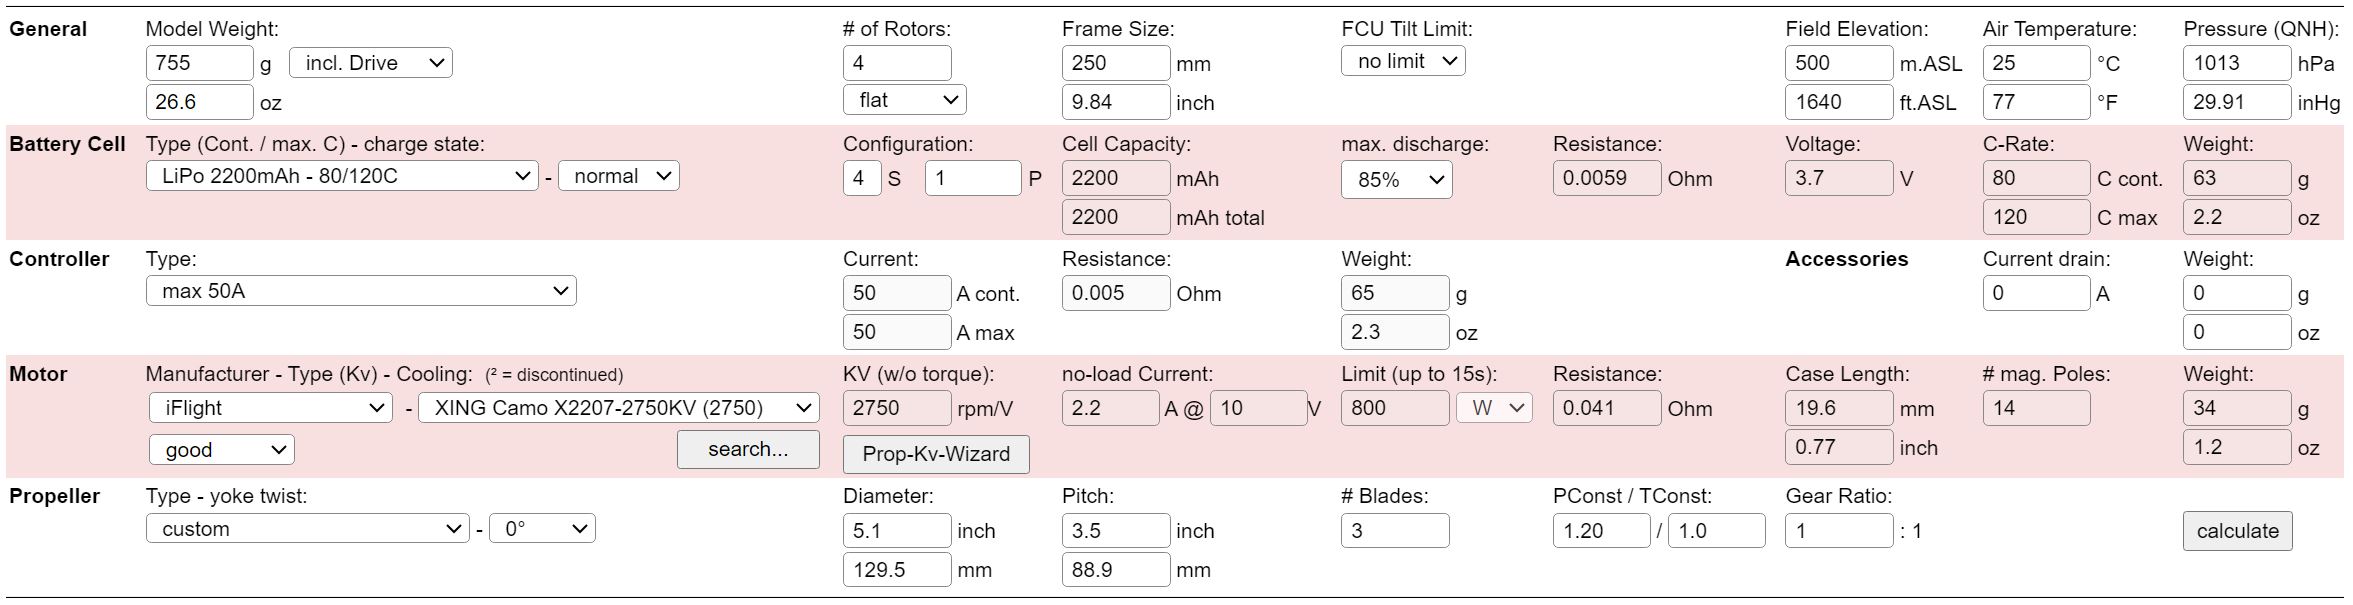
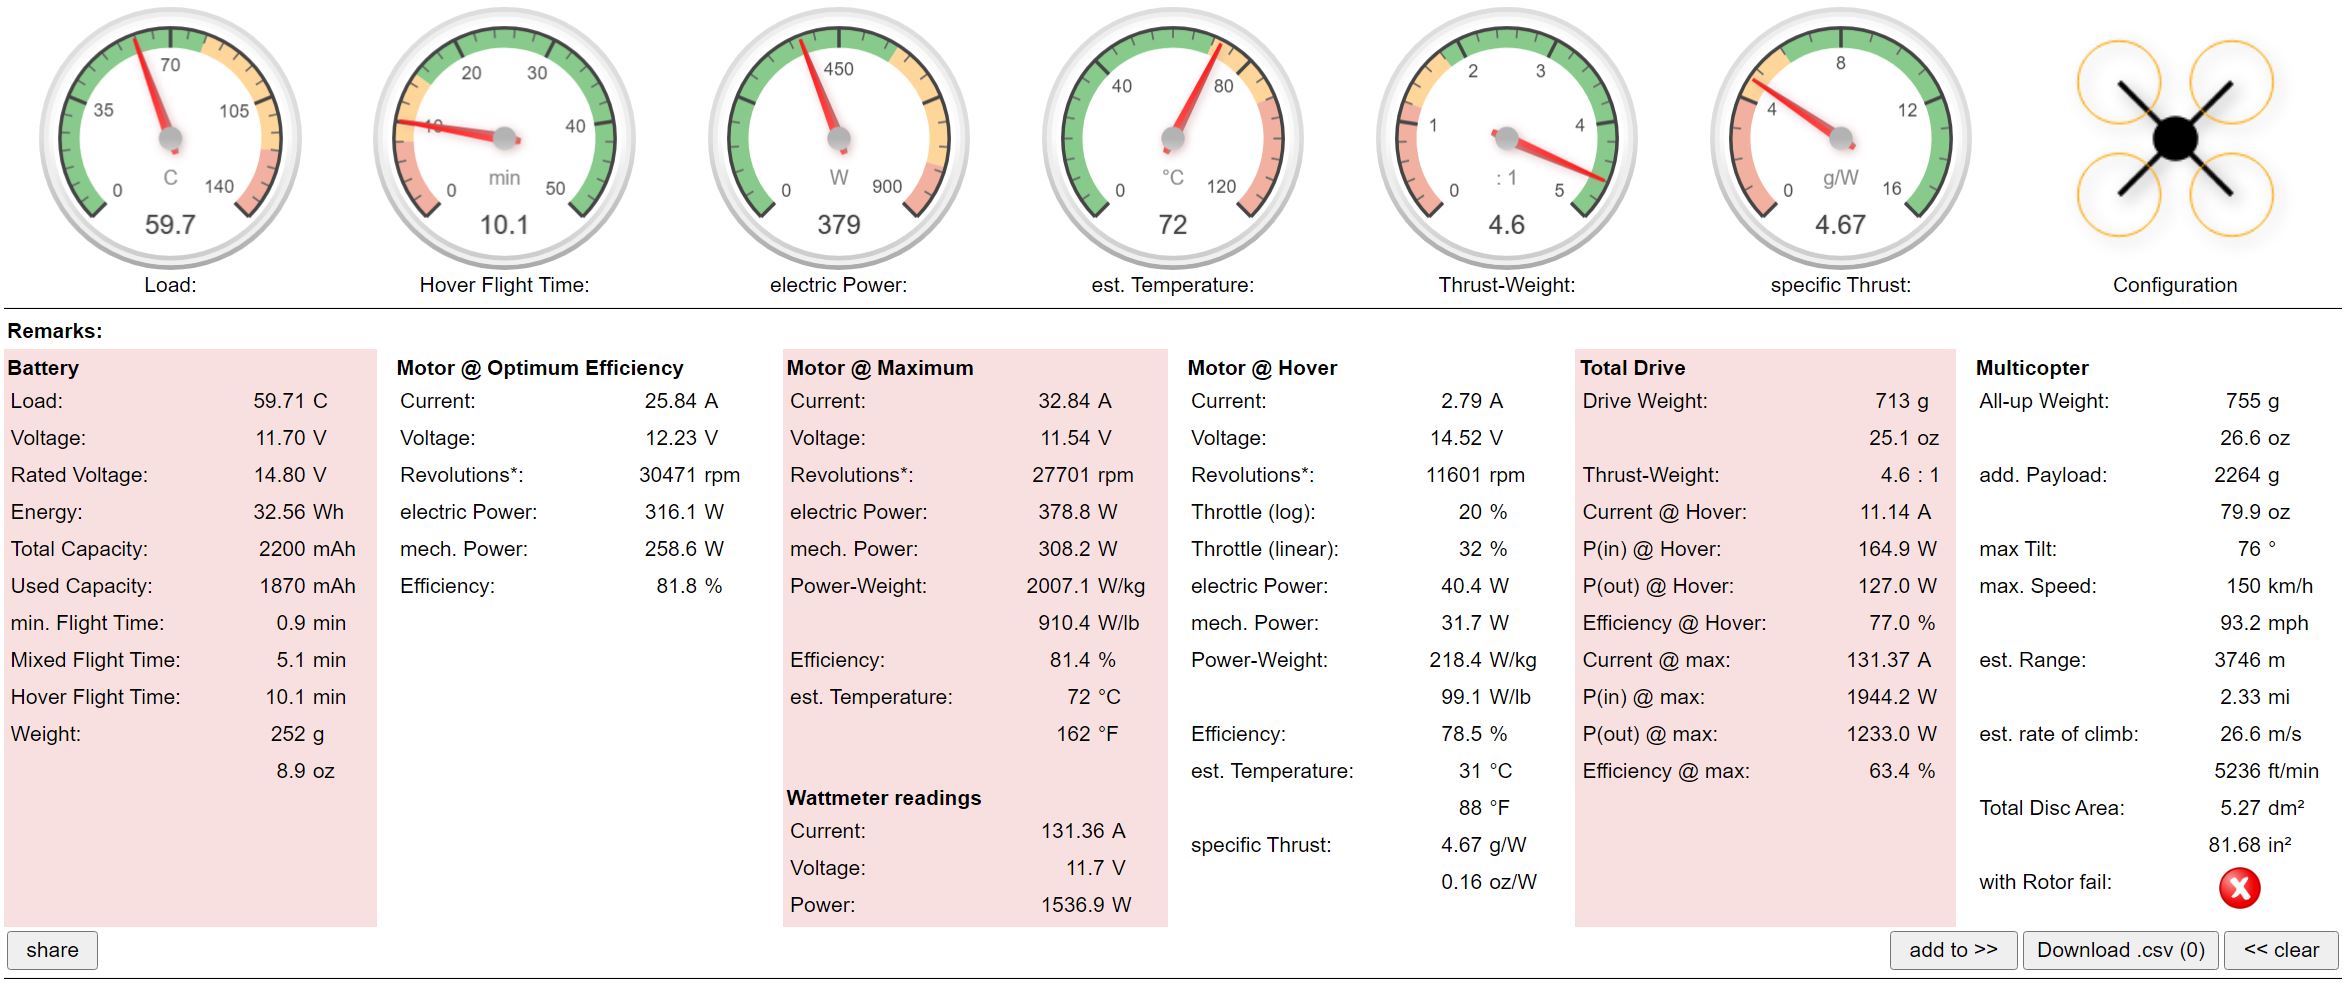
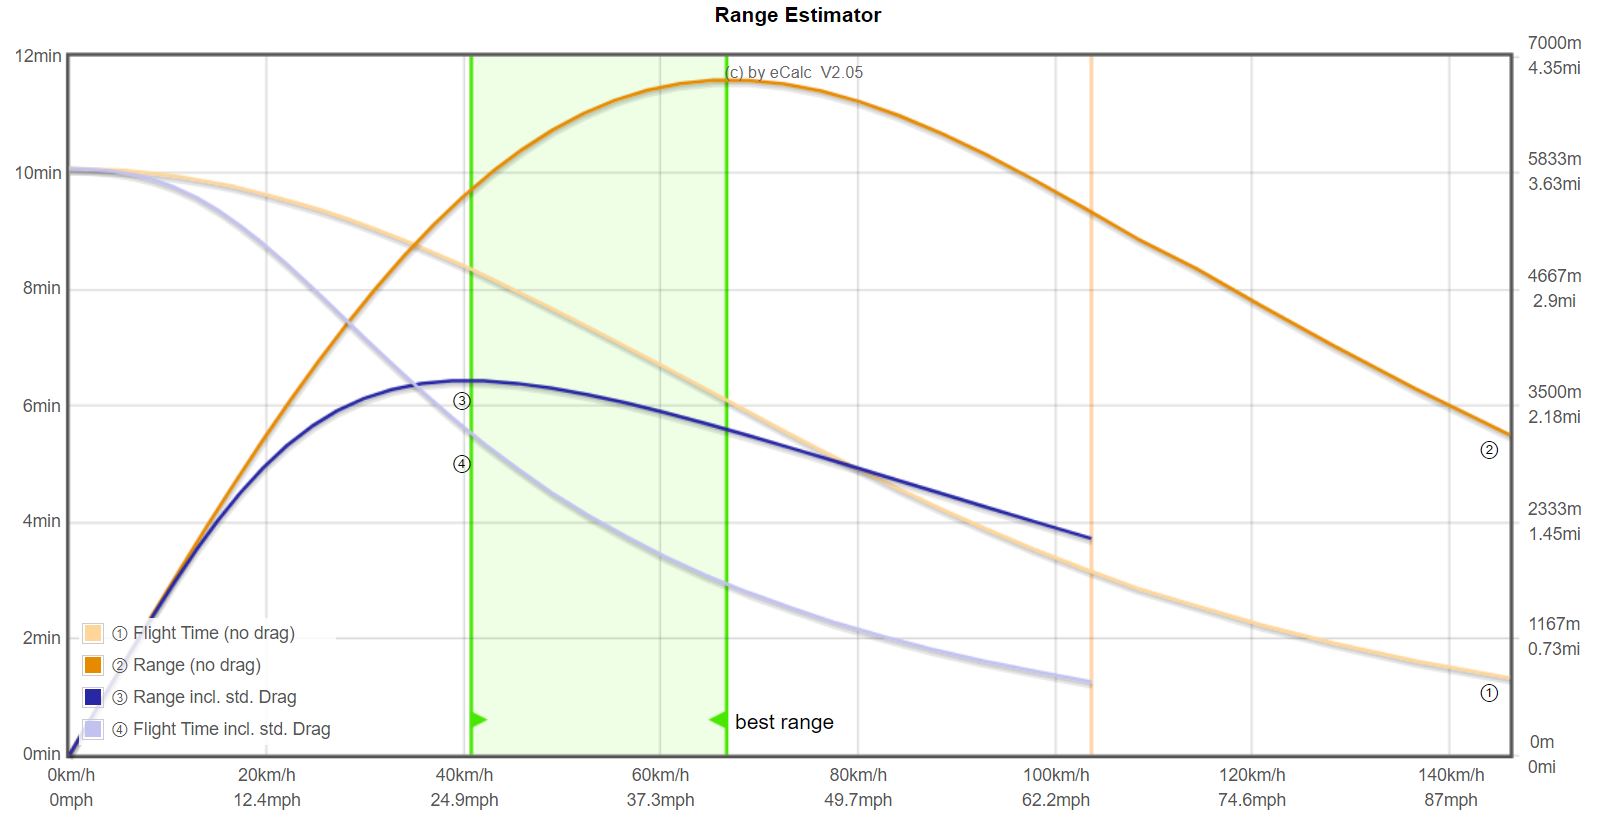
FLY Data Calculator
In the following tables and graphs we see Flight Data Calculation
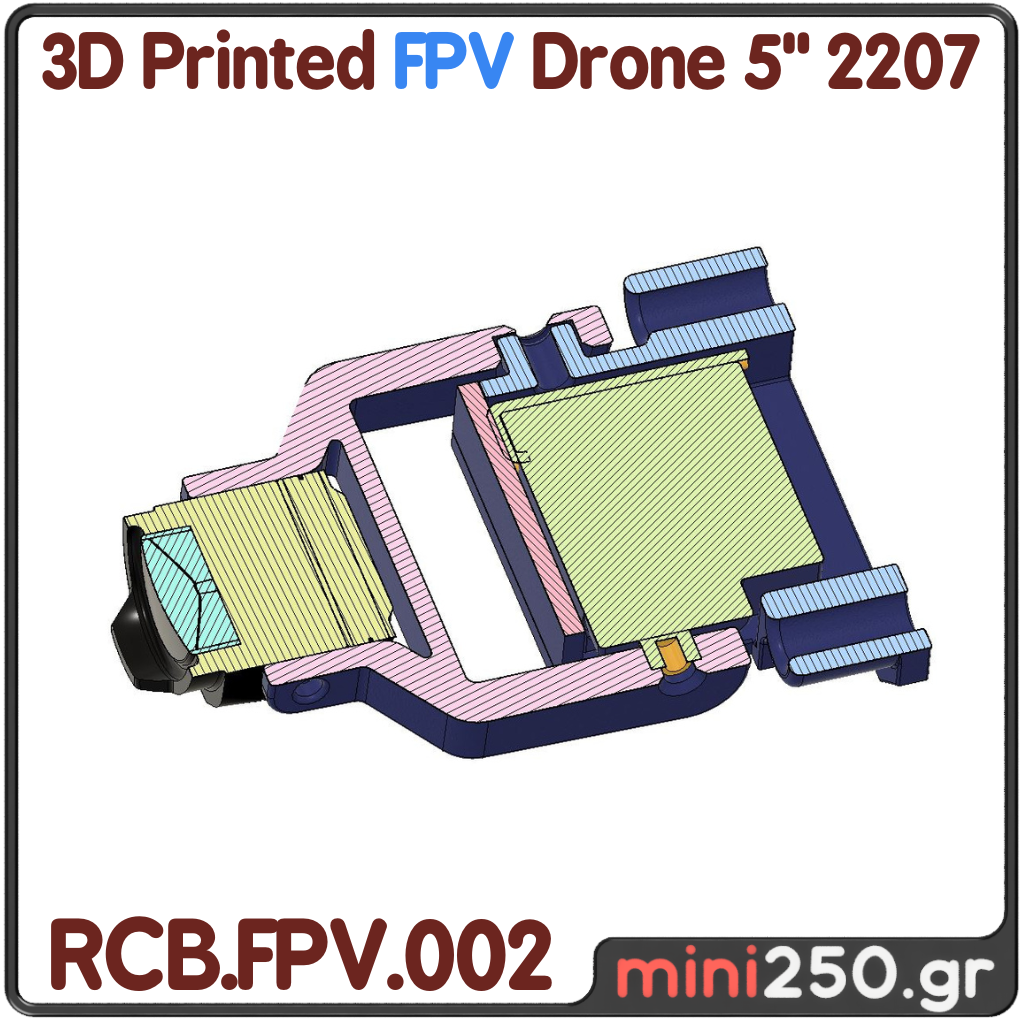
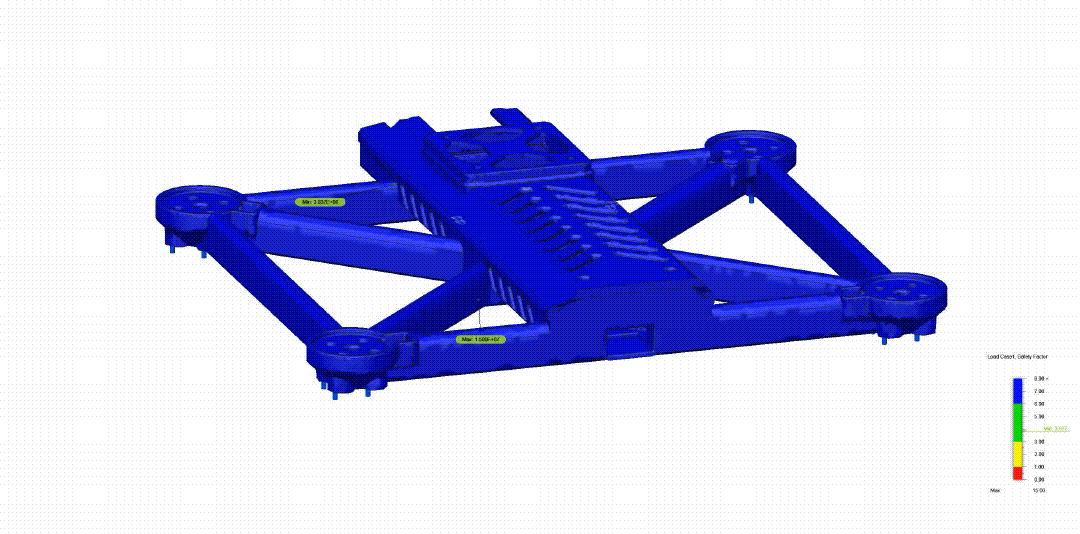
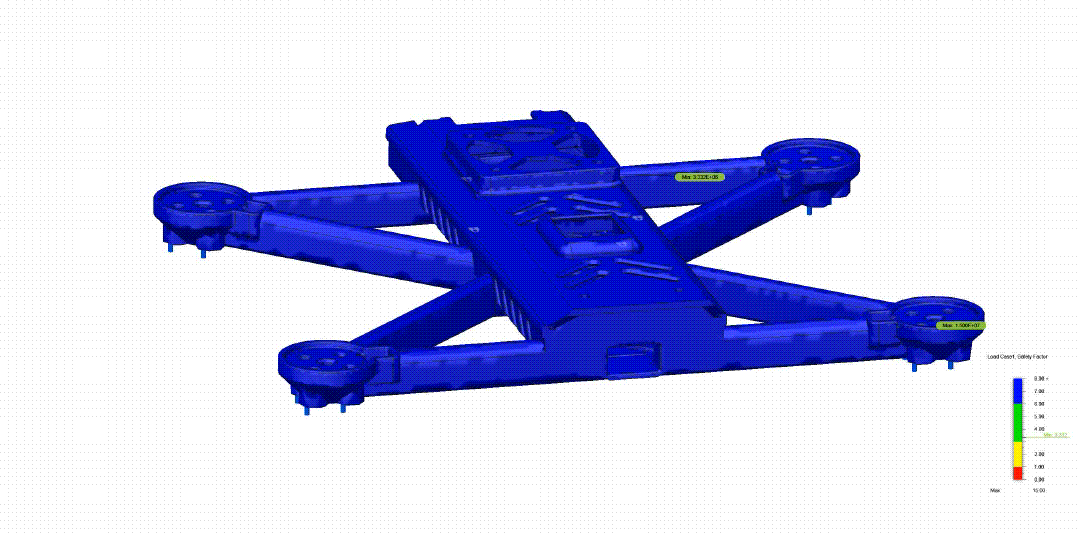
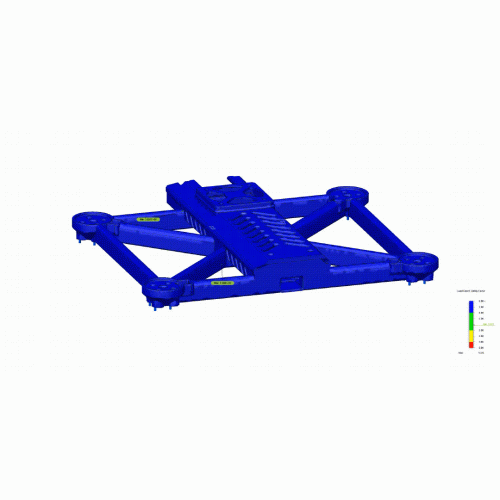
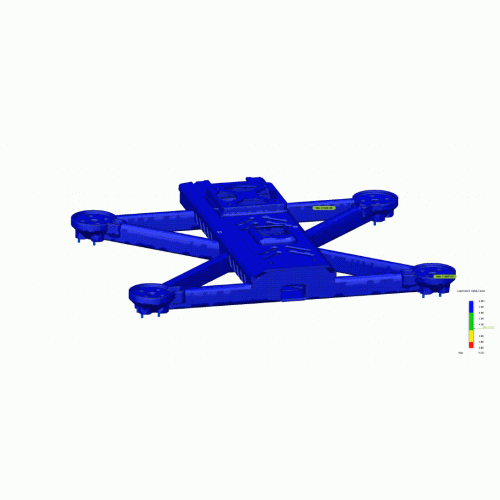
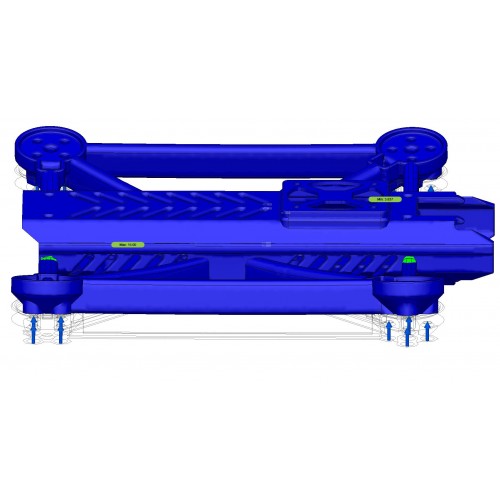
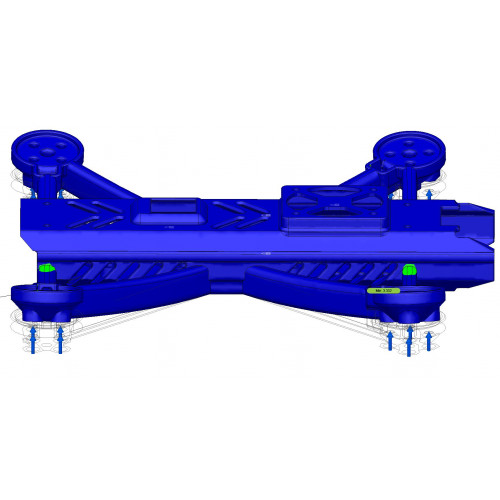
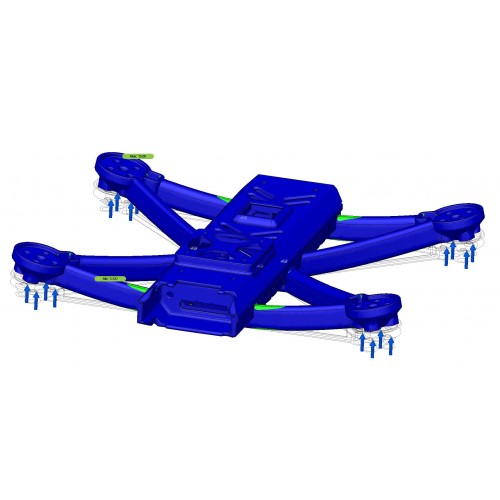
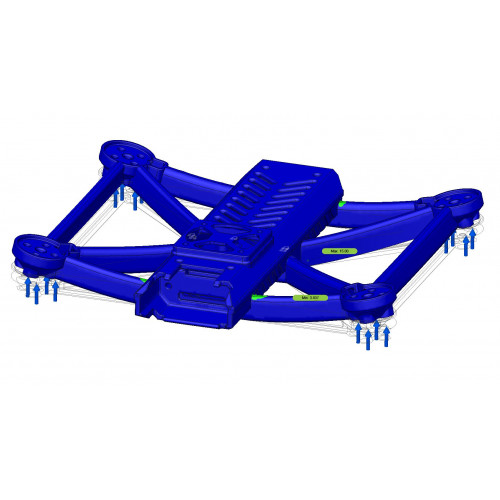
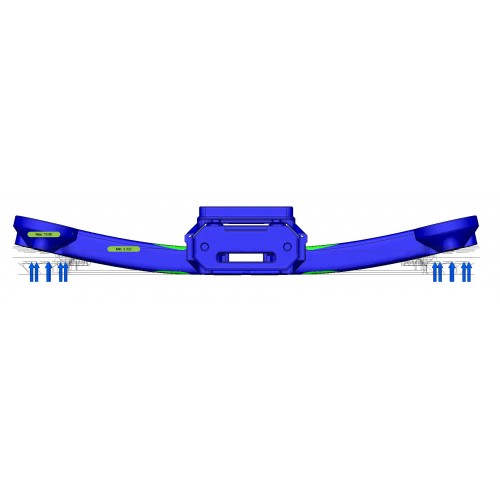
Stress Analysis Simulation
Fusion 360 ( 80 Newton ) 2kg / Motor mount
If you are one of those who want to learn first and then buy....
Choose which of the following you want and you will be taken to a complete educational process for each of the topics listed.
The Ultimate Drone for those who want to start FPV now
Durable! Easy to Assemble, Repair and Train
End
Thank you for coming this far and reading my entire article to the end
Go up now and buy the machine that suits you
THE
Call me to choose it together