Menu
Your Cart

RCB.ROV.001

ChatGPT Feed ✨

Announcement for Students

  • This page collects all the course content in one place, organized “page by page!” 📚
  • You can share or feed it into AI applications like ChatGPT, so the AI can “learn” from it. 🤖
  • Once the AI has “read” the page, it can answer your questions based on the lessons provided here! 💡

In short:

  1. Share the link or the text with the AI. 🔗
  2. The AI studies the material carefully. 🧐
  3. Ask anything you want about the course content. ❓
  4. The AI responds, guided solely by what it has “read” here! ✅

Enjoy your studies & have fun exploring with AI! ✨

Typical Days with the Rover 🚀

From Playtime to Professional Use 🚀

The Rover is not just for fun – it's also a powerful tool for professional applications. Below, you'll find examples of typical days using the Rover, helping you understand the workflow and the similarities between play and work!


🎮 Playtime

📅 Preparation (The Day Before)
✅ Charge the Rover battery, the spare battery, and the controller.
✅ If using an action camera (e.g., GoPro), make sure it's fully charged.

🏁 Game Day
🔹 Bring the Rover, batteries, and controller.
🔹 Turn on the controller first, then connect the battery and power on the Rover.
🔹 Let the fun begin! Drive the Rover around the park or any open space!

📷 If using a camera, capture amazing action shots!

🔋 Battery Life:
🕒 Each battery lasts about 45 minutes → With two batteries, you get 1.5 – 2 hours of playtime.

🔧 After Playtime
✔️ Clean the Rover (remove dust, leaves, and dirt).
✔️ Blow air to remove debris (preferably at a car repair shop, not a gas station to avoid moisture issues).
✔️ Store the batteries properly to ensure they're ready for next time.

🎉 That's it! Simple, exciting, and easy!


🤖 in a Robotics Lab

📅 Preparation (The Day Before)
✅ Charge the Rover fleet and make sure the correct code is uploaded for the lesson.

📚 Classroom Session
🔸 Today’s lesson: Differential motion & control.
🔸 A timer in the software disables the right side wheels after 5 minutes, creating a real-time learning experience.
🔸 Students observe and discuss how differential speed affects movement.

🕹 After the Lesson
✔️ Restore the correct software and let students enjoy free play.
✔️ Prepare the Rovers for the next lesson!

👩‍🏫 An engaging way to teach real-world engineering concepts!


🏆 at the BattleBot Café

📅 Preparation (The Day Before)
✅ Charge all Rovers and batteries.
Teams register online, indicating who will bring their own Rovers and who will rent.
Check all screws, sensors, and hit-detection modules.

🎯 During the Tournament
🔹 Rovers enter the arena in pairs, threes, or fours.
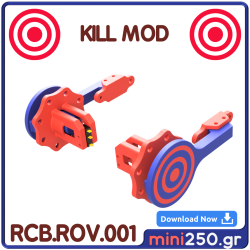
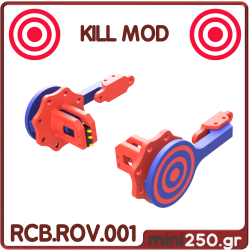
🔹 Battle begins! Rovers lose points when hit on the Kill Mod targets.
🔹 The software can be customized for respawns, power-ups, or kill zones.

⚙️ Post-Battle Maintenance
✔️ Clean & inspect Rovers.
✔️ 3D print replacement parts if necessary.
✔️ Prepare for the next big event!

🚀 The ultimate RC battle experience!


📡 at Work – Air Duct Inspection

📅 Preparation (The Day Before)
✅ Charge Rover batteries, FPV goggles, and HDMI receiver.
✅ Pack extra batteries for extended use.

📍 On-Site Inspection
🔸 Check if the air duct can support the Rover’s weight (approx. 3 kg).
🔸 Deploy the Rover into the air duct and monitor live FPV footage.
🔸 Optional: Attach a robotic arm for sample collection.

🔧 After the Job
✔️ Clean the Rover (compressed air, avoid gas stations).
✔️ Store batteries in storage mode for future use.

📢 Job done safely, efficiently, and with zero human risk!


🏗 on a Construction Site – Cable Pulling

📅 Preparation (The Day Before)
✅ Charge the Rover and FPV camera.
✅ Pack extra batteries.

🏗 On-Site Deployment
🔹 Forgotten cable installation in an underground duct? No problem!
🔹 The Rover is small enough to navigate tight spaces where humans can't fit.
🔹 Attach a cable pilot line to the Rover and guide it from one side of the tunnel to the other.

Problem solved! The cable is pulled through with minimal effort!


💡 Other Possible Rover Applications

🔹 Search & Rescue – Exploring hazardous areas without human risk.
🔹 Pipe & tunnel inspections – Navigating and capturing real-time video.
🔹 Remote transport of small objects – Delivering tools or items to hard-to-reach locations.
🔹 Entertainment & FPV Racing – Compete in high-speed Rover races!


🎯 Conclusion

The Rover is more than just a toy – it’s an all-purpose tool with limitless possibilities!

For fun, learning & competitive RC battles!
For inspections, industrial work & rescue missions!

🚀 Which scenario do you like the most? How would you use the Rover?

📩 Share your thoughts & ideas with us!

🏎️ The First 3D Printed Rover is Ready! 🚀

🏎️ The First 3D Printed Rover is Ready! 🚀

  • The very first rover is ready to be printed, and you can get started in just a few minutes! 👏
  • ✔️ Designed to fit even the smallest 3D printer, like the A1 Mini.
  • ✔️ Completely modular, giving you the freedom to choose how to assemble it and create something new each time.
  • ✔️ Combines knowledge, fun, and hands-on experience in 3D printing, assembly, programming & electronics.

🛠️ Two Ways to Assemble

1️⃣ MOD 4x4

  • Full drive on all wheels for maximum grip and power.

2️⃣ MOD 3x2

  • Drive only on the front wheels with a sliding rear section for lighter and faster movement.

🔧 Four Different Front-End Models

📌 Collision Bumper

  • 🛡️ A large, durable bumper that protects the vehicle and wheels from quick collisions.

📌 Open Bumper

  • 🛠️ Protects only the front section, leaving the wheels exposed for greater maneuverability.

📌 Front “Catch the Mushroom” 🍄 System

  • 🔄 A specially designed bumper that grabs and transports objects in the battle arena.

📌 FPV Camera with Gimbal 🎥

  • 📡 A mobile camera system that tilts up and down, offering live FPV viewing for an even more realistic experience.

💡 LED Mode – For an Impressive Look!

  • An LED add-on that mounts underneath the rover, illuminating the ground and creating an awesome motion effect!

🎮 Two Unique Games with the Rovers

🍄 Catch the Mushroom!

  • A fast-paced strategy game!
  • Rovers collect mushrooms in the arena and carry them back to their “nests.”
  • Goal: Gather more mushrooms than the opposing team before time runs out!
  • 🔥 Ideal for team battles and tournaments!

⚔️ Battle Bot Mode – The Ultimate Showdown!

  • Rovers are equipped with hacking modules at the rear.
  • When the hack module is hit by an opponent rover, the vehicle:
    • Loses 90% of its speed and cannot steer.
    • To regain speed, you must return to your base and press the two hacking modules at the same time.
    • Once reset, the rover gains a “healing pack” and enters battle mode for 10 seconds with a protective shield!
  • 🏆 The team that disables the most enemy rovers wins!

🚀 Start Now!

  • Download the files, print your own rover, and jump into action! 🔥
  • 👉 Ready to create, explore, and play? 🏎️

project based education

Project-Based Education

  • 🙋 I’m Manos, and I’ll be your instructor for the rest of this course. Let’s begin with an overview of what we’ll be covering.

  • 🚀 I designed this rover initially for educational purposes, but it turned into an incredible platform with unlimited possibilities.

  • ⚠️ This project is huge and one of the most demanding ones in my workshop. That’s why I want you to pay close attention and read all the articles I’ve prepared for you.

  • It took me a lot of time to write them, and trust me, it’ll take you even longer to complete the project if you don’t follow them.

  • 🔎 We’ll start by looking at how the project is structured. On the left side, you’ll see a large list of all the articles you need to read before you start building your rover.

  • ⚠️ Important: Before you do anything, read all the articles! It’s essential you go through every single one—don’t skip any.

  • ⏭️ On the top-right side, there’s a “Next Level” button. That will take you to the next lesson without losing track of where you are.

  • 📝 Let’s describe each one, so you know exactly what you’ll find in every section.


Design settings

  • 🎨 Here I explain all the design choices I made, and why I made them, so you can understand how this vehicle came to be.
  • One of the biggest issues I see is that no one has a clear goal for what they want to do. Defining the “why” is crucial.
  • If I don’t know the “why” or set very specific targets, I don’t start anything. We need to know exactly what we’re designing.

Electronic settings

  • ⚙️ Here we analyze the “why” and “how” behind each electronic component of the rover.
  • Just like with the mechanical parts, if you don’t know the reasoning, you can’t move forward.
  • 📖 Read this section carefully to understand the rover’s electronics.

Rover Mods

  • 🤖 To keep the vehicle flexible, it’s designed so you can change and add functionalities through various mods.
  • 🏗️ We’ll describe some of these mods, how they work, and their applications.

Project story

  • 📜 Here you’ll learn the backstory of the project: how it started, what problem I was trying to solve, and how the whole process evolved.
  • 💥 We’ll also talk about the “disaster” in 2019, when everything started off great, but then 2020 and 2021 brought big challenges.

Hub Patent

  • 💡 When you design something new, you create something that never existed. In the process of designing the rover, I ended up with 4 different patents.
  • 🏅 Out of those 4, I officially registered just one, but the patent process was an amazing experience and a proof of concept of what I can accomplish.

Rover platform

  • 🏗️ This is the final product that I currently have, and you can print and build it yourself.
  • 📚 While it began as an educational tool, it became a full platform and ecosystem for many different uses.

If you’re in a hurry to get started

  • Below, we’ll look at some rover applications.
  • If you want to jump straight into production, feel free to skip ahead to “Renti to run” or “3d print it” to download and purchase the files.

Usage & Mods Applications

1. industrial Rover

  • 📹 Mount a camera on the front of the rover and send it into hard-to-reach areas for inspection.

2. Search and rescue

  • 🚑 Its small size allows it to move into collapsed structures to find trapped individuals. It’s also affordable and rugged for challenging tasks.

3. Personal development & hobby

  • 🎉 By 2025, many of us are looking for hobbies that combine technology, creativity, and family bonding.
  • 🤝 It’s a fantastic way to spend time with your kids while diving into 3D printing and modeling.

4. Edutainment

  • 📺 We merge education with entertainment—perfect for engaging children in learning environments.

5. Education

  • 🎓 The main reason this rover was designed. It helps keep older students (12+) interested in robotics workshops, where their attention often wanes.

Let’s Look at the Games

Fpv slalom

  • 🏁 Attach a camera to the front, set up a track (e.g., 5×5) and time your laps. Fastest lap wins!

Mastorou hunter game (Μάστορου hunter game)

  • 🍄 Designed for smaller spaces or quick events. Attach a “fork” on the front and give the rover mushrooms to transport around.

Battle bot

  • 💥 Arguably the most impressive and action-packed game. Place a special “kill info” system on the back, and let the rovers duke it out!

Rover body

  • 🏎️ Here we’ll go through every part of the vehicle—what it’s called and what it does.
  • 📌 You need to know them for assembly and in case you ever need replacement parts.

Custom configuration

  • 🛠️ There isn’t just one rover model. There are many variations and customization options, depending on your needs.
  • 📨 Contact me if you want a rover designed specifically for your project.

Custom Mods

  • 🔧 If you already have a rover but need something extra or a different mod, I can design just that part.
  • 💬 Don’t hesitate to reach out if you want to order a custom mod.

Renti to run (Ρέντη του run)

  • ⚙️ If you prefer a ready-made, assembled, and tested machine, this is the category for you.
  • ⏱️ You can buy it and start using it literally within minutes.

3d print it

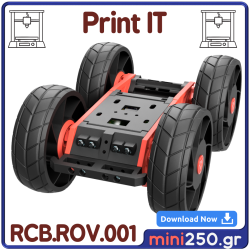
  • 🖨️ Here you’ll find the 3D printing files. Purchase them, load them into your printer, and get started.
  • ⚠️ But be careful: you’ll need your own printer and specialized knowledge. If you’re a beginner, try something simpler first.

Project kits

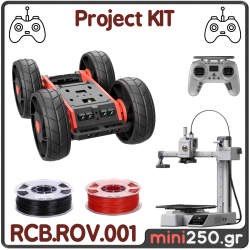
  • 🎁 I’ve bundled everything you need into kits (screws, electronics, mods, etc.) so you can buy exactly what you need.

Project parts

  • ⚙️ This section contains all the parts that are NOT 3D-printed (e.g., remote control, motors, LEDs).
  • 🔎 If something breaks, you can find individual replacements here.

Spare parts

  • 🛒 All printable spare parts are here. If something breaks, you’ll find the exact piece you need.
  • 🏷️ WARNING: make sure you know the exact name of the part. If unsure, refer back to the previous lesson.

Body assembly

  • 🔩 This is where assembly begins. You have your printed parts and everything else you need?
  • Follow the correct procedure carefully so you don’t run into headaches. It’s a critical step.

Mods assembly

  • 🔀 Depending on the mod you choose, the assembly process may differ.
  • 📚 In this section, you’ll find detailed instructions for each mod.

Control tower assembly

  • Assembling the control tower is more advanced. You’ll need soldering experience and a basic understanding of electronics.
  • ⛑️ If you’re a beginner, it might be best to purchase the control tower pre-assembled.

programming

  • 💻 The rover is ready, so now it’s time for programming and fun!
  • ♻️ Note: depending on your chosen mods, you may need different code.

Terms & Conditions

  • 📜 All the rules you must follow to use my files can be found here.
  • 💰 If you use the rover professionally, you need to pay the subscriptions I mention—this is my livelihood, not just a hobby.

✅ These are all the things we’ve covered so far and everything you’ll see in the left column!
Good luck and… have fun!

🔍 The Design Choices Behind the Rover 🚀

🔍 The Design Choices Behind the Rover 🚀

Welcome to the Rover Q&A! 🎯 Here, you’ll find answers to the most frequently asked questions about the design choices behind the Rover.

Why were certain materials chosen? Why doesn’t the Rover have a steering system? Why was 3D printing used as the manufacturing method? All the answers are here! 📖✨


🛠️ Why Did I Choose 3D Printing for Manufacturing?

The design process is directly influenced by the chosen manufacturing method! 🎨 Before I even started drawing the first component of the Rover, I had to decide how it would be built. 🔩

I set the following goals, which led me to 3D printing as the ideal solution:

Low production cost – 3D printing is the most economical manufacturing method for small-scale production.
User-friendly machines – 3D printers are easy to use, don’t require specialized personnel, and don’t produce waste or hazardous materials.
Compact & space-efficient – A 3D printer fits easily in a workshop, a school, or even a home! 🏡
Minimal technical knowledge required – Even someone with little to no mechanical experience can assemble the Rover! 🔧
Easy repair & part replacement – If something breaks, you simply print a new part and keep going!
Complete customization freedom – Modify the Rover to suit your needs without relying on external suppliers for spare parts.

For all these reasons, 3D printing was the best choice! 🏆


🚗 Why Doesn’t the Rover Have a Steering System?

Unlike traditional vehicles 🚙, the Rover doesn’t have a steering system. Instead, it moves using differential wheel rotation.

🔹 How does it work?

  • If the right wheels move slower than the left, the Rover turns right.
  • If the left wheels move slower than the right, the Rover turns left.
  • By controlling both sides independently, the Rover can rotate in place, just like a tank! 🏁

🎯 Why this choice?

Fewer components – Without a steering mechanism, there’s no need for axles, servo motors, or complicated linkages.
Simplified construction – All four wheels are identical, making printing and assembly easier.
Greater maneuverability – The Rover can make sharp turns and navigate tight spaces, making it ideal for industrial & rescue applications.

By eliminating the need for a steering system, we have a rugged, efficient, and easy-to-maintain vehicle! 🚀


🏆 Why Did I Redesign the Wheel?

One of the biggest challenges with similar vehicles was the immense forces applied to the wheel axle, leading to:

Rapid component wear.
Vibrations transferring to the chassis.
High maintenance costs.

🛠 The solution?

✔️ I developed a completely new wheel design that eliminates most of the stress on the axle and distributes forces more evenly.
✔️ This design was so unique and effective that it has been officially patented!

Bonus:
This design also allows for natural suspension, removing the need for additional shock absorbers! 😃


🔋 Why Did I Choose Brushed Motors Instead of Brushless?

The Rover uses brushed motors instead of brushless ones – and for good reason!

📌 What do brushed motors offer compared to brushless?

On-the-spot braking – By short-circuiting the motor’s output, the Rover can decelerate efficiently.
Massive starting torque – The Rover can start instantly, even on rough terrain!
Simpler control – Brushed motors don’t require complex software to function correctly.

Brushless motors may be faster, but in terms of durability, control, and reliability, brushed motors are the best option for the Rover! 🔥


⚙️ Why Did I Choose Larger Motors Than Needed?

More power means more possibilities! 💪

✅ The Rover can carry heavier loads without a problem.
✅ The extra torque ensures better grip and increased stability.
✅ The vehicle can handle high stress & long-term use without breaking down.

It might seem excessive, but trust me – you never regret having more power! 😆


💡 Why Did I Design the Control Tower?

The Control Tower was created to make your life easier!

🛠 What does it do?
✔️ It includes all electronics in a compact, easy-to-install module.
⚡️ It has plug-and-play connections for quick setup.
🔧 It can be easily disassembled and repaired, if necessary!

Even if you have no experience with electronics, you can assemble and operate the Rover without difficulty! 🎉


🔋 Why Did I Choose 18650 Batteries Instead of LiPo?

While LiPo (Lithium Polymer) batteries might seem like the natural choice for the Rover, I decided to use 18650 or 21700 Li-ion cells instead.

📌 Why?

Increased reliability & safety 🔥 – LiPo batteries may provide more power, but they’re far more dangerous. If damaged, they can catch fire, making them unsuitable for workspaces or educational environments. 18650 cells, on the other hand, simply stop working if damaged, without any fire risk.

Longer lifespan 🔄18650 cells last significantly longer than LiPo batteries, maintaining stable performance over many charge cycles.

Durability in harsh conditions 🛠️ – LiPo batteries are sensitive to shocks, punctures, and extreme temperatures. 18650 cells are much more resilient.

Easy replacement & availability 🔄 – 18650 batteries are widely used, making them easy to replace. If one cell fails, you replace just that one, instead of an entire battery pack, as you would with a LiPo.

Perfect for industrial & educational settings 🏫 – The Rover is designed for workshops and classrooms, where safety is the top priority. Choosing 18650 batteries ensures safe, efficient operation without fire hazards.

📌 Conclusion:

LiPo batteries are great for RC models and drones, but they were not the right choice for the Rover due to their safety risks, sensitivity, and high maintenance costs.

By using 18650/21700 Li-ion cells, the Rover becomes more durable, safer, and more reliable for any application! 🚀🔋


🔹 These were just some of the key design decisions behind the Rover!

Do you have any questions? Send me a message, and I’ll be happy to answer! 💬

📌 Remember! Every choice was made with one key goal in mind:
✅ To give you the best, most versatile, and most affordable Rover possible! 🚀


This version keeps the professional yet engaging tone you wanted while making everything clear and easy to read. Let me know if you want any tweaks! 😊

Electronics & Programming of the Rover 🚀

🔍 Introduction to Electronics & Programming of the Rover 🚀

Although the "Programming" and "Mini Electronics" sections are the best places to learn coding, here I will give you a concise overview of all the electronic components of the Control Tower, as well as the fundamental programming principles used in the Rover's operation.


🖥️ What is Programming and What is Coding?

Before you start programming and writing code, it is crucial to understand the big difference between these two concepts.

🔹 Programming

Programming is the logical design process that defines "what" will happen and "when", without writing a single line of code.

For example:

📌 When the rear target is hit, the Rover will reduce its power to 10% for 15 seconds.
📌 After 15 seconds, the Rover will restore its power to 100%.

This is an example of programming for a Battle Bot game. It is written in plain English and does not involve any programming language yet.


🔹 Coding

Coding is the process of translating the programming logic into a language that a computer or microcontroller can understand.

Depending on the microcontroller we use, we will work with two different programming languages:
C++ if using Arduino
Python if using ESP32

📌 Important!
If your programming logic is incorrect, your coding will also be incorrect. Errors in logic lead to errors in execution.

If you can differentiate between programming and coding, your experience in developing the Rover will be much smoother! 🚀


⚙️ Control Tower Components & DIY PCB Modules

Just like the Rover’s mechanical design, I faced major challenges in finding suitable electronic components.

Since I couldn’t find the right hardware, I designed all the PCBs for the Control Tower. In total, I created 68 different PCBs, all of which can be stacked and interconnected!

📌 PCB Features:
✔️ Stackable design – All PCBs can be layered and work together.
✔️ Easy to repair – If something fails, you can replace only the faulty part.
✔️ Through-Hole Technology (THT) – Instead of Surface-Mount Devices (SMD), I used THT components so that repairs can be done with a simple soldering iron!
✔️ Modular pin headers – All modules connect with pins, so you can detach and replace them without soldering.

The Rover is not just a simple RC toy – it is a learning & experimentation tool, which is why all electronics are repairable and upgradable! 🔬


🔋 Battery & Battery Management System (BMS)

The battery is where the Rover stores energy for its operation.

📌 Why did I choose Li-ion instead of LiPo?
✔️ SafetyLi-ion 18650 cells are much safer and don’t risk explosions or fires.
✔️ Longevity – They last more charge cycles compared to LiPo batteries.
✔️ Durability – Unlike LiPo, they don’t get damaged easily from impact or punctures.

The Battery Management System (BMS) is the PCB that manages the battery pack and serves as the main power distribution system.

🔹 Features of the BMS in the Control Tower:
Includes DC-DC converters to step down 16V to 9V, 5V, and 3.3V.
Balance Charging Circuit ensures equal charge distribution across all battery cells.


⚡ DC-DC Converter (Voltage Step-Down Module)

DC-DC converters are small circuits that convert the 16V battery power to 9V, 5V, or 12V for different components.

📌 Why are these separate modules instead of being built-in?
✔️ Replaceable in case of failure – If a converter burns out, you replace just that module!
✔️ Reliability – Separating power circuits prevents failures from damaging the entire system.


🔌 Main Power Distribution Board (PDB)

The PDB is the main power board, responsible for distributing energy to all components.

📌 Why does it have two separate circuits?
✔️ One circuit for 5V controlled power (for logic circuits).
✔️ One circuit for 16V high-power output (for motors).

This dual-circuit system ensures that the Rover does not run off unexpectedly while you are programming! 🚀


🧠 Arduino Core Board (Main Control Module)

The Arduino Core Board is the brain of the Rover!

✔️ Compatible with both ESP32 and Arduino microcontrollers.
✔️ Includes an LCD screen and 3 buttons for easy interaction.
✔️ Removable & replaceable – If it fails, you can swap it out with a new one!


⚙️ H-Bridge (Motor Driver & Differential Steering)

The H-Bridge is the circuit that controls the Rover’s movement.

📌 How does it work?
✅ It receives 16V power from the battery.
✅ It has two outputs, one for each side of the Rover.
✅ It controls the speed & direction of the motors.

📌 For 4x4 Configuration:
✔️ Uses two motors per side.
✔️ Requires an active cooling fan due to higher power consumption.

📌 For 3x2 Configuration:
✔️ Uses one motor per side.
✔️ Does not require cooling as the load is lower.


🔹 This was a brief introduction to the Rover’s electronics & programming!

📌 Do you have questions? Send me a message, and I'll help you! 💬

📌 Continue to the "Programming" section for more details! 🚀

🛠 Rover Blocks

The Components of the Rover

In this section, we will describe the essential components included in the Rover kit, so you know exactly what you will receive and how to use it.


🔹 The 5 Main Components of the Rover

The Rover consists of five primary components:

1️⃣ Main Body (Front Section) – The front part of the Rover, which houses the Control Tower.

2️⃣ Control Tower – This contains all the electronics required for the Rover's operation, including the Arduino, sensors, communication modules, H-Bridge, batteries, and more.

3️⃣ Rear Section – This determines whether the Rover will have two wheels or a single swivel wheel, depending on the chosen configuration (3x2 or 4x4).

4️⃣ Remote Controller – The controller that allows you to send commands to the Rover for movement and functionality.

5️⃣ FPV System (Optional) – If you have added an FPV camera, you will also receive FPV goggles or an HDMI receiver to view real-time video feed from the Rover.


📌 Additional Components Based on Configuration

Depending on your Rover setup, you can add or remove components to customize it for your needs.

✔️ Wired Operation – The wireless system can be removed, allowing the Rover to be controlled via a base station.
✔️ GPS & Satellite Navigation – A GPS module can be added for autonomous navigation.
✔️ External Batteries – Instead of integrated batteries within the Control Tower, removable batteries and a separate charger can be used.

Regardless of the configuration, the core components of the Rover remain the same, and each part is carefully designed to work seamlessly together.


📌 What You Need to Know Before Purchase

You know exactly what’s included in the kit and what customization options you have.
You understand how the Rover works and how it can be modified.
You're ready to assemble & operate your Rover immediately!

If you have any questions about any of the components or need custom modifications, feel free to reach out! 🚀

🎮 Datalink

The Rover’s Remote Control System 🎮

The term Datalink refers to the process of transmitting data from the controller to the Rover.

Depending on the application, this can be done wirelessly or via a wired connection. In our case, we use wireless transmission, but a wired setup is also possible for specific applications.


📡 Why ExpressLRS?

Due to the massive adoption of FPV drones, which primarily use the ExpressLRS protocol, I decided to integrate the same system into the Rover.

This choice provides several advantages:

Ease of use – Many users already own ExpressLRS-compatible controllers, so they can use them directly with the Rover!
Compatibility with existing hardware – If you already have an FPV drone, chances are that your controller is fully compatible with the Rover.
Large community support – Since ExpressLRS is widely used, there’s extensive support and frequent updates available.

So, if you’re a drone enthusiast, rest assured that your current FPV controller can also control the Rover! 🚀


🕹️ The Controller & Control Channels

The Rover’s controller includes:

🔸 Two gimbal sticks for primary movement controls.
🔸 Multiple buttons & switches for additional features.
🔸 Support for up to 16 control channels – meaning you can program up to 16 different commands for the Rover!

🛠️ Basic Functions:
✔️ Forward & Reverse 🚗
✔️ Left & Right Turns 🔄

The remaining 14 channels can be assigned to any function you desire, such as:

✔️ Turning lights on/off 💡
✔️ Activating a horn 📢
✔️ Adjusting Rover settings ⚙️
✔️ Controlling extra features like a robotic gripper or sensors 📡

Your options are limitless – You define the functions! 💯


📺 EdgeTX – The "Operating System" of the Controller

The controllers we use run EdgeTX, a full-featured firmware that:

🔹 Provides access to settings & configurations
🔹 Allows real-time adjustments via the controller’s display
🔹 Enables customization for optimal Rover performance

Think of EdgeTX as the Windows or MacOS for your controller!

This means you can adjust settings on the fly during a battle or mission, ensuring optimal response from your Rover! 🏎️


📡 The Receiver & Control Tower

The ExpressLRS receiver is installed inside the Rover’s Control Tower. The Control Tower processes incoming signals and converts them into actions and movements for the vehicle.

The Control Tower outputs can be:

On/Off switches via transistor circuits for activating components 🔘
PWM outputs for controlling motors & servos ⚙️
Data transfer & sensor integration for advanced applications 📊

Essentially, any function can be controlled from your controller – from motors, LEDs, and servos to speakers or even cameras! 🎶📹


📊 Telemetry & Real-Time Data Transmission

The system allows bi-directional communication, meaning that data can be sent from the Rover back to the controller, providing crucial information such as:

📍 Distance from the operator
🔋 Battery level
🌡️ Temperature & barometric pressure
🧭 GPS coordinates & compass orientation
📊 Any other sensor data you wish to integrate!

This enables full control over the Rover, regardless of the environment or mission requirements!


🚀 Summary: Full Control at Your Fingertips!

With ExpressLRS and EdgeTX, you have access to a powerful remote control system that can be customized for any need!

🔹 Fast & reliable wireless control
🔹 Programmable multi-function system
🔹 Real-time telemetry & data feedback

All you need to do is tell me about your project, and we’ll customize the Rover to perfectly fit your needs! 💡🔥

🔧 Mods & Customization

Expanding the Rover's Capabilities

While the Rover is already highly versatile, the ability to swap mods makes it even more adaptable and powerful. Its modular design allows you to customize the Rover to fit your mission needs or the type of game you want to play.


📌 Compatibility Matters!

🔴 Some mods are not compatible with each other!
📌 Before installing a new mod, check if it can be used together with other attachments.
✔ For example, the Mushroom Hunt mod and the FPV mod cannot be used simultaneously, as both require the front mounting point.

🔴 Different mods require different code
📌 Depending on the mod, you may need to upload a new firmware to the Control Tower to ensure proper operation.
✔ For example, if you activate the Kill Management mod, the Rover must be programmed to register opponent “hits” and apply the correct digital responses.


🛠 Mods with Electronic Components

🔌 Some mods require additional electronic components and must be connected to the Control Tower.
✔ Mods that add servo motors, winches, air pumps, and other mechanical parts will need extra connections and proper wiring.
✔ For FPV video mods (DJI O4, HDZero, Analog systems), you must include a controller to allow proper communication between the video transmission module and the Control Tower.


🚀 Available Mods & Add-Ons

1️⃣ FPV Camera Mod 🎥
📌 Attaches a front-facing camera for first-person remote driving.

2️⃣ Battle Mode – Kill Management Mod 🔫
📌 Adds hit sensors that manage digital “damage” and respawns in combat mode.

3️⃣ Mushroom Hunt Mod 🍄
📌 Specialized front forks for object transportation, useful for both games and educational projects.

4️⃣ LED UnderGlow Mod 💡
📌 Adds lighting to the Rover’s underside for aesthetic effects during night missions and races.

5️⃣ Servo-Driven Attachments 🔄
📌 Allows integration of air pumps for soft grip mechanisms or servo motors for additional moving components.


🔧 Rules for Proper Mod Usage

Check mod compatibility before installing multiple add-ons.
Avoid combining mods that share the same mounting points.
Always load the correct firmware on the Control Tower to prevent system failures.
Follow proper installation guides when connecting electronic parts to avoid short circuits.
Upgrade your Rover according to your needs, but don’t overload it with unnecessary mods!


📌 The Rover is more than just a toy – it’s a tool.
📌 It’s designed to evolve and adapt to any mission.
📌 Add mods, experiment, and create your own unique version of the Rover! 🚀


💡 Want More Mods? Let’s Make It Happen!

✔ If you have ideas for new mods or want to design your custom add-on, we can develop it and integrate it into your project!

Are you ready to experiment with the endless possibilities of the Rover? 🚀🔧

🚀 Pricing Strategy for the Rover

Positioning in the Market

To properly price the Rover, we first need to position it correctly within the market. This is neither a simple RC toy from a toy store, nor a high-end industrial or military-grade robotic vehicle. Instead, it sits in between these two categories, offering high performance at an affordable price.


📊 How Does the Rover Compare to Other Products?

To better understand the Rover's pricing, let’s compare it to other categories of products:

  • Basic RC toys range from €25 to €100.
  • High-end hobby-grade RC models cost between €250 and €700.
  • Advanced RC vehicles with specialized features range from €1,300 to €2,300.
  • Industrial and military-grade Rovers start at €7,000 and can exceed €15,000.

The Rover is positioned much closer to the high-end RC model category, as it far surpasses most standard RC vehicles but doesn’t carry the excessive cost of industrial machines.

📌 Rover Pricing Breakdown:

  • Base version€1,300 – €1,400
  • FPV & Camera version€1,800 – €2,300

However, there is one unique option that drastically reduces the cost:
You can 3D print the Rover yourself for just €68! 🎉


🛠 The Power of 3D Printing – A Revolutionary Approach to Pricing

Instead of buying a fully assembled Rover for over €1,300, you can:

Purchase the 3D model files for €68
Print the parts using a 3D printer 🏠
Assemble the Rover yourself 🛠
Select and buy the electronic components you prefer 🎛

This way, you fully control the cost and can customize the Rover to fit your specific needs. All you need is some technical knowledge and patience, but the detailed instructions I provide will guide you every step of the way.

📌 How You Save Money with 3D Printing:

  • No manufacturing and assembly costs – You do it yourself!
  • No reliance on suppliers for spare parts – If something breaks, you just reprint it!
  • Complete freedom for customization – You choose the materials and components!

💡 Why Am I Offering the Rover as a Digital File?

This project has been in development for over 5 years. Initially, I planned to sell it as a ready-made product, but I struggled to find partners who truly understood its potential and could help bring it to market.

🔹 So, I decided to release it on my own—but as a digital product.

Now, I become your personal engineer! Instead of paying thousands of euros for a pre-assembled Rover:
✔️ You print it yourself
✔️ You assemble it with my guidance
✔️ You customize it to fit your needs

This approach benefits both of us:
You save money by handling the printing and assembly.
I can support more users without the complexity of physical production.


📢 Why a Subscription to the Workshop is Essential

📌 Although the Rover is offered as a digital file, a subscription is necessary to access updates, support, and new designs. This ensures that:
✔️ I can continue improving and developing the Rover.
✔️ You receive continuous technical support.
✔️ The project remains sustainable for everyone.

Without this model, the entire system would not be viable in the long term. That’s why the subscription is crucial—so I can continue providing new features and ongoing support to the community!


⚖️ Final Thoughts – Balancing Cost & Performance

The Rover is the ideal solution for those looking for something between a high-performance RC model and an industrial robotic vehicle. It’s affordable, versatile, and powerful, designed for both hobbyists and professionals.

💡 With the Rover, you get:
✔️ The power and performance of an industrial Rover at a fraction of the cost.
✔️ The flexibility and customization of a DIY project.
✔️ A sustainable pricing model that supports future development and community growth.

👉 What do you think? Is this the right way to bring high-performance robotics to more people at an accessible price? 🚀

Franchise Management & Use of Mini250 Lab Products in Robotics Schools 🎓🤖

Franchise Management & Use of Mini250 Lab Products in Robotics Schools 🎓🤖

The following terms and conditions apply to all products, services, and files from Mini250 Lab, not just the Rover.

By joining our franchise program, your robotics school or workshop gains access to our educational system, training materials, and exclusive product rights.


💰 Subscription Fee Structure

There is a €3 fee per student per month for any institution using our educational program in their classes—whether in physical or digital format.

The minimum monthly charge is €280 per institution.

This covers all students enrolled in courses utilizing Mini250 Lab tools and content.


🎯 Benefits of Registering as an Official Mini250 Lab Partner

🔹 Official Certification & Recognition 🏆
Only registered institutions can officially present themselves as Mini250 Lab-certified training centers.

🔹 Access to Exclusive Learning Materials 📚
✅ Registered educators gain access to exclusive teaching content that is not available to students or parents.
✅ This includes training guides, lesson plans, and methodologies to help instructors deliver high-quality courses using our products.

🔹 Priority Access to New Products & Prototypes 🛠
✅ Franchise members can rent or test new products, modifications, and equipment before public release.

🔹 Hosting Official Competitions & Events 🏁
✅ As an official partner, you have the right to host official competitions using our branding and systems.
✅ This simplifies event organization and gives your school credibility in national & international robotics tournaments.

🔹 Exclusive Role in the National Championship 🌍🏆
✅ Your institution will become a regional hub, training and preparing students for the Mini250 National Championship.
✅ You will have the exclusive right to manage local memberships & qualifying rounds in your area.

📩 Interested in becoming a Mini250 Lab partner? Contact us today to secure your franchise! 🚀

🎯 Mini250 Lab Support for Official Events

Use of Rover in Events & Competitions – Royalties & Support 🎪🚀

Using Rovers and Mini250 Lab products in professional events and competitions requires the payment of royalties.

If you are planning to organize any event where:
✅ Participants pay a registration fee 🏁
✅ There is paid entry with tickets 🎟
Rovers or other products designed, manufactured, or even inspired by Mini250 Lab are used 🛠

Then, the payment of royalties is mandatory.


💰 Royalties Calculation Methods

🔹 Percentage-Based Fee: A small percentage of the event’s profits.
🔹 Fixed Fee: A one-time payment, regardless of the event’s revenue.
🔹 A combination of both, depending on the event type.

The details regarding royalties are determined on a case-by-case basis.
Before organizing any event that includes our products, you must contact us to finalize all necessary agreements. 📩


⚠️ Intellectual Property Protection & Legal Coverage

📌 The Rover and Mini250 Lab products are legally protected 📜.
The design, technology, and innovations incorporated into the Rover and its mods are protected by intellectual property rights and patents.

📌 Copying, modifying, or commercially exploiting our designs without authorization is strictly prohibited 🚫.
Using our products in events without an official license is a violation of our intellectual property and may result in legal action.

📌 Unauthorized use will lead to legal consequences ⚖️.
We have a dedicated legal team ensuring that all usage of our Rover complies with our terms and conditions.

📌 If you want to use our products for commercial purposes, the solution is simple: Contact us! We will help you find the best solution. 🚀


🎯 Mini250 Lab Support for Official Events

All officially licensed events benefit from significant advantages & support, including:

Event Promotion & Advertising 🎯
📢 Posts across all our channels (Facebook, Instagram, YouTube, Discord, Forum).
📌 Promotion of event banners and logos on our website.

Official Leaderboard Inclusion 🏆
📊 Participants of your event will be added to our global Mini250 Lab ranking.

Shoutouts & Mentions for Winners 🏅
Event winners will receive special recognition on our Social Media and official ranking platform.

Exclusive Access to Unique Content & Updates 🛠
Official event partners will gain early access to new mods & updates unavailable elsewhere.

Technical Support & Guidance 📡
We provide technical assistance & guidance to ensure the Rovers operate flawlessly during the event.

📩 Want to host an event with Rovers? Contact us, and we’ll guide you through every step! 🚀

🚫 Commercial Exploitation & Sale of Mini250 Products

🚫 Commercial Exploitation & Sale of Mini250 Products

The commercial exploitation, resale, or mass production of any product, construction, or component designed by Mini250 is strictly prohibited 🚫.


🔴 What Is Prohibited?

🔹 Selling or reselling any product, physical or digital, designed or based on Mini250 Lab designs, without approval.
🔹 Listing and commercially promoting Mini250 Lab products or files on online platforms (Etsy, eBay, Amazon, AliExpress, etc.) or physical stores.
🔹 Modifying and exploiting products based on Mini250 Lab designs for financial gain.


✅ Who Has the Right to Sell?

The exclusive commercial distribution of Mini250 Lab products is conducted only through official platforms and our physical store:

📍 Official Online Platforms:
🔹 www.mini250.gr
🔹 www.mini250.com

📍 Physical Store:
🏪 Mini250 - Arrianou 15, Thessaloniki, Greece

Any other method of distributing products derived from Mini250 designs is considered illegal commercial activity and may result in legal action.


⚠️ Legal Warnings

🛑 All Mini250 products, files, and designs are protected by copyright and registered patents.

🚫 Copying, distributing, or commercially exploiting without approval is a violation of our terms of use and may lead to legal action and financial compensation claims.

📌 If you are interested in becoming an authorized partner or reseller, please contact us to discuss collaboration opportunities.

Contact: [email protected] | 📞 +306982377015

🚀 We support innovation & open creation, but we also protect our intellectual property! 💡

🔧 Support Program for personal Users

Subscription & Support Management from Mini250 Lab

The access and usage of the Rover files are designed to be as simple as possible for individual users. Below, we explain what applies to private users, as well as the available support options.


📌 Program for personal Users – No Subscription Required

Private users can purchase the file once and use it for personal use without a subscription. This means that once someone buys the file, they can download and use it freely for the entire lifespan of the product.

However, there are some important limitations to be aware of.


⚠️ Attention!

This is a Digital Product.
The file requires the appropriate equipment and basic knowledge of 3D printing and assembly.
💡 Make sure you have the necessary skills before purchasing!

No returns or exchanges.
📌 Digital products cannot be returned or exchanged.
For this reason, please double-check that the product is compatible with your 3D printer and meets your needs before purchasing.

Access to the file after purchase.
📥 Once the order is completed, the file will be available for download in the "Downloads" section of your account.
📌 A login or account creation is required to make a purchase.

📩 Need more information?
If you have any questions, feel free to contact us!


🔧 Support Program for personal Users

If a user needs additional help to complete their project, a fast-track support program is available.

✔️ Cost: €28 per hour
✔️ Duration: As long as the student needs to complete their project
✔️ Includes private lessons where we address all your questions!


📌 What Applies to Support & Subscriptions?

No subscription is required to purchase and use the files as a private user.
No restrictions apply to file usage after purchase.
Additional support is available only upon request and is charged separately.

📌 This means you can buy, download, and use the file without any extra costs or limitations! 🎉

👉 If you need assistance or more information, feel free to contact us! 🚀

🚀 The Journey of Creation – From Idea to 3D Printed Rover

The 3D Printed Rovers I’ve designed are not just remote-controlled vehicles. They are learning tools, a gateway to experimentation, discovery, and development in 3D printing, mechanical assembly, and electronics.

To understand how we got here, let’s take a step-by-step look at our journey:


🔹 2012 – The Beginning of the Journey

I graduated from the Mechanical Vehicle Engineering Department in Thessaloniki. Since then, I was always drawn to innovation and unconventional ideas—I never wanted to follow the standard path. My interest in Arduino and hydrogen energy led me to my first DIY cars and robotic projects.


🔹 2014 – The First Big Challenge

A high school from Mytilene approached me for help with an exciting competition: CanSat Europe.

📌 Goal: Build a mini satellite that would be launched with a rocket 2.5 km high and collect data.
📌 Method: We used 3D printing, which was still in its infancy in 2014.
📌 Result: The team traveled to Norway and won 2nd place in Europe!

🔥 This was when I realized the power of hands-on learning. The students weren’t just learning—they were creating, competing, feeling excitement, and achieving success.


🔹 2019 – Taking the Leap: Opening the Robotics Lab

After years of experimentation and professional exploration, I decided to invest in STEM education.

📌 I opened Mytilene’s first robotics lab.
📌 The lab was filled with micro:bit, Arduino, and LEGO Education.
📌 We had arena battles, educational projects, and students of all ages.

🛑 The Problem:
While students were initially excited, their interest faded over time as they grew older.

The traditional learning method—📖 Theory, 🔧 Assembly, 🔍 Observationwasn’t engaging enough. Something was missing.


🔹 2020 – The Moment of Inspiration: Creating the First 3D Printed Rover

To keep students engaged, I needed to rethink the entire learning process.

📌 Goal: Design an educational tool that could inspire, challenge, and sustain excitement in learning.
📌 Solution: A fully 3D-printed rover.

Modular design – allows infinite customization.
Easy repairs – students can fix it themselves.
Designed to “break” – students learn by troubleshooting and improving their designs.

💡 Every failure becomes a learning opportunity. Students weren’t just assembling—they were understanding, fixing, and optimizing their own rovers.


🔹 2021 – The Patent & System Testing

In 2021, we took the next big step:

📌 Filed for a patent for the rover’s design.
📌 Experimented with VR cameras, new materials, and different wheel configurations.
📌 Battle-tested the rovers in real-life robotics arenas.

📢 The result:
The students went crazy for it. The rover became the ultimate learning tool.

🔥 It wasn’t just another project—it was an experience, a gamified way of learning.


🔹 2022 – Expanding into Larger Rovers

As the project evolved, we realized that these small rovers could also serve beyond the classroom:

STEM education in schools and robotics labs.
Testing platforms for research institutions and universities.
Industrial and defense applications for exploration and logistics.

📌 That’s when we decided to scale up, creating larger, more durable rovers capable of carrying heavier payloads and operating in demanding environments.


🔹 2023-2024 – The Project Today & The Future

📌 Building a comprehensive educational platform for teachers and students.
📌 Developing new rovers with autonomy, FPV control, and specialized applications.
📌 Expanding the project globally to make it a worldwide educational tool.

🚀 The Vision
I want to create a community of educators, makers, and learners who use the rover to explore, experiment, and innovate.

The journey continues… and now you can be part of it! 🎯

🛠️ The Patent Registration Process & Design Evolution

📌 The Goal: Designing the Ultimate Vehicle

When I set out to design the first 3D Printed Rover, I had to meet very specific requirements:

Simple to build – Fewer parts mean easier assembly.
Easy to use and maintain – It should be quick to assemble and repair, even for students and educators.
Extremely durable – A robotics lab cannot afford to constantly replace broken parts.
Modular and customizable – It had to support different configurations, from FPV cameras to battle-ready attachments.
Affordable – Schools and educators should be able to access and use it.
Visually impressive – To keep students engaged and excited.
Safe to use – Suitable for educational environments without risks.

To achieve this, I designed an entirely new type of vehicle, where all critical components (motor, steering system, ESC, and gearbox) would be integrated into a single module.


🚧 The Problems with Earlier Designs

The initial concept worked, but the first prototypes had serious durability issues.

🔻 The wheels were directly mounted on the motor, which caused huge stress on the gears and axles.
🔻 After just a few days of battle use, most vehicles broke down completely.
🔻 The impacts and collisions transferred directly to the gearbox, causing failures.


✅ The Solution: A Revolutionary Wheel Design

💡 To solve the problem, I designed a new type of wheel that absorbs shocks and impacts.

The wheel now has a built-in suspension system!
Lobed sections in the tire absorb shocks, protecting the motor and gears.
The flexible material (TPU) allows the internal hub to handle pressure, rather than the gearbox absorbing the damage.
Instead of a rigid connection, a flexible coupler was used, which reduces sudden loads on the motor.

The result?
📌 The new Rover design could now withstand weeks of combat in arenas without breaking!


📜 The Patent Registration Process

Once I had perfected the design, I needed to patent it – a process that turned out to be far more complex than I expected.

📌 Two close relatives with experience in patent writing helped me navigate the process.
📌 The designs I had to submit were completely different from my technical models.
📌 Instead of colorful 3D models, I had to submit technical cross-sections, numbered dimensions, and detailed function descriptions.

💡 Without their guidance, the process would have been nearly impossible.

After months of preparation, the patent was submitted and officially approved, marking a major milestone in the project’s development.


🎯 The Rover Today

📌 After countless tests and refinements, the 3D Printed Rover is now a fully developed, durable, and educational tool.
📌 The modern versions continue to be improved based on the lessons learned throughout this journey.
📌 The patent protects the innovative design approach, while the project remains open to educators and makers who want to further develop it.

🚀 This was the journey from concept to patent approval – and the adventure continues! 🎯

🚀 Applications of the 3D Printed Rover

The Ultimate Modular Robotics Platform

What started as a simple educational tool to captivate students and introduce them to robotics has evolved into a revolutionary, multi-purpose robotic platform.

The 3D Printed Rover can be adapted to various environments and missions thanks to its modular design, field-repairability, and easy assembly.

Below, we explore some of its primary applications, along with the advantages it offers in each field.


🔬 1. Research & University Projects

Universities and research centers require flexible, cost-effective, and customizable platforms to test new technologies and algorithms.

📌 Capabilities:
✔ Development and testing of autonomous navigation & AI algorithms.
✔ Experimentation with various locomotion models (4x4, 3x2, crawler, etc.).
✔ Integration of sensors for environmental monitoring & data collection.
✔ Low-cost alternative to expensive research-grade robotic platforms.

📌 Advantages:
✔ Entirely 3D printed, reducing manufacturing costs.
✔ Easily modifiable to fit different research needs.
✔ Allows students to develop and test custom hardware & software without significant investments.


🏗 2. Industrial Applications & Professional Use

The 3D Printed Rover can be used in industrial settings as a monitoring and automation tool, thanks to its ability to carry sensors and telemetry systems.

📌 Capabilities:
✔ Inspection of hazardous environments (factories, mines, warehouses, etc.).
✔ Monitoring of temperature, humidity, gas levels, and other environmental conditions.
✔ Automated facility inspections without human intervention.

📌 Advantages:
✔ Reduces human exposure to dangerous environments.
✔ No complex manufacturing process – all you need is a 3D printer.
Quick replacement and repair of parts by printing new components in hours.


🆘 3. Search & Rescue (SAR) Operations

The Rover is an ideal tool for search and rescue missions, helping teams operate in dangerous or hard-to-reach areas.

📌 Capabilities:
Navigating disaster zones and rubble (earthquakes, collapsed buildings).
Delivering medical supplies or water in hazardous zones.
Thermal & ultrasonic sensors for detecting survivors.
Remote-controlled exploration of extreme environments (fires, floods, toxic zones).

📌 Advantages:
✔ The lightweight, modular design requires no special equipment.
✔ Can be 3D printed on-site, eliminating reliance on supply chains.
✔ In case of damage, broken parts can be recycled and reprinted for immediate repairs.


🎮 4. FPV & STEM Education

The Rover is an excellent tool for education, enabling students to learn engineering, robotics, coding, and telemetry through hands-on projects.

📌 Capabilities:
✔ Equipped with FPV (First Person View) camera for remote-controlled driving using VR goggles.
✔ Teaching physics and mechanics through interactive experiments.
✔ Development of coding & AI-based navigation algorithms.

📌 Advantages:
Engages students who find traditional robotics classes boring.
✔ Encourages learning through trial, error, and problem-solving.
✔ Can be used for STEM competitions and robotics challenges.


🔧 5. Field Repairability & On-Demand Part Replacement

One of the Rover’s greatest strengths is its repairability. Unlike traditional vehicles that require complex repairs, the Rover can be fixed instantly, even in the field, without specialized personnel or expensive equipment.

📌 Capabilities:
✔ Recycling broken components: Used plastic parts can be shredded and reprinted.
On-demand part manufacturing using a standard 3D printer, eliminating the need for replacement stock.
Minimized logisticsa single printer can produce all the required components!

📌 Advantages:
Reduces repair costs – no need for expensive spare parts.
✔ No need for expert engineers – anyone can replace components.
Self-sustaining maintenance in remote areas, removing the dependency on repair shops or supply chains.


🚀 Conclusion: A Platform Without Limits

The 3D Printed Rover started as an educational tool, but quickly evolved into a highly versatile robotic platform.

✅ It can be used in research, industry, rescue missions, STEM education, and beyond.
✅ Its modular 3D-printed design allows for customization, rapid repairs, and easy modifications.
A single 3D printer is enough to produce a fully functional vehicle, removing the need for complex manufacturing!

📌 The future is here – and it's 3D printed! 🚀

🏗 Industrial Applications

Professional Use

The 3D Printed Rover is a powerful tool for inspection, automation, and remote access in challenging or hazardous environments. Its flexibility, durability, and quick repair capabilities make it ideal for industrial applications, construction, facility inspection, and monitoring.


📌 Capabilities:

Inspection of hazardous areas such as factories, mines, infrastructure, and warehouses.
Environmental condition monitoring (temperature, humidity, toxic gases, leaks).
Automated facility control without human intervention.
Live image & telemetry capture from remote locations.
Access to hard-to-reach spaces thanks to its 4x4 drive system & zero-turn capability.


📌 Advantages:

Extremely low-cost construction & repairs – all you need is a 3D printer.
Lightweight & corrosion-resistant due to its plastic frame.
Affordable & disposable, allowing full utilization without fear of damage.
Customizable for any application simply by swapping sensors & accessories.
On-the-spot repairs – broken parts can be reprinted and replaced within hours.
Simple operation via Ethernet cable or wireless control, depending on field requirements.


🔍 Remote Inspections & Facility Monitoring

One of the most common applications for the Rover is its use in inspecting and analyzing hazardous or inaccessible areas.

📌 Key Features That Make It Ideal:
✔ The 4x4 drive system and zero-turn capability allow smooth navigation in confined spaces.
✔ Equipped with cameras & sensors, it can enter tight tunnels, manholes, and underground areas.
✔ Its plastic body prevents corrosion, reducing maintenance needs.
✔ If damaged, replacement parts can be 3D printed on-site, minimizing downtime and costs.
✔ Due to its low production cost, it can be deployed in high-risk environments without fear of loss.


🛠 Flexibility & User-Specific Customization

The Rover can be tailored to meet the specific requirements of each application.

📌 Customization & Add-On Options:
Increased payload capacity – additional wheels & mounting points for larger loads.
Modular sensor & camera mounts – users can provide component dimensions, and we will design a custom mount to fit their needs.
Ethernet-controlled operation – ideal for applications requiring stable, interference-free communication.
Wireless control for short-range operation – effective up to 2-3 meters of concrete penetration.


⚠️ Limitations & Future Improvements

While the Rover is highly versatile, some limitations exist, which are being addressed in future iterations:

📌 Current Limitations:
✖ Not fully waterproof – unsuitable for submerged pipeline inspections.
✖ Requires improvements for better electronic protection in humid environments.
✖ Under extreme loads, some plastic parts may need reinforced material upgrades.

📌 Future Improvements:
Sealed electronics & waterproofing for use in wet environments.
Stronger components made from reinforced polymers for extreme industrial conditions.
✔ Integration of autonomous functions & AI for fully automated inspections.


📌 Conclusion: The Ideal Tool for Industrial Use

The 3D Printed Rover has proven itself as an affordable, durable, and easily repairable solution for industrial inspections and monitoring.

Perfect for use in factories, mines, infrastructure, and hazardous environments.
Highly flexible & customizable – accessories & sensors can be added as needed.
Field-repairable using a 3D printer, reducing supply chain dependencies and maintenance costs.

📌 The next generation of industrial robotics is here – and it’s 3D Printed! 🚀

🆘 Search & Rescue (SAR)

Emergency & Disaster Response

The 3D Printed Rover is a highly adaptable platform that can be quickly modified for search and rescue (SAR) missions, helping emergency teams operate in hazardous or hard-to-reach locations where human presence is either dangerous or impossible.


📌 Capabilities:

Deployment in disaster-stricken areas (earthquakes, floods, building collapses).
Transportation of critical supplies (medicine, food, water, oxygen tanks) to inaccessible locations.
Survivor detection through thermal imaging, ultrasonic sensors, and CO₂ detectors.
Hazardous material detection and neutralization (gas leaks, toxic substances).
Remote exploration of high-risk zones (fire, explosion sites, toxic environments) without endangering human lives.
Navigation through unstable terrains (caves, ravines, landslides).


📌 Advantages:

Extremely low-cost compared to commercial search & rescue robots.
Fully customizable – easily attach new components and sensors for mission-specific needs.
Rapid part replacement & repair in the field – damaged components can be 3D-printed on-site within hours.
Lightweight and highly durable – plastic body resists corrosion, unlike metal robots.
Easy on-the-spot repairs – old, damaged parts can be recycled and reprinted for immediate use.
Disposable & risk-free deployment – operators can push the rover to its limits without fear of losing an expensive unit.
Wired or wireless operation – adaptable for remote-controlled or autonomous navigation.


🚑 Specialized Upgrades & Extensions

The Rover can be easily adapted for different emergency scenarios.

📌 Example Upgrades:
Extended battery life & additional wheels for increased payload capacity and endurance.
Mounts for specialized sensors (gas detection, seismic activity monitoring, biometric scanning).
Detachable FPV cameras with night vision & infrared capabilities for low-light environments.
Water-resistant modifications for operations in flooded or high-humidity areas.

📌 Custom-Built for Your Needs:
📢 Send us your component dimensions and specifications, and we will design a custom mount that fits your rover perfectly!


🛠 Built for Real-World Operations – Not Just for Testing

The Rover is not a showcase robot. It’s engineered to perform in real-life, high-risk field operations.

Designed for extreme conditions – if damaged, it can be reprinted within hours, eliminating downtime.
Ideal for rescue teams, military units, and emergency responders in need of low-cost, adaptable solutions.
Suited for professional use in disaster relief, search & rescue, and remote exploration.


📢 Do you have a specific mission in mind?
📌 We can customize and modify the Rover to fit your exact needs – contact us to discuss your requirements! 🚀

🎮 Rover as a Hobby & Modeling

The New Era of DIY RC

The world of modeling and remote-controlled (RC) vehicles has drastically changed with the arrival of 3D printing. What was once an extremely expensive hobby, requiring a huge upfront investment and reliance on costly replacement parts, is now affordable, interactive, and open to limitless modifications.

The 3D Printed Rover is more than just an RC vehicle – it’s a fully immersive DIY experience that lets you print, assemble, program, and modify your own machine exactly the way you want.


🛠 Why Choose the Rover for Your Hobby?

Cheaper than traditional RC models – Print what you need instead of buying expensive spare parts.
Fully customizable – Change the design, adjust dimensions, and add new components.
Unlimited spare parts – Print new components instantly without waiting for orders.
Learn new skills – 3D design, printing, mechanics, programming & electronics.
Develop a DIY mindset – Build something from scratch and truly understand how it works.
Community-based fun – Join groups, compete in battles, and improve your builds together.


🚀 From Digital to Physical – The Future of Modeling

🔹 In the past, most RC hobbyists relied on expensive, pre-built kits. Now, you can create your own RC vehicle from scratch at a fraction of the cost.

🔹 Thanks to 3D printing, building an RC vehicle isn’t just about buying parts – it’s an experience! You learn how it works, modify it, repair it, and upgrade it however you like.

🔹 No limits! Want bigger wheels? A unique chassis? More torque? Just print whatever you need instead of searching for rare or overpriced parts.

🔹 The process is simple: Download the files, set up your printer, assemble the components, and in just a few weeks, you’ll have a fully functional, customized vehicle in your hands!


🏆 Multiplayer Fun – RC Battles & Racing

The Rover isn’t just a remote-controlled car – it’s an experience best shared with others.

📌 RC Battle Bots – Form teams and compete in arena battles with custom upgrades.
📌 RC Off-Road Races – Navigate obstacle courses, jumps, and rough terrain.
📌 RC FPV Exploration – Add an FPV camera and explore the world through your Rover’s perspective.

🛑 RC isn’t a solo hobby! Design, build, share your ideas, and join competitions & events.


🧠 Hobby or Learning? Why Not Both?

The Rover is not just a toy – it’s a skill-building machine.

🛠 Mechanical Understanding – Learn how movement, wheels, motors, and transmission systems work.
🔌 Electronics & Programming – Add microcontrollers and program the Rover for custom tasks.
🎨 Design & Creativity – If you learn 3D modeling, you can create custom parts and modifications.
🕹 Project Management – From idea to execution: Learn how to organize and build a real-world project.

This blend of education and entertainment makes the Rover a game-changer in the world of RC modeling.


👨‍👩‍👧‍👦 A New Hobby for Parents & Kids

🛑 Do you have a tech-savvy child?

Classic hobbies like hunting, fishing, or traditional sports are great, but kids today are born into a digital world. Instead of pushing them away from technology, why not integrate learning into play?

📌 The Rover is a fantastic way to bond with your child, help them develop skills, and learn together!

📌 You can create a complete project from scratch, improve it, and enjoy racing, battling, and modifying together.

📌 No experience needed – Everything starts with a simple download, and in a few weeks, you’ll have your very own custom-built Rover!


🚀 A Hobby with Unlimited Potential

No matter how you look at it, the Rover is so much more than just an RC vehicle. It’s a tool for creation, learning, and innovation.

📌 You can customize and upgrade it endlessly.
📌 You can improve your skills in engineering, electronics, programming, and 3D design.
📌 You can build a community and participate in unique events and challenges.
📌 You can be part of the future of RC modeling!

This isn’t just another RC car. It’s the next step in DIY remote-controlled innovation! 🚀

🎢 Edutainment

The Future of Learning & Fun

The year 2025 has redefined education and entertainment, merging them into a single powerful concept: Edutainment. Learning and play are no longer separate experiences—they now work together to create immersive, hands-on learning environments.

The 3D Printed Rover fits perfectly into this new era of interactive education, offering a unique way to engage people in a learning experience while having fun.


🏢 The Rover as a Rental Experience

Since the Rover is a high-end, modular piece of technology, it may be too expensive for a casual user to purchase for personal use. However, its true potential lies in rental-based applications, where multiple people can experience the thrill without the high entry cost.

This makes it an excellent choice for businesses looking to provide a unique entertainment experience, while also generating revenue.

📌 Think of it as an "Escape Room on Wheels" – highly customizable and technology-driven.


🏆 Battle Arenas & Competitive Play

One of the most exciting commercial applications of the Rover is arena-based battle games, where users can rent and compete against each other in high-adrenaline RC combat.

📌 Fully modular combat modes: Customize game rules, battle strategies, and obstacles to keep things exciting!
📌 New experiences for every session: Just like Escape Rooms, players face unique challenges every time.

Since we will detail battle games later, let’s now explore how different industries can benefit from integrating the Rover into their space.


🏬 Commercial Applications of the Rover

The Rover can be seamlessly incorporated into various professional settings to create interactive, engaging activities that attract customers and encourage repeat visits.

🎨 Creative Learning Centers

📌 Integrating Rover battles and activities into your space offers children a unique 2-3 hour immersive gaming experience that boosts creativity and teamwork.

📌 Kids will want to return daily, often bringing friends along to show off the amazing battle system they discovered.

📌 Increased engagement means more sign-ups, memberships, and revenue for your space.


🏨 Hotels & Resorts

📌 Luxury hotels and resorts already offer childcare and activity centers—but traditional entertainment options are outdated and uninspiring.

📌 Imagine a summer resort with 10 children who need entertainment while their parents enjoy their vacation. What could keep them engaged for hours?

A fully immersive gaming experience where kids control and battle Roversmodifying them, breaking them, repairing them, and playing again!

No additional costs: The Rover is designed to break in a controlled way, meaning no extra charges for damages. Kids learn, repair, and repeat—staying engaged for hours.

📌 The result? Parents can relax, kids are entertained, and the hotel gets amazing customer feedback.


🎉 Birthday Parties & Events

📌 Forget traditional entertainment—the Rover brings the action to birthday parties and special events.

📌 Event hosts can rent an entire battle system, where kids form teams and compete in an exclusive championship.

How it works:
🔹 We provide an event specialist and four fully-equipped Rovers.
🔹 The kids battle it out in a controlled arena setting.
🔹 The experience lasts up to two hours—keeping everyone engaged and entertained.

📌 A one-of-a-kind birthday party experience that no one will forget!


🛠 Flexible Business Models for Maximum Accessibility

Not every business has the same needs, so we offer multiple ways to integrate the Rover into your space:

📌 Outright Purchase – Buy the Rovers, manage them yourself, and create your own events & experiences.
📌 DIY Assembly – Purchase digital files and hardware, print the parts yourself, and build your Rovers in-house.
📌 Leasing Model – Rent Rovers for a fixed term (e.g., monthly or yearly) without worrying about maintenance.

With our Leasing Plan, you receive:
Fully functional Rovers without high upfront costs.
Regular maintenance & repairs included.
Access to new upgrades & mods as we develop them.

This allows any business to experiment with Rover-based entertainment without financial risk.

📌 You choose the model that suits your business best, and we will help you integrate the Rover into your space seamlessly.


📢 Experience It Before You Invest!

Want to see the Rover in action before making a decision?

📌 We offer on-site demonstrations where we bring the Rovers to your location for a trial event.

Watch the excitement firsthand—see how kids and guests react!
Experience the thrill of an RC battle arena and understand the value before investing.


🔒 Franchise-Like System (Without the Hassle!)

📌 If you integrate the Rover system into your space, you must display an official certification stating that your business is licensed to use Mano3D’s battle system.

📌 This license costs only / per month— It is mentioned in the subscriptions section. a small price to pay for a unique entertainment system that brings repeat customers.


🚀 What Are the Benefits of Joining the Network?

Your business will be listed on our official Rover locator, making it easier for customers to find and visit you.
Your brand will be included in our promotional campaigns, benefiting from our marketing efforts and exposure.
Full support & access to new Rover designs, updates, and special mods.

🛑 Rover technology is patented. You cannot use it commercially without an active franchise license.

📌 If you stop paying for the license, you lose the right to use Rover-based entertainment in your business.

📌 This is NOT a complex franchise system—just a simple way to ensure quality control, brand consistency, and fair access to the technology.


🔥 Ready to Level Up Your Business?

If you want to bring a one-of-a-kind edutainment experience to your venue, reach out to us.

📌 We’ll help you choose the best business model, set up a trial event, and guide you through maximizing engagement and profitability.

The future of interactive entertainment is here—be one of the first to introduce it to your customers! 🚀

🎓 Education

The Ultimate Way to Keep Kids Engaged!

The primary reason the Rover was created was to captivate older kids. It’s easy to engage younger children aged 7-12, but after 12+, things get tricky. Kids lose interest, and you have to start from scratch recruiting new students from elementary school.

How much better would it be if you could keep students engaged all the way through high school?

That’s why I created the Rover from day one – and if you’ve read the story, you already know this! 🚀


🏢 My Lab Model – A First-Hand Experience

In my 250m² workshop lab, I set up a tech-driven makerspace, filled with machines, 3D printers, and computers, where kids could drop in whenever they wanted to learn, assemble, and create.

📌 Unlike traditional educational spaces, I wasn’t restricted by:
Fixed hours & rigid lesson plans.
Complicated certifications or school regulations.
The need for full-time instructors.

The only thing I needed? A simple café license!

With this model, kids flocked to the lab, because they had never experienced this kind of freedom to learn and create.


📈 Explosive Growth in Student Numbers!

I started with just 3-4 kids.
📌 In less than a month, I had over 80 enrolled students! 🚀

The only problem?
📌 The kids didn’t want to leave!
Parents had to drag them out of the lab because they wanted to stay longer!

With the Rover and the workshop, kids found their own creative space.

No more internet cafés or arcades – This became their new hangout spot!
A space where they could meet friends, exchange ideas, build and design.

And the best part?
📌 No little kids!
I only accepted kids aged 12+, which meant no babysitting, feeding, or distractions!


🔧 How You Can Use the Rover in Your Own Lab!

📌 Same collaboration model as previous categories:
Leasing Rover Units – Rent Rovers for use in your space.
Buying Full Rover Systems – Own and manage them yourself.
DIY Kit & Customization – Get the files and assemble your own Rovers.

📌 We can customize the educational model for your space, adapting it to your students and their needs.

📌 If your lab has 300+ students, you may need multiple licenses, as each license covers 150 students.


📢 Test Battle Experience!

📌 Not sure? Try before you invest! 🚗💨

We bring the Rovers to your space and set up a battle event!
You see firsthand how excited kids & parents get.
You experience the hype before making a decision!

📌 Watch the kids go wild over these machines!


🔒 Franchise – No Complicated Procedures

To legally use Rovers in an educational setting, you need a certified usage license for the Mano3D Rover System.

📌 License Cost / month ( It is mentioned in the subscriptions section ).

Franchise Benefits:

Right to use the patented Rover System.
Promotion through our platform.
Your location gets listed in our lab network, increasing visibility!

🛑 Important:

📌 The Rover is a patented product.
📌 You cannot use it commercially without an active license.

📌 If you stop paying, you lose the right to use the Rovers for business purposes.


🚀 Ready to Bring the Future of Education to Your Lab?

📌 Contact us now, and let’s craft the perfect strategy for your space! 💡🔥

🏁 mini250 FPV Slalom Racing

The Ultimate 3D Printed Rover Challenge!

🚀 Welcome to the most immersive and adrenaline-pumping Rover experience – FPV Slalom Racing!
This event is designed to push your driving skills to the limit while delivering maximum excitement to both participants and spectators!


🏎 The Ultimate FPV Racing Setup

📌 Rover Configuration:

4x4 drivetrain for maximum traction and smooth maneuverability over obstacles.
FPV camera system mounted at the front for a fully immersive first-person driving experience.
Powerful LED headlights for a stunning night-time racing effect.

📌 Remote Control System:

✔ Uses an FPV-capable radio controller, similar to drone racing controllers.
✔ Video transmission options:

  • DJI O4 System – for ultra-low-latency video feedback.
  • HDZero System – with HDMI output for real-time streaming on large screens.
    Option for spectators to watch in real-time via a big screen, adding to the thrill of the event!

⛳ Track Setup & Racing Experience

📌 The race takes place in an outdoor football (soccer) field with artificial turf.
Barrier pipes are placed on the ground, forming a winding track for the Rovers to navigate.
LED tubing is installed along the barriers, lighting up the track for a spectacular night-racing atmosphere.
✔ Drivers must navigate through the course as fast as possible, avoiding obstacles and ramps while maintaining precision.

🔥 Customization & Variations:

Obstacle zones – Add ramps, jumps, and tricky corners for extra challenge.
Timed lap races – Compete to set the fastest lap time.
Head-to-head racing – Two or more Rovers on the track at the same time for direct competition!

The result? An insanely exciting spectacle where the glowing track, LED-lit Rovers, and high-speed maneuvering create an unforgettable racing experience!


📢 Event Organization & Logistics

Track Setup Time: Requires preparation for track assembly, lighting setup, and course layout.
Spectator Experience: Recommended to have seating areas to maximize engagement.
Battery Management: Each Rover runs for about one hour per charge.

  • Have spare batteries or backup Rovers ready for continuous gameplay.
    Session Scheduling: Divide the event into time slots to allow multiple players to compete.

💰 Monetization & Revenue Opportunities

Participant Fees: Players can join using their own Rover or rent an event Rover for the session.
Spectator Tickets: Charge entry fees to create an exclusive, high-energy event.
Merchandising & Sponsorships: Offer branded merchandise or event sponsorships to increase revenue.


📜 Licensing & Royalties

To host an FPV Slalom Event, an official license fee applies:
💰 Per event ( for non-franchise holders It is mentioned in the subscriptions section. ).
💰 Per event ( for franchise holders It is mentioned in the subscriptions section. ).

📌 What You Get with the License:
Full event rights to organize, promote, and monetize the ( mini250 FPV Slalom ) .
Access to official Rover event resources & track designs.
Listing in our event directory for increased visibility.

🔺 Important: The ( mini250 FPV Slalom ) is a patented & licensed event. Unauthorized usage or commercial organization without a license is strictly prohibited.


🎉 Ready to Host the Most Exciting mini250 FPV Racing Event?

📌 Contact us now to set up your first mini250 FPV Slalom competition and bring the future of racing to your audience! 🚀🔥

🍄 mini250 Mushroom Hunt

The Ultimate Interactive Game for All Ages!

🚀 A fun and easy-to-organize Rover game!
Mushroom Hunt is a unique game that can be played in small, enclosed spaces, making it ideal for robotics labs, classrooms, and even play centers!

With a simple setup and easy adaptation, it can be played anywhere, attracting new participants to the world of robotics and remote-controlled vehicles!


🎮 Setup & Equipment

📌 Vehicle Options:

4x4 configuration for better traction & control.
3x2 setup for quicker maneuvers and speed.
No FPV camera system required, reducing equipment costs.
Drone-style controller, allowing for precise movement and steering.

📌 Specialized “mini250 Mushroom Grabber” Bumper:

✔ A custom front bumper with prongs is attached to the Rover, designed to grab mushrooms off the ground and transport them.
✔ The four holes in the front bumper ensure secure carrying of the mushrooms without dropping them.


⛳ Arena Setup & Game Rules

📌 This game can be played in any indoor space!
Outline the play area using PVC pipes or simple tape on the floor.
✔ Create two goal zones (one for each team) using tape.
✔ Place mushrooms in the center of the arena, ready to be collected.
✔ The match begins, and players try to transport their opponents' mushrooms into their own goal while preventing the other team from doing the same!

🔥 Variations & Customizations:

Add obstacles to the arena for an extra challenge.
Time-based competition – The team with the most mushrooms in their goal at the end wins!
Solo Challenge – Players compete one at a time, trying to collect as many mushrooms as possible within a set time.

Simple, fast-paced, and incredibly fun – a game that keeps kids engaged!


📢 Event Organization & Gameplay

Perfect for small spaces! No need for a large arena, making it ideal for schools, labs, or small events.
Average game duration: 15 minutes per round.
Battery life: 1-2 hours of continuous gameplay before requiring a recharge.
Great for demo events & open days – A fantastic way to introduce new players to Rovers and robotics!


💰 Revenue & Earning Potential

Rover Rentals – Participants can play using their own vehicle or rent one.
Marketing Event – Helps attract new members & students to robotics labs and schools.
Kids’ Parties & Special Events – Can be combined with other activities for a fully immersive interactive experience.


📜 Licensing & Royalties

To organize an official mini250 Mushroom Hunt Event, the licensing fee is:
💰  per event (for NON-franchise holders It is mentioned in the subscriptions section. ).
💰  per event (for franchise holders It is mentioned in the subscriptions section. ).

📌 What the license includes:
Full rights to host and monetize the Mushroom Hunt event.
Access to official arena setup files & installation guides.
Listing as an official event host in our directory, increasing your event’s visibility.

🔺 Important: The mini250 Mushroom Hunt Rover is patented and requires a license for commercial use.
Unauthorized usage or events without royalty payments are strictly prohibited.


🎉 Ready to host the most exciting robotic event?

📌 Contact us today and bring mini250 Mushroom Hunt to your venue! 🚀🍄

🛡 mini250 Battle Bots

The Ultimate Robotics Combat Game!

🚀 A next-generation combat robotics experience!
Battle Bots is a revolutionary take on robotic battles, eliminating the high costs and destruction associated with traditional combat robotics.

Unlike classic Battle Bots competitions, where each vehicle can cost between €5,000 and €10,000, our affordable and modular Rover Battle System allows anyone to participate without worrying about expensive repairs or replacements.

With our custom digital damage system, vehicles take virtual damage instead of physical destruction, adding strategy, longevity, and accessibility to the game!


🎮 Setup & Equipment

📌 Vehicle Configuration:

3x2 drive system (4x4 version is in development for future updates).
Digital Damage System – No need to repair or replace expensive parts!
Modular attachment points for additional customization.

📌 Combat System:

Target Sensors – Placed on both sides of the rear wheels.
Hit Detection – When an opponent strikes a target, the Rover loses health points (HP).
Regeneration Zones – Players must return to their base and simultaneously activate both hit sensors to regenerate their vehicle.


🔥 Game Rules & Battle Mechanics

Strategic Combat – Players must land hits on opponents while avoiding damage.
Health & Regeneration – Vehicles with zero HP must retreat and recharge at the base before re-entering combat.
Healing Mode – After regenerating, vehicles receive a 15-second invulnerability period to counterattack aggressively.
Arena Design – The battlefield can include obstacles, ramps, and tunnels for strategic movement and positioning.

💡 Bonus:
🎯 Mushroom Hunt Integration – Combine Battle Bots with Mushroom Hunt to create a multi-objective game where players must:
Collect mushrooms and deliver them to the base.
Attack opponents and disrupt their plans.


📢 Event Organization & Revenue Opportunities

Ideal for gaming arenas, tech expos, and robotic competitions.
Customizable to suit different age groups and skill levels.
Matches can be recorded and analyzed using Rover software to track scores and stats.


💰 Licensing & Royalties

To host an official Battle Bots Event, licensing fees are as follows:

💰 Indoor Games (Mushroom Hunt License):
 per event (for non-franchise holders It is mentioned in the subscriptions section.).
 per event (for franchise holders It is mentioned in the subscriptions section.).

💰 Outdoor Games (FPV Slalom License – ticketed events):
 per event (for non-franchise holders It is mentioned in the subscriptions section.).
 per event (for franchise holders It is mentioned in the subscriptions section.).

📌 What the license includes:
Right to host, monetize, and promote the event under the official mini250 Battle Bots brand.
Full access to game setup guides and rules.
Exclusive recognition as an official host in our event directory.

🔺 Important: The mini250 Battle Bots Rover system is patented and requires a license for commercial use.

Unauthorized usage or hosting without royalty payments is strictly prohibited.


⚔ Are You Ready for the Ultimate mini250 Battle Bots Experience?

📌 Contact us today to bring the future of robotics combat to your venue! 🚀🛡

🔧 How the Rover is Designed

The Rover consists of three main assemblies, designed to offer easy assembly, repair, and upgradeability.


📌 The Core Components of the Rover

1️⃣ Main Chassis
📌 The main chassis provides the structural frame of the vehicle, serving as the foundation for the entire system.

2️⃣ Control Tower
📌 All electronic components are mounted on the Control Tower, which includes:
Main Controller & Microprocessor
Battery & Power Management System
Receiver & H-Bridge (for motor control)
Data Transmission System & Wireless Communication

3️⃣ Rear Section – Modular Setup
📌 Depending on the Rover's configuration, you can choose:
4x4 setup – Full four-wheel drive with two additional rear motors.
3x2 setup – Featuring a single rear caster wheel, offering more agility and a lower cost.


🛠 Wheel & Hub Design

📌 The Rover's tires are 3D-printed using TPU, which provides excellent flexibility and grip.

📌 Important Considerations When Printing Tires:
✔ There are left and right tires, so the lobes are mirrored for proper traction and balance.
✔ This ensures optimal force distribution and better handling on different terrains.

📌 Hubs Are Different for the Front and Rear Wheels:
✔ In the 3x2 configuration, the rear hubs house the motors.
✔ In the 4x4 configuration, each hub has an independent motor for fully controllable movement.
✔ Carefully assemble the motors inside the hubs to ensure proper alignment and function.


🛠 Assembly & Repair

Never use thread-locking glue!
📌 The screws fasten directly into plastic, and if you apply glue, attempting to unscrew them later may cause the insert to spin inside the plastic, forcing you to reprint or cut the part.

Use an Allen key and check the screws regularly!
📌 Tighten the screws properly, but avoid excessive force to prevent damaging the plastic parts.

Easy Access to Internal Components
📌 The Rover can be split into two sections, allowing quick part replacement without full disassembly.

📌 It's 100% 3D-Printed!
✔ If something breaks, you can reprint and replace it in just a few hours.
✔ All components are designed for easy replacement and modular customization.


⚠ Important Warnings

🔴 It’s NOT waterproof! The Rover cannot withstand water exposure. If it gets wet, it will likely short-circuit.
🔴 Designed for dry environments – Avoid use in wet, muddy, or highly humid conditions.
🔴 Built for durability but remains DIY-friendly – Even a 4th-grade kid (who's a genius 🔥) could assemble and repair it!


📌 Why the Rover’s Design is Unique
Modular frameworkSwap parts quickly and efficiently.
Compatible with various mods – Customize the Rover for different applications & missions.
Total freedom in assembly – Mix and match components to create your own customized version.

Are you ready to build it? 🚀🔧

🔧 Custom Configuration

Build the Rover You Need!

For industrial applications, search & rescue missions, and educational purposes, we offer the ability to design and build fully customized Rovers tailored to your specific needs.

You’re not limited to existing models – need more wheels? Higher payload capacity? Extended range? Bigger battery? A completely different configuration?
We can build it for you!

All you need to do is reach out, and together we’ll create the perfect solution for your application.

Additionally, we provide specialized training for your team, ensuring they can efficiently operate and integrate the Rover into their workflow.

Don’t limit yourself to what you see – if you have an idea, we’ll bring it to life!


🏭 Industrial Applications

📌 If your business requires specialized Rovers for automated inspections, cargo transportation, or facility monitoring, we can create a solution tailored to your needs.

✔ Designed for challenging environments (industrial warehouses, construction sites, factories).
✔ Can integrate sensors for temperature, humidity, gas leaks, and more.
✔ Easy integration into automated systems for industrial processes.
Durable construction built for heavy-duty daily operations.
Configurable payload capacity for transporting materials and equipment.

Using customized Rovers can significantly reduce operational costs and improve workplace safety.

Need a Rover designed specifically for your business?
📩 Contact us today, and let’s develop the perfect solution!


🆘 Search & Rescue – SAR Operations

📌 In search and rescue missions, speed and durability can mean the difference between life and death.

✔ Need a Rover that survives extreme conditions (earthquakes, floods, rubble-filled zones)?
✔ Want to transport medical supplies, water, or equipment into hazardous zones?
✔ Need a platform that integrates thermal cameras, CO2 sensors, or ultrasound for locating survivors?
✔ Looking for a reliable, easily repairable Rover for remote rescue operations?

The Rover can be fully modified to suit the needs of rescue teams and humanitarian missions.

📩 Let’s design the Rover that will help save lives – contact us today!


📚 Education – STEM & Robotics

📌 The Rover can become one of the best educational tools you’ve ever used.

✔ Want to introduce kids to robotics, 3D printing, and programming in an engaging way?
✔ Need customized Rovers for STEM programs and robotics workshops?
✔ Looking for a system that can be used in competitions, arenas, or hands-on learning activities?

The Rover isn’t just a toy – it’s an educational tool that fosters STEM learning, creativity, and collaboration.

📩 If you run a school, robotics lab, or educational program and want a specialized Rover, reach out today!


🚀 Don’t Wait – Let’s Build the Rover You Need!

Whether for industrial use, rescue missions, or education, we can create a fully customized Rover just for you.

📩 Contact us now, and let’s discuss the solution that fits your needs! 🚀

🔧 Custom Mods & Attachments

Adapt the Rover to Your Needs!

The Rover is already a highly flexible and customizable machine, but what if you need even more?

We can design and integrate custom mods and attachments to expand its functionality for your specific needs. Whether you want a robotic arm, a LiDAR sensor, a specialized gripper, or enhanced vision capabilities, we can make it happen.

You’re not limited to what already exists – if you have a requirement, we will create a solution for you!


🛠️ Possible Modifications & Attachments

🤖 Robotic Arm & Gripper

  • Need to grab and manipulate objects remotely?
  • Want a servo-controlled claw that can pick up and move materials?
  • Need a soft grip system for handling delicate objects?

A robotic arm can be mounted on the Rover, fully controlled via remote or autonomous programming.


🛰️ LiDAR & Mapping Sensors

  • Need precise environmental mapping?
  • Want to navigate through tunnels, industrial sites, or underground locations?
  • Need a high-resolution 3D scan of an area?

We can integrate LiDAR technology, allowing your Rover to autonomously map and analyze its surroundings.


📷 360° Rotating Camera & Night Vision

  • Need a camera with full 360° motion?
  • Want to explore dark or enclosed spaces?
  • Need infrared or thermal imaging for low-visibility conditions?

We can attach a fully motorized camera module, giving you real-time vision from any angle.


🌬️ Air Blower & Dust Cleaner

  • Need to clear debris, dust, or contaminants from vents and air ducts?
  • Want a high-pressure air jet system mounted on the Rover?
  • Need automated cleaning for industrial environments?

We can equip your Rover with an air blower, making it perfect for air duct cleaning and dust removal.


🔦 High-Powered LED Light Modules

  • Need stronger illumination for tunnels, air ducts, or dark spaces?
  • Want adjustable LED configurations for long-range and short-range lighting?

We can integrate custom high-powered LED arrays, ensuring your Rover sees everything in the darkest conditions.


📡 Data Transmission & Specialized Connectivity

  • Need long-range communication in extreme environments?
  • Want Ethernet-based control for deep underground areas?
  • Need a custom wireless system with stronger signal penetration?

We can upgrade the Rover’s connectivity, ensuring it remains fully operational in difficult-to-reach locations.


📦 Cargo Transport & Secure Storage

  • Need a Rover that can carry specific tools or materials?
  • Want a secure compartment for transporting critical items?
  • Need a multi-compartment system for delivering supplies in remote areas?

We can modify the chassis to include internal storage, allowing your Rover to transport items safely and efficiently.


🚀 Let’s Build the Rover That Works for You!

Whether you need a gripper, camera system, mapping tool, or industrial cleaner, we can create the perfect modification for your Rover.

📩 Contact us today and let’s discuss your custom attachment needs! 🚀

🚀 Ready-to-Run Rover

Your Fully Assembled & Ready-to-Use Rover!

Want to get your own 3D Printed Rover but don’t have experience in assembly or aren’t sure which configuration is best for your needs?

That’s exactly why I created the Ready-to-Run models!

Below, you'll find fully assembled, tested, and optimized rovers, designed with the most popular configurations and essential equipment. These machines are completely ready to use, requiring zero assembly or setup from your side.

🔹 Who Is This For?

You want to start immediately without needing to assemble anything.
You're unsure which configuration suits you best and want an already optimized setup.
You need a professionally built & calibrated rover, ensuring peak performance from day one.


🛠️ What’s Included in a Ready-to-Run Rover?

Fully assembled and ready for use.
Thoroughly tested & fine-tuned for maximum performance.
Pre-programmed & optimized for your specific use case.
Complete test reports & training videos, so you know exactly how to operate it before it even arrives.
Direct shipment of a fully functional machine, with no additional setup required.


📦 Order & Manufacturing Process

📌 Custom-built per order – No stock, each Rover is made specifically for you.
📌 Production time: 1-2 months, depending on part availability.
📌 All orders begin ONLY after full payment, ensuring the latest and best-quality components.
📌 Track your Rover’s production progress through a dedicated console.
📌 Final shipment after rigorous testing & quality control, along with video training materials to help you get started seamlessly.


🎯 Why Choose a Ready-to-Run Rover?

No assembly required – just power it up and start!
Professionally fine-tuned & pre-configured for optimal performance.
Perfect for professionals, research centers, and educators who need a ready-to-deploy solution without spending time on assembly.
Expandable with additional Mods based on your needs.


📩 Ready to get your own Ready-to-Run Rover?

📲 Contact us today, and let’s start building your custom Rover! 🚀

📂 Download & 3D Print It

Build Your Own Rover!

If you own a 3D printer and can follow assembly and programming instructions, then downloading and printing your own Rover is the perfect option for you!


📥 What’s Included in the Download?

In the list below, you’ll find four different file options, depending on the level of customization you want:

1️⃣ Base Rover File – Includes all the essential parts to 3D print and assemble the basic Rover with its core functions.

2️⃣ Mods (Optional) – If you want to add extra functionality, you can purchase individual mod files. Each mod file contains the additional parts needed to integrate the selected feature into your Rover.

3️⃣ Component Kit List – A full hardware & electronics list, including screws, nuts, washers, batteries, H-Bridge, Control Tower, and everything else you need for assembly. This way, you don’t have to search for parts individually.

4️⃣ Firmware & Software – The code & programming guides required to flash the firmware and set up your Rover correctly.


🛠️ How Does It Work?

Purchase the files and download them instantly.
Print all the components using your 3D printer.
Order all necessary hardware & electronics from the Component Kits section.
Assemble & program the Rover following the detailed instructions.
Start using and customizing your Rover!


📌 Is This Right for You?

The process is straightforward, but it requires basic knowledge of 3D printing, assembly, and programming. If you’re a beginner, this is not recommended as a first project. If you need to gain experience first, I suggest starting with smaller projects, such as those in the Mini Electronics category.

If you already have experience, this project will give you endless opportunities for customization and adaptation.


🔧 What’s Included in the Download?

All 3D printing files for the Rover and its mods.
Detailed assembly & programming guides.
Complete list of required components (screws, nuts, electronics, etc.).
Access to support via the Engineer Support Package (optional).


📡 Need Extra Support?

If you need additional assistance, you can purchase the Engineer Support Package.

🔹 🔧 Engineer Support – €28 / month
With this package, you’ll receive:
Access to the project management platform.
✔ The ability to ask questions and receive direct answers from me.
Step-by-step guidance to successfully complete your project.


⚠️ Important Information

📌 A 3D printer is required – If you don’t have one, you can purchase a 3D printer and the print files in the next category.
📌 These are digital files – No physical components are included.
📌 No refunds or cancellations are available for digital file purchases.


🚀 Ready to build your own Rover from scratch?

Download the files and get started today! 🎯

🔩 Project Kits

All Components in One Place!

Below, you will find all the component kits I have created for the Rover.

🔹 For Mods:
Each mod kit includes all necessary parts, cables, and materials, ensuring seamless integration with your Rover. No need to search for individual components – I have everything organized for you!

🔹 For the Base Rover:
You can choose between the 3x2 or 4x4 configurations, add the mods that interest you, and customize your Rover to fit your needs.

📌 Try the Interactive Pricing Tool!
I've developed a dynamic pricing system where you can experiment with different configurations and see real-time cost adjustments based on your selections.

✔ Want to buy pre-printed parts?
✔ Need a 3D printer included with your kit?
✔ Looking to add specific mods to your build?

This tool allows you to mix and match different options to find what works best for you!


📆 Build Your Rover Gradually – No Stress & No Financial Pressure!

Purchasing a complete Rover kit might be a significant investment. That's why I offer the option to build it step by step, month by month, without requiring credit cards or bank loans.

🔹 Flexible Payment Plan:

Month 1: Purchase all 3D-printed parts and assemble your Rover as a static model.
Month 2: Get the Control Tower, assemble it, and learn the electronics.
Month 3: Add the motors and start seeing your Rover come to life!
Month 4: Purchase the remote control system, and your Rover is now fully operational!

📌 This approach allows you to gradually acquire your Rover without financial strain!


🔎 Choose How You Want to Buy Your Rover!

✔ Buy the entire Rover kit as a full package.
✔ Purchase only the components you need to assemble it yourself.
✔ Build your Rover piece by piece at your own pace!

🚀 No matter how you choose to build it, I’m here to support you every step of the way!

Start today and create your custom Rover exactly the way you want it! 🔧

🔩 Project Parts

All Components, Individually!

Below, you'll find all the components needed for building the Rover, organized but not grouped into kits.

This means that:
✔ You can purchase each part separately, based on your specific needs.
✔ It's perfect if you need a specific replacement part or if you want to create your own custom setup.
✔ This category includes all electronics, cables, sensors, PCBs, motors, LEDs, H-bridges, and every other essential component for the Rover.


⚠ Pay Attention to Compatibility!

If you choose to buy individual parts, you need to know exactly what you need and ensure compatibility. There is no predefined setup here, unlike the Project Kits!

📌 If you're unsure, check the "Project Kits" section for pre-grouped selections with properly matched components.


🛠️ Spare Parts & Repairs

Need a replacement part for your Rover?
✔ If any electronic component fails (e.g., motor, sensor, PCB), you’ll find a replacement here.
If a Rover part breaks and isn't 3D printed, you can order a new one from this section.
All electronic components & spare parts are available in this category!

🚀 Buy exactly what you need, without unnecessary extras!

🛠️ Spare Parts

3D Printed Components for the Rover and Mods

Below, you will find a complete list of available spare parts for the Rover and all the Mods designed for it.
📌 Each product contains all the related spare parts, neatly organized in one place, so you can find exactly what you need.


🔍 How to Order Spare Parts Correctly

Order parts separately:
For example, if you need the front right suspension arm and the rear right suspension arm, you must add them to your cart separately.
There is no option to buy multiple spare parts as a set – this is to avoid mistakes during the ordering process.

No screws or accessories included!
All spare parts in this section are 3D-printed components only!
📌 No screws, nuts, or electronics are included.
📌 If you need screws and hardware, check the "Project Parts" or "Project Kits" sections.

If you need a complete Mod or Rover:
This section is only for spare parts! If you're looking for a full Rover or an entire Mod, visit the appropriate product category.


⚠ Spare Parts Compatibility

Check your Rover version carefully!
We are currently on Version 1, but future versions may have different spare parts that are not compatible with earlier models.
📌 Make sure you select the correct version before placing your order!

Left & Right-Specific Parts:
Some components have left and right variations, such as suspension arms and wheel hubs.
📌 Double-check that you are ordering the correct part for the correct side!

Not sure which spare part you need?
Check out the "Project Parts" category where everything is neatly organized by type, or contact us before placing your order.


🚀 Easily repair your Rover with 3D-printed spare parts that can be replaced in just minutes!

🛠 Body Assembly

Step-by-Step Guide

Since we need to fit many components into a very compact space, the assembly process for the Rover follows a strict and specific order. Below is an overview of the steps required to assemble your Rover properly.
After reading, make sure to watch the video tutorial above for a detailed, visual explanation of each step.


📌 Step 1: Mounting the Motors into the Wheel Hubs

This is the most crucial step!
The entire Rover structure is built around the motors, so they must be installed into the wheel hubs first before proceeding.


📌 Step 2: Installing the Front LED Lights

Install the LED lights before closing the Rover!
Once the assembly is complete, you won’t have enough space to fit your fingers inside to install them later.


📌 Step 3: Attaching the Hub Plates

Secure the plates onto the hubs.
It’s important to follow the correct order—if you mount the plates after assembling the Rover, you won’t be able to tighten the inner screws properly.


📌 Step 4: Mounting the Plates to the Rover Frame

Attach the hub plates to the front frame section and the middle chassis plate.
At this stage, the basic structure of the Rover begins to take shape.


📌 Step 5: Assembling the Rear Section

✔ If using the 4x4 version, connect the two additional motors.
✔ If using the 3x2 version, install the free-rolling rear caster wheel instead.


⚠ Important Assembly Tips

Double-check every screw as you go!
Ensure that all screws are properly seated but not overtightened—you’re working with 3D-printed plastic components, and excessive force can damage them.

No Threadlock Glue!
Never use threadlocker on screws! If you ever need to unscrew a part, the metal insert inside the plastic might rotate freely, forcing you to reprint the entire component.

Check and tighten all screws after 4-5 hours of gameplay.
Due to vibrations and stress, many screws will loosen slightly during the initial use. A quick re-tightening will keep everything secure.

Minimal tools required!
The entire assembly can be done using just three Allen keys, making it simple and efficient without requiring special tools.

The video guide covers everything.
I’ve designed the tutorial to be straightforward and easy to follow, ensuring you don’t miss any steps or get lost during assembly.

If you choose to disassemble and reassemble the Rover multiple times, good luck!
Many users end up taking their Rover apart 10+ times before getting the perfect setup.

No left or right difference for the suspension arms.
All suspension arms are identical, so you don’t have to worry about orientation when installing them.


🚀 Follow these steps carefully, and your Rover will be up and running in no time!

🔴 Kill Mod Assembly

Setup & Installation Guide

The Kill Mod is a crucial add-on for Battle Bot gameplay and is designed to be mounted on vehicles with a 3x2 configuration.

📌 Purpose of the Mod:
✔ To send hit detection signals to the Control Tower when the vehicle is struck by an opponent.
✔ To allow hit tracking and damage management through a custom software system that calculates “life loss” in the game.


📦 Components Included

The Kill Mod consists of the following parts:

TPU Target (Shock Pad) – the component that absorbs hits from other bots.
Terminal Switch Base – holds the limit switches in place.
Base Connector – attaches the base to the Rover chassis.
Limit Switch with Wiring – detects hits and sends data to the Control Tower.

🛑 Important:
📌 The Kill Mod components are mirrored—meaning they can be used on both the left and right sides of the vehicle.


⚙ Assembly Process

🔹 Step 1: Remove the screws from the rear wheel assembly of the Rover.
🔹 Step 2: Secure the Terminal Switch Base onto the frame of the vehicle.
🔹 Step 3: Attach the Base Connectors to the Rover chassis using screws.
🔹 Step 4: Mount the TPU Target onto the Base Connector and tighten it securely.
🔹 Step 5: Connect the wiring from the Limit Switches to the Control Tower of the Rover.
🔹 Step 6: Upload the new software to the Control Tower, so the system can register hits and apply game logic accordingly.


📌 Key Features & Functions

Code Update Required:
When installing the Kill Mod, a new firmware update must be uploaded to the Control Tower, ensuring proper hit detection and battle mechanics.

Damage & Hit Management System:
The Rover software can track how many hits a vehicle has taken and activate different game mechanics such as:
🔄 Returning to the “home base” for regeneration after taking a hit.
🛡 Temporary invincibility after regeneration to prevent instant knockouts.
🎯 Kill zones & scoring system to record and reward successful hits.


With this mod installed, your Rover is now fully equipped for Battle Bot combat! 🚀

📡 FPV Mod Assembly

Installation & Setup Guide

The FPV Mod is one of the most exciting and functional upgrades for the Rover, enabling real-time first-person video transmission via a front-mounted camera.

📌 Compatibility:
✔ Can be installed on both 3x2 and 4x4 configurations.
✔ Currently supports DJI O3 Air Unit for stabilized image and tilt functionality.
Custom Adaptations: If you need to mount a different camera, send me the design and specifications, and I will create a custom mount for you.


📦 FPV Kit Contents

New front chassis section – Replaces the existing front part of the Rover to accommodate the camera.
FPV Camera Mount Assembly – Includes the mounting mechanism and a servo for tilt stabilization.
Camera Dome – Protective housing for the camera to shield it from impacts and debris.
Not Included: FPV camera & transmitter – These must be purchased separately.


⚙ Assembly Instructions

🔹 Step 1: Assemble the entire FPV camera mount, servo, and new front chassis section before attaching it to the Rover. This makes testing and adjustments much easier before final installation.
🔹 Step 2: Remove the existing front section of the Rover.
🔹 Step 3: Attach the new front section with the camera and servo.
🔹 Step 4: If you are using a Flight Controller for OSD, you may need to modify the Control Tower wiring.
🔹 Step 5: If you are using video transmission only, simply connect the power from the Control Tower.


📌 Features & Advantages

Full FPV Experience:
You can use FPV goggles to immerse yourself inside the Rover and experience true first-person control! 🎮🚀

Automatic Tilt Stabilization:
With the integrated servo, the camera offers smooth movement and stability, ensuring a clear and steady view during races or battles.

Multiple Viewing Modes:
Whether you use basic FPV video or OSD via a flight controller, the FPV Mod allows you to customize your experience to fit your needs.


🛠 The FPV Mod transforms your Rover into a fully equipped exploration and combat vehicle! 🔥🚀

🍄 Mushroom Mod Assembly

Installation Guide

The Mushroom Mod is one of the simplest and most fun mods you can add to your Rover! It is easy to install, perfect for quick gameplay, and primarily used in the Mushroom Hunt Game.


📌 Compatibility

✔ Can be installed on both 3x2 and 4x4 Rover models.


📦 Kit Contents

Front bumper with integrated forks – Designed to pick up and transport the mushrooms.
4 Mushrooms – The game targets that players must collect during the match.


⚙ Assembly Instructions

🔹 Step 1: Remove the existing front bumper from the Rover.
🔹 Step 2: Secure the new bumper with the integrated forks to the front of the Rover, attaching it to the LED block.
🔹 Step 3: Ensure it is firmly attached so it doesn't loosen during gameplay.
🔹 Step 4: Place the mushrooms on the arena and start playing!


📌 Advantages of the Mushroom Mod

Quick and easy installation – No special tools or modifications required.
Ideal for small spaces – The game can be played in small workshops or arenas.
Low cost & maximum fun – An affordable mod that provides endless hours of entertainment.


💡 The Mushroom Mod is the perfect add-on for those who want a simple and quick upgrade to their Rover! 🚀🍄

Control Tower Assembly

Control Tower Assembly

Soon, you will find a complete video guide below, along with detailed instructions on how to assemble the Control Tower correctly. Until then, you can either wait or send me a message, and I will provide you with the necessary information directly.


⚠ Warning: If You Choose to Assemble It Yourself

📌 If you decide to assemble the Control Tower on your own, you take full responsibility for any damages that may occur during the process.

💥 If you damage the components, burn the motors, short-circuit the electronics, or cause any other malfunction, it is entirely your responsibility.

🔧 I do not provide technical support for self-assembly mistakes or incorrectly connected components.


📌 If you want to assemble the Control Tower yourself, proceed carefully and make sure you understand the wiring and configuration correctly.

If you need assistance, wait for the official assembly guide or contact me for support.

Control Tower Programming

Control Tower Programming

Soon, you will find all the codes and instructions below, along with detailed explanations on how to program the Control Tower. Until everything is available, you can either wait or send me a message, and I will provide you with the necessary code directly.


⚠ Warning: If You Want to Write Your Own Code

📌 If you choose to install your own code or develop a custom application, you take full responsibility for the proper operation of the Rover.

💥 If you burn the electronics, damage the Control Tower, or cause any malfunction, it is entirely your responsibility.

🔧 I do not provide technical support for custom code modifications.


📌 If you want to program the Rover your way, proceed carefully and make sure you know what you're doing.

If you need support with the official code, wait until it becomes available or contact me for assistance.

🚨 Terms & Conditions

Terms & Conditions

To access new designs, mods, and vehicles, you must follow specific rules. If you violate these terms, I simply won’t be able to continue developing new products.


❌ What You MUST NOT Do

🚨 1. DO NOT SHARE my files

The files you purchase are for personal use only. If you distribute them for free or sell them, you will only kill the project. This is my full-time job—if I don’t have revenue, I will simply stop working on it.

If that happens, you lose, not me.

⚠ 2. DO NOT USE my Rovers commercially WITHOUT A LICENSE

If you want to rent, host events, or run workshops using my vehicles, you must pay for the appropriate license or franchise fee. If you skip this, you are not allowed to use them professionally.

Don’t want to pay? No problem. Go buy something else. Other commercial solutions cost 10-20 times more, but that’s your choice.

🚫 3. DO NOT RUN a workshop using my Rovers without a license

If you own a robotics academy, educational center, or makerspace, you need a license. If you don’t have one, you are violating my terms, and I will take legal action. Don’t try it—I have a strong team behind me.

📸 4. DO NOT PUBLICLY ADVERTISE that you 3D print my Rovers WITHOUT A LICENSE

If you post photos or announce that you are 3D printing my Rovers without the required license, I will have to take legal action. I won’t allow this.


✅ What You MUST Do

Follow the rules and pay the required subscription or license fee.
Respect the fact that this is my full-time job.
If you follow the rules, I will continue to create incredible mods, new vehicles, and unique features for you.


💡 Why I Let You Download the Files Instead of Selling Only Physical Rovers

The Rover is a patented design. I could have locked it and only sold physical products. Instead, I chose to make it available as downloadable files so you can get it at a lower price.

In return, I expect you to respect the terms of use.

If you try to cheat the system, you won’t just lose this product—you’ll also lose access to the 39 upcoming designs I have planned.

📌 What you see now is just the beginning. The big projects are coming, but only if you support me.


⚠ Pay Attention to Rover Versions

The Rover is constantly evolving, and new versions may not be compatible with older parts.

If you buy something that isn’t compatible with your older Rover, that’s entirely your responsibility. I won’t accept returns or exchanges for incorrect purchases.

📌 If you’re unsure about compatibility, ask BEFORE you buy.


🔴 If you follow these rules, you’ll continue to have access to unique designs and advanced Mods. If not, you’re out.

🚨 Liability Disclaimer

The Rover has been designed for proper and intended use by users. Any misuse, improper handling, or unauthorized modifications by any individual absolves us of any liability. Since the Rover is manufactured using 3D printing technology, we have no control over who prints and assembles it, and therefore, we do not maintain any records regarding its production or usage.


Terms and Conditions of Use:

  1. Limitation of Liability:

    • We are not responsible for any damages, losses, injuries, or accidents that may occur due to improper or unsafe use of the Rover.
    • The user assumes full responsibility for the proper assembly, programming, and operation of the Rover in accordance with the provided instructions.
  2. Safety and Maintenance:

    • The user is responsible for ensuring that the Rover is operated in a safe environment and under appropriate conditions.
    • Regular inspection and maintenance are recommended to prevent potential malfunctions or accidents.
  3. Modifications and Customization:

    • Any modifications or adjustments to the Rover are done at the user’s own risk.
    • The company is not liable for any malfunctions, damages, or safety hazards resulting from unauthorized modifications.
  4. Training and Supervision:

    • The Rover should be used by individuals with appropriate training or under the supervision of qualified personnel, especially when operated by minors.
  5. Compliance with Local Laws and Regulations:

    • The user is responsible for ensuring compliance with local laws and regulations regarding the use of the Rover.

By purchasing, assembling, or using the Rover, the user agrees to these terms and acknowledges that our company holds no liability for any damages, malfunctions, or accidents resulting from its use.

The Maker’s Challenge

📝 Feedback

Your Opinion Matters! 🚀

You’ve made it to the end – CONGRATULATIONS! 🎉 🎯

Did you ever imagine you'd be able to create something this awesome? 🤩

🔍 What do you think?

✔️ Did you enjoy the experience?
✔️ Was there anything that felt challenging?
✔️ What would you like to see next?

Your opinion is valuable to us! 🏆

📩 Share your thoughts in the form below so we can improve the project and create even more epic things! 🚀🔥

👇 Don’t overthink it – tell us what you think! 👇